Description: In this How-To, I will whip up a guide to getting TV shows off of TiVo and onto an Android phone/tablet so that you can take favorite TV shows when away from home.
If you’re frequent traveler, a question may come up like this – How can I get my TiVo shows remotely with my Android tablet (phone)? Although TiVo released its offical Android app to allow TiVo customers to use Android device to access TiVo shows via Wi-Fi, but that is restricted to enjoying TV recordings at home. Currently there’s not yet a good solution for wirelessly play TiVo shows remotely, but here’s a way to transfer TiVo shows to your Android for on-to-go viewing, so that you can take favorite TV shows when away from home.
The process sounds easy – first transfers TV shows from TiVo to PC, and then convert the .tivo files to MP4 videos for Android.
Part 1: Transfer TV shows from TiVo to PC
It takes a while depending on length of TV program you are transferring. Make sure your TiVo and computer are in the same home network, and follow this guide to proceed TiVo file transfer:
Part 2: Convert TiVo shows to Android friendly MP4 video
After transferring to computer the TV shows are saved as .tivo files. The .tivo format, however, is kind of protected MPEG-2 video. The Android based device, however, plays neither protected shows nor MPEG-2 video. That’s why you need to encode TiVo to MP4 video (720p or 1080p). See below how to convert TiVo shows to Android playable videos.
Download and install Pavtube Video Converter Ultimate to your PC. Launch it and press “Option” button. Switch to “TiVo” tab in Option window, and enter TiVo Media Access Key.
Tip: How to find your Media Access Key on TiVo: Go to “TiVo Central” menu >> “Messages and Set Up” “Account and System Information”, and your Media Access Key would be there.

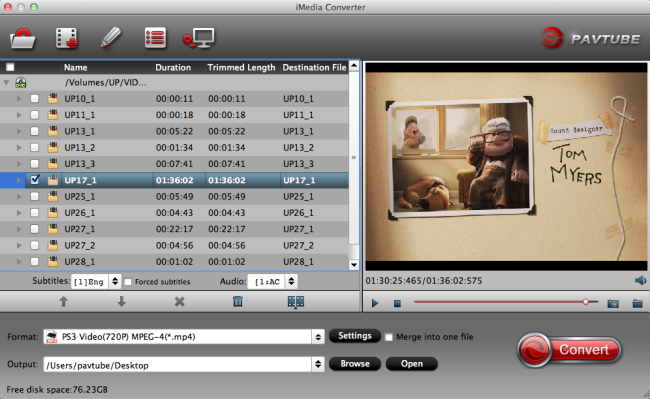
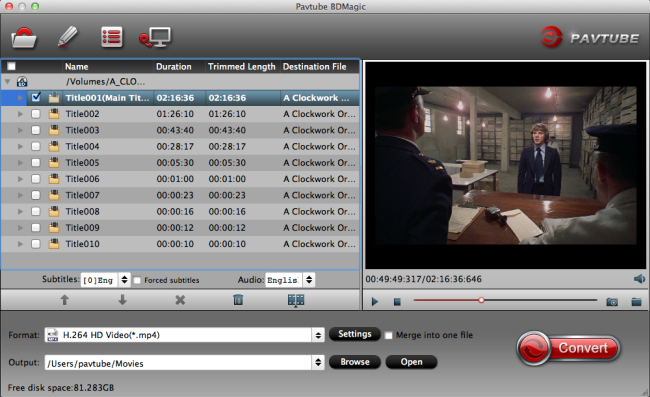
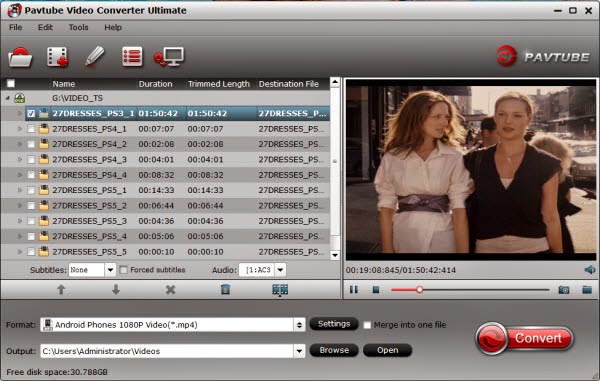
Drag and drop TiVo shows to the main interface for converting.
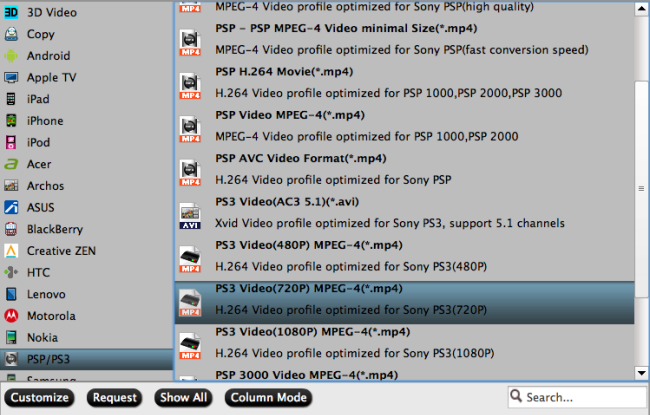
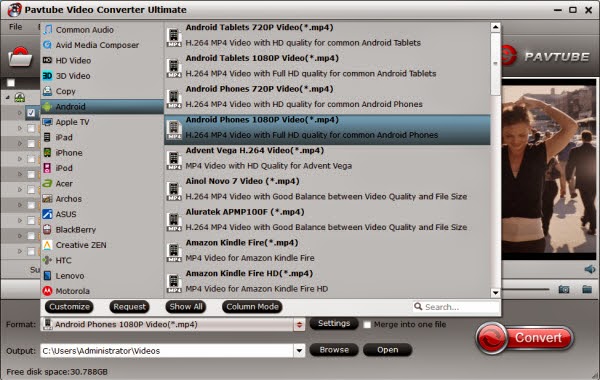
Click “Format” and select an output profile for your Android device. There are optimized presets for Samsung, Amazon Kindle, Google Nexus, Asus Transformer, Acer, Archos and more. Basically the Android >> Android Tablets 1080P Video(*.mp4) is an universal format for Android tablets and smartphones.
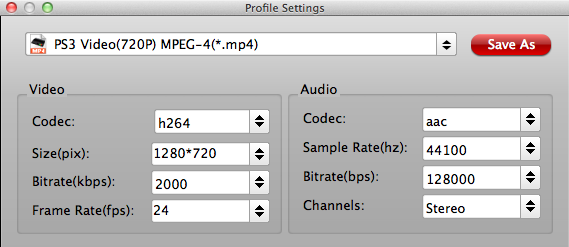
Optimize the settings – The default settings may not satisfy you, and you can click the settings button to change the settings by yourself. Keep in mind that the file size and conversion quality is based more on bitrate than resolution (bitrate higher results in big file size, and lower visible quality loss, and vice versa). According to my experience, for watching videos on an Android phone or tablet, 720p with 1500~3000kbps (depends on what device you use) is just all right.
If you’re happy with the output videos, just press the “Convert” button to begin encoding TiVo shows. Once the encoding task completes, you can transfer the converted videos to your Android tablet or phone for viewing on the move.
The Mac version is iMedia Converter for Mac.
Not an Android user? Converter also supports “common” video formats like MOV, M4V, MP4 and has presets for all the models of iPad, iPhone, iPod Touch and Apple TV, so you should be able to create files compatible with your iOS basd devices, as well as BlackBerry PlayBook, Windows RT/8 devices and HP TouchPad.
Read Related:
Convert/Play DVD ISO image files on Android Tablets
Convert 1080p/720p Videos and Movies on Android Tablet/Phones
Copy 2014 Disney Blu-ray movies to Android Tablet/Phone for watching
If you’re frequent traveler, a question may come up like this – How can I get my TiVo shows remotely with my Android tablet (phone)? Although TiVo released its offical Android app to allow TiVo customers to use Android device to access TiVo shows via Wi-Fi, but that is restricted to enjoying TV recordings at home. Currently there’s not yet a good solution for wirelessly play TiVo shows remotely, but here’s a way to transfer TiVo shows to your Android for on-to-go viewing, so that you can take favorite TV shows when away from home.
The process sounds easy – first transfers TV shows from TiVo to PC, and then convert the .tivo files to MP4 videos for Android.
Part 1: Transfer TV shows from TiVo to PC
It takes a while depending on length of TV program you are transferring. Make sure your TiVo and computer are in the same home network, and follow this guide to proceed TiVo file transfer:
- On your PC, launch TiVo Desktop for PC (click to download), the freeware that transfers shows from your networked TiVo box to your computer.
- Click “Pick Recordings to Transfer.” A window showing your TiVo box’s “Now Playing” or “My Shows” list appears.
- Highlight any title in the list to see more information about the show. Check the box next to the title of the show (or shows) you want to transfer.
- Click “Start Transfer.” Transfer times vary, but may take as long as the show’s duration to complete the transfer.


Part 2: Convert TiVo shows to Android friendly MP4 video
After transferring to computer the TV shows are saved as .tivo files. The .tivo format, however, is kind of protected MPEG-2 video. The Android based device, however, plays neither protected shows nor MPEG-2 video. That’s why you need to encode TiVo to MP4 video (720p or 1080p). See below how to convert TiVo shows to Android playable videos.
Download and install Pavtube Video Converter Ultimate to your PC. Launch it and press “Option” button. Switch to “TiVo” tab in Option window, and enter TiVo Media Access Key.
Tip: How to find your Media Access Key on TiVo: Go to “TiVo Central” menu >> “Messages and Set Up” “Account and System Information”, and your Media Access Key would be there.
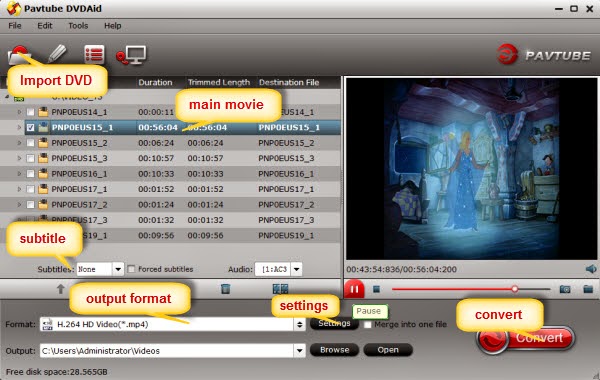
Drag and drop TiVo shows to the main interface for converting.
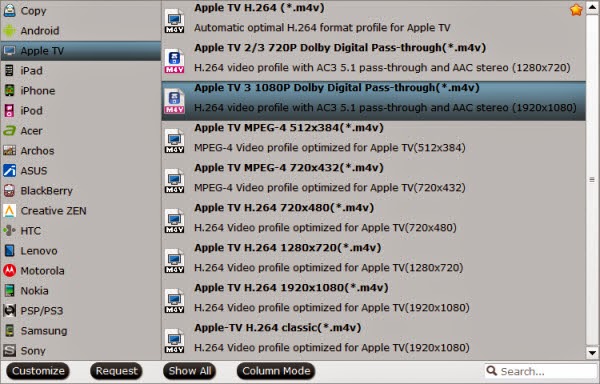
Click “Format” and select an output profile for your Android device. There are optimized presets for Samsung, Amazon Kindle, Google Nexus, Asus Transformer, Acer, Archos and more. Basically the Android >> Android Tablets 1080P Video(*.mp4) is an universal format for Android tablets and smartphones.
Optimize the settings – The default settings may not satisfy you, and you can click the settings button to change the settings by yourself. Keep in mind that the file size and conversion quality is based more on bitrate than resolution (bitrate higher results in big file size, and lower visible quality loss, and vice versa). According to my experience, for watching videos on an Android phone or tablet, 720p with 1500~3000kbps (depends on what device you use) is just all right.
If you’re happy with the output videos, just press the “Convert” button to begin encoding TiVo shows. Once the encoding task completes, you can transfer the converted videos to your Android tablet or phone for viewing on the move.
The Mac version is iMedia Converter for Mac.
Not an Android user? Converter also supports “common” video formats like MOV, M4V, MP4 and has presets for all the models of iPad, iPhone, iPod Touch and Apple TV, so you should be able to create files compatible with your iOS basd devices, as well as BlackBerry PlayBook, Windows RT/8 devices and HP TouchPad.
Read Related:
Convert/Play DVD ISO image files on Android Tablets
Convert 1080p/720p Videos and Movies on Android Tablet/Phones
Copy 2014 Disney Blu-ray movies to Android Tablet/Phone for watching