Wednesday, September 10, 2014

Transcode DVD .vob and Blu-ray .m2ts to iPhone 6 for free playback with subtitles

Looking for the way playing disc backup files on iPhone 6? Follow this easy guide to transcode DVD VOB/Blu-ray M2TS to iPhone 6 playable format.

As we all know, Blu-ray/DVD discs are very expensive (especially Blu-ray disc), mainly because of its strong support for capacity storage and high-definition video. Therefore, to prevent your Blu-ray or DVD from any physical damage or loss, you may choose to do a disc backup.

If you have already stored your Blu-ray in m2ts streams or copied DVD into vob files, have you imagined of watching DVD .vob and Blu-ray .m2ts videos on the coming iPhone 6 in travel without buying on iTunes Store?

iPhone 6 and iPhone 6 Plus

Realize DVD .vob and Blu-ray .m2ts video playback on iPhone 6 with subtitles

Generally, there are two ways to enable playing DVD vob and Blu-ray m2ts on iPhone 6: one is to go to iTunes Store to download a similar correct video player app. However, such video player is not all-purpose, in case that the video file is too large in size, and the network speed is not fast enough since high quality video uses more bandwidth. So, it would be better to adopt another method, namely, converting DVD .vob and Blu-ray .m2ts to iPhone 6 playable format.

In fact, your converting task would be as easy as blowing off dust if you get a practical and professional iPhone 6 converting software. Here, Pavtube Video Converter Ultimate is recommended to you without preamble.

With intuitive and easy-to-navigate interface, this program can easily transcode various formats including DVD .vob and Blu-ray .m2ts to iPhone 6 friendly format like MP4, M4V or MOV with awesome video quality at fast speed. What is more, you can even choose whichever subtitle from the Blu-ray, DVD disc for playing on your iPhone 6 at will. Really trustworthy!

Here is Money-saving Trip:

Video Converter Ultimate($65) + Vidpie($29) = Only $74.9, Save $19.1
Video Converter Ultimate($65) + DVD Creator($35) = Only $64.9, Save $35.1

Convert and Transfer DVD .vob and Blu-ray .m2ts files to iPhone 6 on Windows/Mac

Preparations:

- DVD .vob and Blu-ray .m2ts videos stored
- Windows 2003/XP/Vista/Windows 7/Windows 8/Windows 8.1
- Download and install Pavtube Video Converter Ultimate/iMedia Converter for Mac

Step 1: Add source AVI/VOB file

Launch the excellent VOB/M2TS to iPhone 6 Converter. And then click "Add Video" import your source materials in .vob or .m2ts format. Besides that, you can also load FLV, MKV, WMV, VOB, TiVo, MPG, MOV, etc. files to the program. Batch conversion is supported so that you can add multiple files.

iPhone 6 Video Converter

Note: 
Because the subtitles are not hardcoded on the Blu-ray, DVD video, so we can choose the subtitles which you want to keep. Just click the drop down menu after "Subtitles", force subtitle can be checked for output so as to help you to read the unknown language and fully enjoy the Blu-ray,DVD movies.

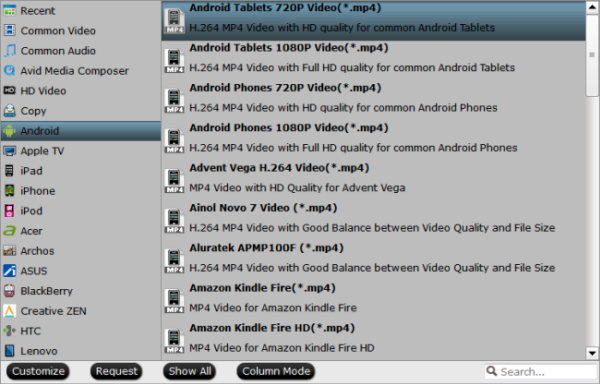
Step 2: Choose an iPhone 6 playable format.

Click "Format" bar and move mouse to "iPhone" column, you can easily find the profile of "iPhone 6 H.264 Full HD 1080P(*.mp4)" as the best profile for iPhone 6. Or choose "iPhone 6 Plus H.264 Full Screen/Full HD 1080P(*.mp4)" which fit on your iPhone 6 Plus perfectly.

And choose the destination folder to save the converted videos.


iPhone 6 playable format

Step 3: Make personal settings optionally and additionally

If you like, you can click "Settings" to change the video encoder, resolution, frame rate, etc. as you wish.


Step 4: Start converting DVD .vob and Blu-ray .m2ts video to iPhone 6

After above settings, you can start the VOB/M2TS to MP4 Conversion to fit the iPhone 6 so as to play back videos in portable and wireless way. You can view the duration and remaining time of the conversion process, and choose whether to shut down computer and open output folder when conversion completed.

Once the process completes, download and transfer the converted MP4 videos to your iPhone 6 via iTunes and enjoy it in travel.

P.S. Pavtube Video Converter Ultimate also enables or add external subtitle, crop and trim videos by clicking the "Edit" button and take snapshot.

More tips about iPhone 6/6 Plus

Friday, September 5, 2014

Copy Blu-ray collection to hard drive with good quality picture/sound for Tablet/TV viewing

Copy Blu-ray to Hard Drive for viewing on tablets/TV? How to enjoy with good quality picture/sound quality? This article will teach you how to...

I own lots of Blu-ray movies and want to copy my BD collection to hard drive and for tablet viewing more Flexibly as I tend to watch these children's films with 4 year old son. I want a top ripping tool which works very well in converting my Blu-ray moives for enjoying on my samsung tablet and TV (On Network Hark Drive) with good quality picture/sound output.
Copy Blu-ray collection to hard drive


If you are looking for such a powerful, easy-to-use third-party assistance software that output playable video with excellent quality, turn to Pavtube BDMagic that can digitize their physical Blu-ray disks onto computer HDD. With this app, you can help you remove the Blu-ray/DVD disc protection and convert them to playable format for various purposes within a few clicks. Besides, you can copy source BD/DVD disc to computer hard drive with same structure preserved. Refer to the guide below.

The app is also available for Mac OS – Get BDMagic for Mac if you work with OS X 10.5/10.6/10.7/10.8/10.9.

FYI: If you want to rip BD/DVD with keeping all the audio tracks (language) and soft subtitles, here's another choice for you: 30% off ByteCopy/ByteCopy for Mac.

Easily backup Blu-ray to hard drive with good quality picture/sound for viewing

1. Launch the highly recommended Blu-ray Ripper. Insert your Blu-ray movie to BD drive, and click “Load Disc” button on Pavtube BDMagic interface to load Blu-ray disc; it also support importing BD ISO and BD folder.

Best Blu-ray Ripper

2. Select the main title and set subtitles/audio language you'd like to preserve.

3. Click "Format", you can find many video formats in the dropdown list, you can choose the one you need like "H.264 Video(*.mp4)" or "MKV(Matroska) Video (*.mkv)" from "Common Video" option.

Format for Tablet/TV viewing

4. Change target video/audio specs (Optional)

If you are not satisfied with the default video/audio specs, click "Settings" to adjust video seize(pixel), frame rate, bitrate (the higher bitrate, the larger file size and better video quality), or audio settings.

MP4 Settings

5. Start Conversion.

Click the big "Convert" to start converting Blu-ray to Hard Drive as MP4/MKV format. After conversion, you can click "Open" to find the converted files.

Now you can successfully rip and backup Copy Protected Blu-ray to hard drive Up to the format you wish for playing on Samsung tablet and TV.

Tips:

1. You can hit the Copy the entire disc icon on BDMagic main interface and start Blu-ray, DVD backing up process.

2. If you’d like to copy only movie content and leave out the extras and commentary, the Directly Copy is exactly what you need, which copies intact M2TS/VOB main movie from original BD/DVD disc without extras.

Read more:

Tuesday, August 26, 2014

Enjoy The Amazing Spider-Man 2 3D Blu-ray movie with Optoma HD25-LV DLP projector

Want to enjoy The Amazing Spider-Man 2 3D Blu-ray movies through Optoma HD25-LV DLP projector in the best possible 3d quality? Here lead your the easy way.

Imagine the bewitching beauty of Avatar's planet Pandora spread out before you. Or a close-up shot of Jeff Beck's fingers coaxing delicate harmonics out of his Stratocaster. All this can be achieved by a wonderful projector!

Optoma HD25-LV DLP projector

The HD25-LV projector is a single chip DLP projector that’s a very nicely bright home entertainment projector. Consider it a step up from entry level, in terms of most performance areas. At its very best, this HD25-LV can tackle most family rooms, living rooms etc.  This projector is going to be a very good choice for many first time projector owners, primarily the ones that just want the “big screen”.

Are you confused when looking for a software to a 3D Blue Ray movie- The Amazing Spider-Man 2 that can play on Optoma HD25-LV DLP projector? Want to find a solution? Please go on reading.

Working as a Swiss army knife in Blu-ray and DVD ripping field, Pavtube BDMagic removes the copy protection from your Blu-ray/DVD legally and convert to just about any video format. It offers a wealth of tweaking option to get the best possible file as a result, and even has pre-configured profiles built in that make easier for you to rip Blu-ray and DVDs in the right format for playing on Optoma HD25-LV DLP projector. If you are mac users, please refer to BDMagic for Mac to handle the task.

Now, we'll show you exactly how to get the The Amazing Spider-Man 2 3D Blu-ray movie into the format you want to playback on Optoma HD25-LV DLP projector. — The fast and easy way even for a first time Blu-ray/DVD ripping with basic knowledge of computer.

Step 1: Load 3D Blu-ray source

Insert and launch BDMagic as the top 3D Blu-ray Ripper. Click "Load file" to import 3D Blu-ray files. After the files imported, you'll see an interface looks something like screenshot below.

3D Blu-ray Ripper

All of the major functions are shown in front of you, including the options to check 3D Blu-ray property, choose output format, edit the files, and preview the movies and several other options.

Step 2: Choose output format

 From the “Format” drop-down list, you are suggested to follow the path “3D Video > MKV Side-by-Side 3D Video (*.mkv)” for ripping Blu-ray to side-by-side 3D MKV video for enjoying on Optoma HD25-LV DLP projector.

3D SBS Video

Tip:

If you like, you can click "Settings" which is next to “Format”, free change your target video size, bitrate, frame rate and 3D depth. If you want to get best video quality, pls switch them to “original”.

SBS MKV settings

Step 3: Start ripping 3D Blu-ray to Optoma HD25-LV DLP projector file

Now you can go ahead and rip The Amazing Spider-Man 2 3D Blu-ray. Simply hit the "Convert" button at the lower right corner of the window to begin ripping 3D Blu-ray movie to 3D SBS MKV format. This will take a while, depends on the encoding settings, hardware of your computer and the length of the 3D Blu-ray file.

Step 4: Stream the converted 3D Blu-ray movie

The last step, after the conversion completed successfully, transfer the movie on your Optoma HD25-LV DLP projector via HDMI! Becides SBS MKV format, you can also choose other format with 3D effect. Happy enjoying!

Related articles:

Rip 3D Blu-rays to 2D MP4/MOV/M4V for playing
Rip 3D Blu-rays for BenQ W1070 1080P 3D Projector
Rip DVD to SBS 3D MKV, AVI, MP4 and MOV on Mac OS X

Friday, August 22, 2014

Put DVD movies to EVGA Tegra Note 7 for Watching on the trip

With the best Tegra DVD Ripper in hand, you will be able to watch any treasured DVD on EVGA Tegra Note 7 for enjoyment wherever you go.

The EVGA Tegra NOTE 7 tablet is the perfect traveling companion - combining a lightning-fast mobile processor with a brilliant 7-inch HD display in a sleek, comfortable design. Play the latest games at full speed. Capture stunning photos. Watch HD video for up to ten hours.

EVGA Tegra Note 7


So to take the cinema with you as you travel, please consider EVGA Tegra NOTE 7 tablet! Being able to watch all your favorite videos on your EVGA Tegra NOTE 7 is definitely a nice experience, when you do not want to end up bored on the trip.

With that in mind, it is tempting to get this glamorous gadget for watching DVD movies on its 7-inch, 1280 x 800 IPS LCD display. However, EVGA Tegra Note 7 still cannot play DVD movies directly because of DVD drive absent. If you want to put and watch beloved DVD movies on Tegra Note 7, the only way out is to rip DVD to Tegra Note 7 supported format in advance.

No worries; this Top Tegra DVD Ripper from Pavtube for ripping and converting DVD movies to Tegra Note 7 MP4. Ease of use, with clean and simple interface, reasonable price, lot of formats supported and basically, faster ripping speed and perfect video quality, it will become your most reliable DVD Ripping tool and the most important is its lossless ripping ability feature. The Mac version is Pavtube DVDAid for Mac.

Get the trial version and follow the steps below:

Rip DVD movie to EVGA Tegra Note 7 supported format for watching when travelling


Step 1. Run DVDAid, as the Tegra DVD Converter. Click "Load Files" to import DVD. It will recognize DVD discs from ROM, DVD ISO/IFO and DVD folders automatically.

Tegra DVD Ripper

Step 2. Choose EVGA Tegra Note 7 compatible format.

Click "Format" drop-down list to locate all the profile; choose "Android -> Android Tablets 720P Video(*.mp4)" as the most compatible format for EVGA Tegra Note 7.


Tip 1:

If you want to rip DVD to for EVGA Tegra Note 7 with multiple audio tracks and subtitles, Bytecopy will help you with special multiple track MP4 profiles. Choose "Multi-track MP4 (*.mp4)" from "Multi-track Video".

Step 3. Customize video specs.(Optional)

Click "Settings" to set up video size, frame rate, bitrate and other settings.

Tip 2:

Please remember the file size is based more on bitrate than resolution which means bitrate higher results in bigger file size, and lower visible quality loss. Here 720P is just enough for you. And if you want to watch converted DVD on Tegra Note 7 in full screen, click “Size(pix)” dropdown list under “Video” item to choose “1280*720”.

watch DVD on Tegra Note 7 in full screen

Step 4. Start the DVD to Tegra Note 7 conversion.

Now hit to big "Convert" button to start ripping DVD files for playing on Tegra Note 7. Once the process completes, just click “Open” to find the EVGA Tegra Note 7 playable MP4 videos and transfer them to Android device with ease. .

Now just enjoy your converted DVD movies on your EVGA Tegra Note 7 and it will make yourself entertained for many hours during this trip. Have a good time!

Related Articles:

Wednesday, August 20, 2014

How to convert Blu-ray/DVD to AVI with multiple audio tracks

Want to convert Blu-ray/DVD to AVI format with multi-track for a good enjoyment? This tutorial will tell how to store and play BD/DVD with multiple audio tracks preserving.  

As AVI format is a multimedia container which can contain both audio and video data in a file container that allows synchronous audio-with-video playback. And AVI is a popular video format that supported by most portable media player devices. For backing up and storing your Blu-ray/DVD on computer and get them for later watching on Xbox 360, or other media players, video editing apps, online video websites, etc, you need to convert BD/DVD to AVI format at first.

Blu-ray/DVD to AVI with multiple audio tracks


But how to finish the Blu-ray/DVD to AVI conversion while preserving multiple audio channels as the above question?

In fact, with the right program, you can get all done easily and quickly. I recommend you Pavtube Bytecopy, which is special designed for users to rip Blu-ray/DVD to MKV/MOV/AVI with multiple audio tracks. Moreover, it's also a professional Blu-ray/DVD ripper, allows you to rip and convert BD/DVD discs to any video format you like. Intimate is, there are many optimized presets for tablet and smartphone, including Kindle Fire HDX, Google Nexus 7/Nexus 10/Nexus 4, Galaxy S4, Galaxy S5, Galaxy Tab 3, iPad, iPhone etc. which will give you best video quality.

Here, this post will give you a guide on how to convert Blu-ray/DVD movies to multi-track AVI format on Windows/Mac.

Tips:

1. When ripping Blu-rays, it is necessary to own an external Blu-ray drive.

2. Mac version is also available: Pavtube Bytecopy for Mac.

Get this ByteCopy installed and let's start the workflow easily.

Step 1. Import Blu-ray/DVD disc, Blu-ray/DVD folder, IFO/ISO image files.

Step 1. Free download and install the Best Blu-ray/Blu-ray Copying & Ripping tool on your PC. Insert Blu-ray/DVD disc to your drive, click "Load files" to import Blu-ray disc. If you have IFO/ISO and BD/DVD folder, choose the corresponding option to load Blu-ray/DVD movies from your computer.

The main title in your Blu-ray/DVD will be checked by default; so let's move on and choose format.


Multi-track Ripping tool

Step 2. Choose format

Click the "Format" drop-down list and choose "Multi-track Video >Multi-track Interlaced DV PAL Video (*.avi)" as below:

Multi-track avi format


Step 3. Adjust video & audio settings (optional)

Click the "Settings" button to check all video&audio settings. By default it will check all the audio tracks (languages), so if you only need some of the languages, just check the unwanted ones.

Btw, video size, bitrate and frame rate can all be changed if you are not satisfied with default settings. Don't forget to click OK to confirm all the changes.

Step 4. Start conversion.

Click the big red "Convert" to start converting Blu-ray/DVD to AVI with multiple languages.

After conversion, hit the "Open" or "Open output folder" icon to quick locate converted AVI videos, transfer it to your media players for playing. OK! We now can freely watch Blu-ray/DVD movies with multiple languages on AVI-compliant devices.

More related:

Tuesday, August 19, 2014

Add srt subtitles to MP4 on Windows 8.1/8/7/XP in a Hassle-Free Way

This guide is available for people who want to add .srt subtitles to the mp4 videos to get them easily understood on Windows 8.1/8/7/XP.

Subtitles are the textual representation of a dialog displayed at the bottom of the screen. They can be a written translation of the dialog in a foreign language or its transcription in the same language. That is really very helpful in case you cannot hear properly what is being said.

Movie with subtitle

Have you ever created your own movie with your recordings but found your clips are difficult to understand? One feasible solution is to add SRT, the most basic subtitle format, to MP4 video file.

If you don't have any .srt subtitle or who want to add some of their own words to the .srt subtitles displayed onscreen.refer to part 1. If you have saved SRT subtitles you need, just skip this part and directly move to part 2. 

Part 1: Download External SRT Subtitle or Create Your Own SRT before Adding to MP4 Video 
Download SRT subtitle: You can put "movie title" + "your preferred language" + "subtitle" as the search strings and select the subtitle file saved in .srt for an effective SRT subtitle file searching. Alternatively, finding the needed subtitle in .srt format from those popular subtitle download sites like Moviesubtitles.org is also a practical way.

Edit or make your own .srt file: Here we take Notepad as an example. Just open Notepad, create the subtitle you like in the text editor, click menu File->Save As; change the subtitle file name based on your name of video file and save it in .srt format.

Tips: The SRT subtitle needs to contain the following parts while creating the SRT subtitle:

1. The number showing which subtitle it is in the sequence.
2. The time that the subtitle should appear and disappear on the screen.
3. The subtitle itself.
4. A blank line indicating the begin of a new subtitle.


Part 2: How to Add SRT Subtitle to MP4 File on Windows 8.1/8/7/XP

To get it done effortlessly, I recommend you Pavtube Video Converter Ultimate, which is most user friendly, professional and the outlook of it is smart. With it, users can add subtitles in *.srt, *.ass, *.ssa to MP4 videos on Windows 8.1/8/7/XP with just a few clicks. It can not only add subtitles to MP4, but also supports many other video formats, like AVI, MKV, etc.

Besides adding subtitles to movies, it is an easy-to-use program with many other functions, which enables you to edit videos, convert videos(MKV, AVI, WMV, MOV, VOB, MPG, FLV…) quickly without quality loss. Just download the program and follow the guide below, you’ll find it is really simple to srt embed subtitle to MP4. The Mac version is iMedia Converter for Mac.

1. Import mp4 source.

Click "Add video" button to import the *.mp4 files. After few second, it will be imported successfully and you can preview the whole movie in the preview window.


For BD/DVD videos, force subtitle can be checked for output so as to help you to read the unknown language and fully enjoy the blu-ray/dvd movies.

2. Choose output format.

Now go to "Format" menu to select output format there. A variety of options are listed, and choose the one you desired like rvmb, mp4, WMV format. For example, you can select "Common Video > H.264 Video(*.mp4)".


Tip:

By the way, if you want, you can adjust output video and audio parameters according to your own needs. You can change bitrate, frame rate, channels, etc. Click "Settings" button to set output profiles.

3. Add .srt subtitles

In order to get customized videos, you can add subtitles to your own videos.

Find "Edit" icon and then click it, you will find video editor. There you can Trim, Crop, Add watermark and Effect. Above all, Subtitle can be added here.


For creating customized subtitle, you can count on free software for subtitle editing: Subtitle Edit. Go to write the subtitle content there and it will be saved as SRT files, which is supported by Video Converter Ultimate. Then load it to the software for output videos and you will get a characteristic video.


Top 5 Subtitle Sites to Download Subtitles

4. Convert your mp4 files.

Now it's time to start conversion. Click big Convert button on the interface and then you will get a conversion dialogue box to show the exact progress, like time left, estimated size, state and so on.

Note: If you are bothered about waiting for conversion to finish, you can choose to check "shut down computer after conversion". Then just let it alone, you are free to go out to do anything you like.

With it you can get your mp4 video played in your media players and portable devices with added subtibles. Just try it now!

Related posts:

Convert DVD to iPad Air/iPad Air 2 with Subtitles/Closed Captioning
Top 5 Free Subtitle Editor Tools for Your Video Editing
How to convert MKV to M4V with external srt subtitles embedded

Friday, August 15, 2014

2014 Back to School Promo Discount- 30% Off Top DVD Ripper for Mac users

Welcome to the Pavtube 2014 Back to School Promotion Center where Up to AMAZING 35% OFF Back to School Specials are waiting for you. You be surely be entertained at your free time.

2014 Back to school Promo Discount

The giveaway includes Blu-rays, DVDs and HD Videos related software which will give you great experience when enjoying these videos and movies on Android/Apple/Windows devices. Besides that, you will have no worry about any compatibility issues when editing the MTS/MOV/MXF files in Mac editors(FCP, FCE, iMovie, Avid Media Composer, Adobe Premiere, etc.), and Windows editing programs (Sony Vegas, Premiere Pro, Movie Maker, etc.)!

Hurry to get- 30% OFF DVDAid for Mac now!  

Powerful abilities to remove DVD protection, convert DVD to any video and audio format, and edit DVD to create personal movie on Mac.

DVDAid for Mac

TERMS & CONDITIONS APPLIED:

The deal is valid from 15th Aug to 15th Sep, 2014

More details are here:

http://www.multipelife.com/back-to-school-specials-2014