You may be surprised to learn that sharing digital media across different devices and platforms is quite easy. Windows 8.1 with Windows Media Player has built-in tools and DLNA/UPnP support for easily sharing digital media libraries with compatible devices. And allowing access to the media across a network or the Web requires minimal configuration.
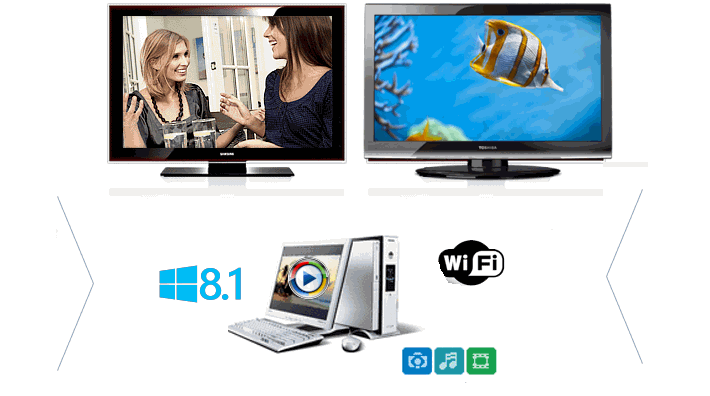
First, some definitions: The device that sends the stream—such as a PC—is the DLNA server. The device that receives the stream—such as an HDTV or something connected to the TV—is the DLNA renderer. Both devices must be on the same network. Follow these steps to stream videos from PC to DLNA HDTV:
Part 1. How to Set Up Your Windows 8 DLNA Media Server for video streaming
Windows 8.1 DLNA Media Server
The quickest way to set up a Windows 8.1 DLNA Media Server is to use the one that comes with Windows 8.1. By default, all the music that you load in the “My Music”, “My Pictures”, and “My Videos” folders gets added to your PC’s media library. In order to share media over your home network, you should put the media you want to share in the “Shared Music”, “Shared Pictures” and “Shared Videos” folders. They will still be part of your local library and fully accessible from your PC but will also be available to anyone on your network. If you want to see how its done read this TopNetTricks How-To article.How It’s Done
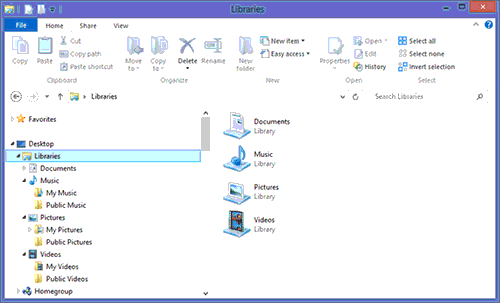
Putting media in the correct folders is simply a matter of using Windows Explorer and moving the files to those folders. You can see from the screen below that each of the media libraries contains a “My” folder and a “Shared” folder. When you set up Media sharing the entire library (both “My” and “Shared” folders) will become visible to media players.
1. Enabling DLNA Media Server Function in Windows Media Player
It is not necessary to have a Homegroup configured to use the Windows 8.1 DLNA Media Server. But you must have Windows Media Player correctly set up.
From the “Stream” menu.
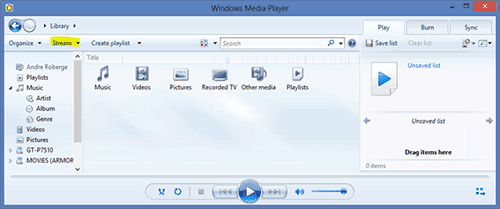
Select “Turn on media streaming”, and press the “Turn on media streaming button”.
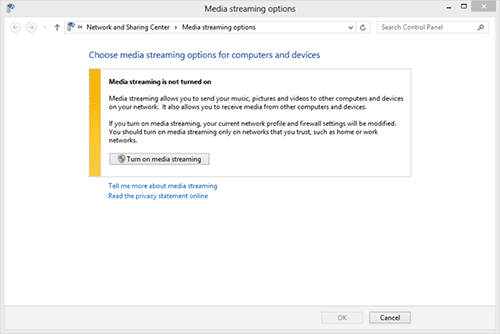
You will then be prompted with a list of DLNA devices that Windows has found on your network. Select the one you want to share with and then “OK”
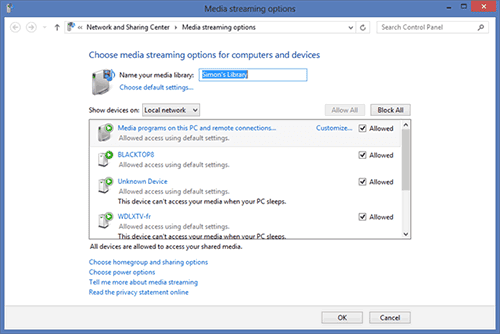
2. Allowing DLNA Media Players to Access Your Media
You want to be a bit careful here about selecting “Allow All”. This will allow people at the office or at the local coffee shop to browse your library, including personal photos you may have. Likewise, the Windows Media Player has an option under “Stream” to “Automatically allow devices to play my media…” which has the same effect. Be careful if you decide to use this option on a laptop computer that you use outside the home.3Setting Up the DLNA Media Client in Windows Media Player
First you need to make sure that the player PC is on the same network as the media server. Now if you go to another windows PC and call up Windows Media Player, you should be able to see, in the left column, under “Other Libraries”, the shared Library that you just set up. You may have to right click “Other Libraries” and select “Refresh” if you don’t see the content right away.
Notice that the shared content that you can see from the Windows 8 DLNA Media Server is the combination of “My Music” and “Public Music”. As well, both “My Pictures” and “Public Pictures” are shared by default. This may not be what you want. You can control what gets shared in Windows Media Player under “Organize”, “Manage Libraries”, and “Pictures”. You can remove the “My Pictures” Folder from the list, or specify a different folder.DLNA Media Server Security (or lack of it)
Keep in mind that Windows 8.1 DLNA Media Server does not have any access control (fancy word meaning security). It has no logins and no permissions. So whatever you make available through your DLNA server is visible to everyone. a Windows 8.1 DLNA Media Server is great around the house but you should be wary if you use it on shared or public networks. It is best to use the Media Streaming Options screen to control who you want to share with if you plan on using that computer outside the home.
2. Pushing/Streaming PC media to DLNA compliant HDTV over wifi
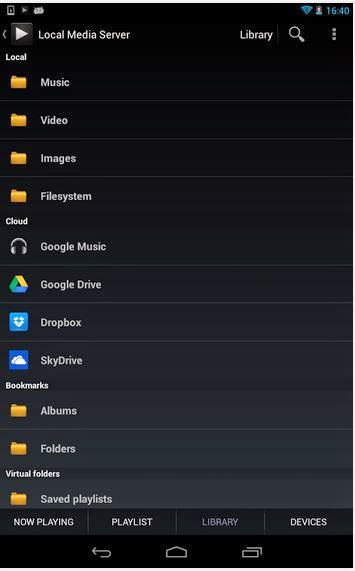
I found this article via PCWORLD on how to stream from PC to HDTV. Having Chromecast is pretty awesome, but has it’s limitations. With the free Android app BubbleUPnP, you can turn Chromecast into a DLNA renderer.
(DLNA uses Universal Plug and Play (UPnP) for media management, discovery and control. UPnP defines the type of device that DLNA supports (“server”, “renderer”, “controller”) and the mechanisms for accessing media over a network)
I installed BubbleUPnP on my Nexus and then selected Chrome Cloud as the renderer.
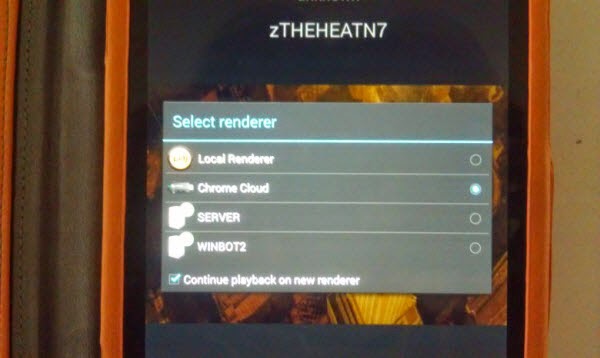
Then you just set up Windows Media Player to stream your stuff. Simply open WMP, select Stream > Turn on media streaming. Once it is turned on, click OK.
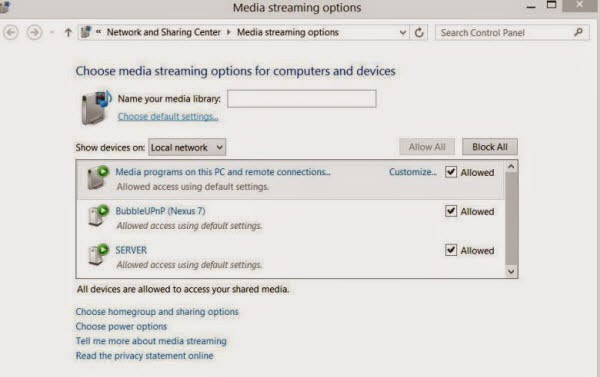
Other ways to stream Video to Your TV can be found here. (All devices required a TV with an HDMI port, so that means an HDTV.)
Notes:
1. Windows Media Player 12 (bundled with Windows 7 and 8.1) supports all DLNA roles. Windows Media Player 11 reportedly supports DLNA, but there appear to be problems.
2. If you’re not sure if your TV is DLNA-certified, search info at DLNA Certified Products and see if it is a DLNA compliant HDTV.
3. Not all the videos can be streamed from PC to HDTV via DLNA. Only specified media formats (MPEG-1, MPEG-4 and WMV 9) are good for DLNA video streaming. Errors occur in case of unsupported video format. Native formats for DLNA media streaming:

4. To stream MKV, AVI, H.264 videos to HDTV, you can transcode the format to one of the applicable required formats. A recommended transcoder here is Pavtube Video Converter, which uses CUDA acceleration tech and converts videos fast enough.
5. You can also use Pavtube BDMagic to convert Blu-rays and DVDs to PC hard drive and your PC a DLNA Media Server for streaming to HDTV and other DLNA certified devices like PS3, PS4 and Xbox 360, etc.