Showing posts with label Uploading. Show all posts

Thursday, February 19, 2015

How to Rip and Upload DVD to YouTube for sharing

This article shares with you how to upload DVD to YouTube by converting DVD to a video format that is compliant with YouTube with a professional DVD to YouTube converter.

As we all know, YouTube has now become the most popular online video site. It allows you to upload videos in almost all popular video formats like FLV, AVI, MOV, WMV, MPEG, MP4, MKV, etc to share with the world in minutes. However, when you are trying to upload DVD to YouTube, you may get into trouble since YouTube website doesn't support DVD uploading.
Rip and Upload DVD to YouTube for sharing

According to YouTube Help Center, H.264 video with AAC audio in MOV or MP4 format is preferred for uploading. To share DVD on YouTube, you will need to rip DVD movies to YouTube friendly H.264 MP4 or MOV first. With the assistance of Pavtube DVDAid, all becomes easy.

It can serve as a professional DVD to YouTube converter that lets you get videos with optimized settings for uploading to YouTube. Besides, it can also convert DVD to video formats like AVI, WMV, FLV, ASF, M4V, MKV, etc. and extract audio from DVD to audio preferred by most online websites like Facebook, Vimeo, Break, Metacafe, Dailymotion, Hightai, etc. for sharing anywhere. Better still, you can edit DVD video by cropping, trimming, adjusting effects and cutting your long video clips to a shorter ones, all becoming easy with this DVD to YouTube ripping program.
Free download it now and follow the below steps to convert DVD to YouTube with ease. If you are using a Mac, you can use the equivalent DVDAid for Mac and refer to the mac workflow.

Part I: Convert DVD to YouTube Preferred Video Format for Uploading to YouTube

Step 1. Load DVD movies

Insert the DVD disc into your computer's DVD drive and run DVD Ripper. You can click the "Load DVD" button to load the DVD files to the program. DVD ISO/IFO, VIDEO_TS folder are supported also.


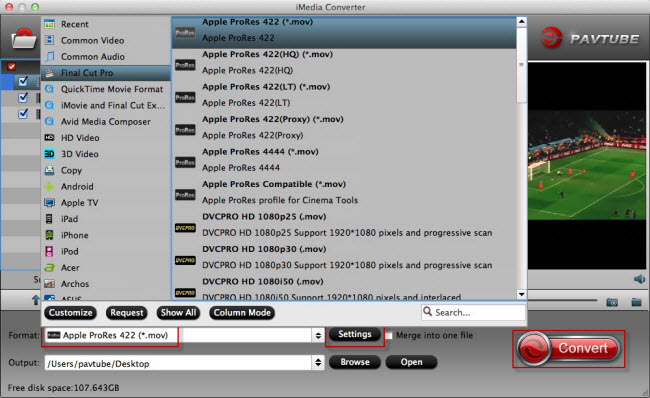
Step 2. Specify output format

As has been stated above, YouTube supports MP4, etc video files. So you can just select "Common Video" > "H.264 High Profile Video(*.mp4)" or choose "HD Video>H.264 HD Video (*.mp4)" as the output video format.


Step 3. Trim/Edit DVD files

Since YouTube has limitations about the uploading video size and length, please pay attention to the video size when ripping DVD movies for YouTube. Here we should highlight the trim function on this software. Just click "Edit" to trim the DVD videos to get the very part you want. Besides trimming, cropping, adding watermark, adjusting special effect, are well supported as well.

Tip: If the video clips you’ve trimmed are still longer than 15 minutes, you can choose to split the DVD movies into smaller parts so as to share on YouTube without limit. Click the Split icon in the main interface, and you can cut your files according to time length and file size.

Step 4. Start converting DVD to YouTube

When all these settings are ready, you can click the "Convert" button to begin the DVD to YouTube conversion. When the ripping is done, you can click on "Open" button to locate the ripped videos.

Part II. How to load video to YouTube

1. Sign into YouTube.

2. Click the Upload link at the top of the page.

3. Select the video you'd like to upload from your computer. (Enter as much information about your video as possible, including Title, Description, Tags, and Category.)

And what we have left is just to follow its instructions. Broadcast yourself now!

More related:
Source: Easiest Solution to Convert DVD for Uploading onto YouTube

Tuesday, December 23, 2014

How to convert any video to FLV with AAC audio for putting on site

Look for ways to convert any video to a FLV with H264 video and AAC audio and put/host on your site? Get an Ultimate Converter to do video to flv conversion with several simple clicks. 

FLV (Flash Video) is a file format used to deliver video over the Internet. If you have a web site, then you possibly plan to add a video to your site using flv format. How to create .flv file with AAC audio from your video?  You should do conversion first.


convert any video to FLV

To realize the conversion, I searched widely and I got some tech support for converting video to FLV with AAC without losing quality in a simplest way. At last, I found Pavtube Video Converter Ultimate is the ideal tool do the the actual work which can help you change all kinds of videos like MTS, MXF, MOV, AVI, MP4, Tivo to FLV video and AAC audio with fast speed for convenient sharing in excellent output video quality. (Read the review or get other free online video converters)

What's more, it provides flexible editing functions, like cutting off the unnecessary part, adding watermarks including text, image and video, adding special effect, inserting subtitles and so on. The mac version is here. Now just download it and follow the steps below to finish the conversion.

How to Transcode any video to FLV with AAC audio for putting on site

Step 1. Load video files

Run the program and click “Add video" button to import source files. You can also directly drag the video clips into the program for conversion. If need, you can check the “Merge into one file” box to join several video clips together.

video to flv converter

Step 2. Select output video format

Click Format bar to get the format list and select a proper export format. In "Flash Video" list, you can find "FLV  H.264 (*.flv)". Or you can convert your video to swf, f4v or mp4 for uploading.

flv video format

Optional: Customize the output video and edit videos

You can click "Edit" button to trim your favorite part from the video, crop video frame size, adjust visual effects, add watermarks, subtitles and more to personalize your videos.

Plus, click the Settings icon, you can adjust the video size, frame rate, bitrate, etc.

flv video settings

Step 3. Start Conversion

When all the settings are OK, you can click the "Convert" button on the main interface to start converting videos to FLV with AAC audio.

After the conversion, you will can easily you can get the web-friendly flv and share on your website.

To add flv to your website, there are two options, which you can consider: 

OPTION #1 - Host video on your site.

Pros:
- you can use any online flash player with any skin, interface, look & feel etc;
- quality of video is controlled by you only -- make it very good or bad, as you wish;
- video size is not limited, you can set any size you like;

Cons:
- it requires a high bandwidth;
- your hosting must be reliable to support requests from many visitors simultaneously;


OPTION #2 - Host video on YouTube.com, but insert the video player directly into your web page.

Pros:
- it doesn't require high bandwidth, it's almost FREE even if you have a lot of visitors;

Cons:
- flash player includes advertisements and logo of YouTube

Detailed steps is here. Just enjoy!

Thursday, October 16, 2014

MP4 to Flash Converter- Turn H.264/AVC MP4 into SWF, ASF, FLV, F4V for uploading

If you want to convert H.264/AVC MP4 for sharing online, then just follow this article to turn MP4 video into SWF, ASF, FLV, F4V with ease. 

MP4 is a container format and can store video, audio and other information which quite often contains H.264/AVC video content. To play mp4 files with H.264 / AVC content, the VLC Media Player is by far the easiest solution.

Turn H.264/AVC MP4 into SWF, ASF, FLV, F4V

However, how to share H.264/AVC MP4 videos with friends on your websites, blogs, etc.? Converting your MP4 videos into SWF, ASF, FLV, F4V format is an easy solution. Then how can you manage that? Now Pavtube Video Converter(Win/Mac) gives a hand. Overall, it's a professional video converter that can help you convert H.264/AVC MP4 to SWF, ASF, FLV, F4V with great quality. After the conversion, you can upload the small converted videos to websites without any troubles. It owns powerful converting functions and flexible editing functions. With it, you can deal with the MP4 format for multiple use with no limitation. 
Convert H.264/AVC MP4 video files to SWF, ASF, FLV, F4V with ease. 

Step 1: Import H.264/AVC MP4 video.

Run the Pavtube Video Converter or Video Converter for Mac, click "Add video" or "Add from folder" button to load mp4 videos to the program, or also support to drag and drop mp4 files to the program.

MP4 to SWF Converter 

Step 2: Choose SWF, ASF, FLV, F4V format.

Go to choose the proper format what you need. Click "Format" to choose "Flash Video > SWF-SWF Format (*.swf)" or other popular format like ASF, FLV, F4V as you like.

SWF Video Format 

Step 3. Attach subtitles to a video/movie.

Find "Edit" icon and then click it, you will find video editor. There you can Trim, Crop, Add watermark and Effect. And subtitle can be also added to your MP4 video.

Step 4. Customize the output format

Click "Settings" to customize the video and audio settings. For video settings, you can adjust Encoder, Frame Rate, Resolution, Aspect Ratio and Video Bitrate. For audio settings, you can adjust Encoder, Sample Rate, Channels and Audio Bitrate to meet your needs.

SWF Video Settings 

Step 5. Start H.264/AVC MP4 Conversion.

Click "Convert" button to start conversion. The conversion from H.264/AVC MP4 to SWF, ASF, FLV, F4V which will be done in amazing fast speed, which costs you a few minutes thanks to its advanced feature and easy-to-use interface.

After conversion, go to find the converted files by clicking "Open" button. In this way, you will change video format from H.264/AVC MP4 into SWF, ASF, FLV, F4V with ease and successfully share with your friends on the internet.

Other useful tips for you:

Friday, October 18, 2013

Make Sony PMW-EX1 XDCAM compatible with Mac (FCP, iMovie) and Youtube

Facing issues with editing and uploading Sony PMW-EX1 XDCAM EX footage on Mac in FCP, iMovie? Fortunately, here is an easy workflow for this. Let's find it out here.
I'm a Production Coordinator (primarily tv commercials, clients include Audi, Samsung, Fisher-Price, Nickelodeon and more). I have some xdcam media from Sony EX1 about documentary following people in their workplace and I required converting footage from my Sony XDCAM for editing and uploading on my website? I have used MPEG Streamclip, but is there any better software?

If you are a XDCAM user, you may face the incompatibity of XDCAM and your editing programs like FCP, iMovie and uploading websites. I exactly looked up the file format in google, and took to me to a website that told me that my EX1 shoot videos in XDCAM file format, it suggest me to convert Sony XDCAM videos to best compatible format for Mac OS. Only by converting can I avoid video playback, editing and uploading problems. And under comments, I was recommend to use a decent XDCAM Video Converter on Mac platform - Pavtube iMedia Converter for Mac, to help me get it done.

Good News! Pavtube Release a New Site - multipelife.com with Product Migration and Name Change.

To thanks for your continued support all along our previous site and the new www.multipelife.com, we are holding a 'New Site Special' with fantastic discounts up to 40% off. You can get 20% off BDMagic, 30% off ByteCopy, 40% off DVDAid and 20% off Video Converter Ultimate on Windows/Mac platform:

https://www.facebook.com/pavtubefans/app_209569249055691

Read more: http://bestvideosolution.blogspot.com/2014/05/pavtube-new-official-website.html

The reviews from people on websites, the price, how easy it is, i mean WOW, click, convert. Now I have bought this XDCAM video to Mac Converter to convert my Sony XDCAM videos into a editing format on Mac and then upload on Youtube. It work well as it says. I'm 100% satisfied with Pavtube, and I'm no pro but I don't think any changes need to be made. I will share a step by step guide as below:

Convert Sony XDCAM EX1 MP4 videos on Mac for editing and shareing

1. Install Sony XDCAM Converter for Mac. Run it and transfer EX1 XDCAM video to hard drive, and then click "Add Video" or "Add from folder" to add the XDCAM files you need into the program.


2. Click format column and choose the output format.

You can choose Final Cut Pro -> Apple ProRes 422 (*.mov), this codec is optimized for FCP editing;


You can also choose iMovie and Final Cut Express -> Apple InterMediate Codec(AIC) (*.mov), it's for iMovie editing;

For sharing on website like YouTube, you can choose MP4 format for output.

3: Click settings button to adjust the output video’s parameters, such as bitrate, resolution, etc.(Optional)


4. You can edit the Sony XDCAM EX1 XDCAM MP4 videos in this program before converting to other formats on Mac OS. Trim, crop, add watermark or adjust effect as you want.

5. Start converting Sony EX1 XDCAM MP4 video on Mac.

This best Mac Sony XDCAM Converter will convert EX1 recorded XDCAM videos on Mac at top speed, you can choose rich formats for output on Mac, and now I can easily and successfully use EX1 recorded XDCAM footages to edit in FCP, iMovie, etc on Mac or sharing on Youtube. It really do a great favor for me, if you have the same problems, you can take a try now! Good luck!

Read more:

Effortlessly import Sony PMW-500 XDCAM to Premiere Pro CS5
Convert and Transfer Sony XDCAM footage to QuickTime MOV on Mac
XDCAM EX to FCP-Transform Sony XDCAM EX MP4 to FCP 6/7 with highest quality