Saturday, December 14, 2013

Get 40% discount for ByteCopy on Pavtube Facebook- Only Two Days!

Will you take your favorite BD/DVD discs with you for the journey to hometown this Christmas? Are you bothered by naughty kids who always like to throw discs to the air around or make noise during your work? Do you feel boring with no sound around during your housework?

Come on! Just build an e-library of your own Blu-ray/DVD discs from now on~

Wellcome to Pavtube Facebook Weekend Special Offer (Only Two Days)


Get 40% discount for Pavtube Bytecopy for Windows or Mac users:

ByteCopy for Windows 40% off:

https://usd.swreg.org/cgi-bin/s.cgi?s=48737&p=48737-78&q=1&v=0&d=0&rc=45K2D47VH9&a=fb-weekend-bc40%

ByteCopy for Mac 40% off:

https://usd.swreg.org/cgi-bin/s.cgi?s=48737&p=48737-81&q=1&v=0&d=0&rc=45K2D47VH9&a=fb-weekend-bc40%

Pavtube ByteCopy is an all-in-one Blu-ray/DVD solution to meet all the needs of movie fans for multi-track backup and conversion.

Ease of use is the feature liked by every users as backup and conversion are only several clicks away on the straightforward interface.

Bytecopy also supports multi-track subtitles and audio language so that users are free to select preferred subtitle to see and listen.

Another remarkable feature is 3D effect output. It enables users to get fantastic visual experience.

With all these features, users will get easy access to watch movies on portable devices on the go, commute, or during journey on the plane, or train etc.

Learn more:
http://www.multipelife.com/bytecopy
http://www.multipelife.com/bytecopy-mac

Interesting?

Don't miss it and tell your friends as well!

It will be expired on 16-Dec,2013.

Other Christmas discount:

http://www.pavtube.com/2013-christmas-specials.html

Now get 40% off for BD&DVD Ripper tool to play Christmas movies on your tablets/smart phone/TV etc at the Facebook Page:

https://www.facebook.com/pavtubefans/app161683100556760

Friday, December 13, 2013

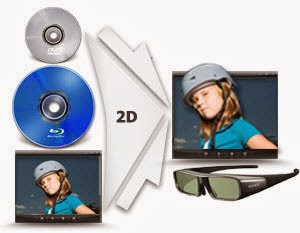
Solution for convert 2D Blu-ray movies for enjoying on 3D TV smoothly

A simple solution to enjoy 3D effect with normal 2D Blu-ray disc; so you can watch the 3D Blu-ray on 3D TV smoothly. 
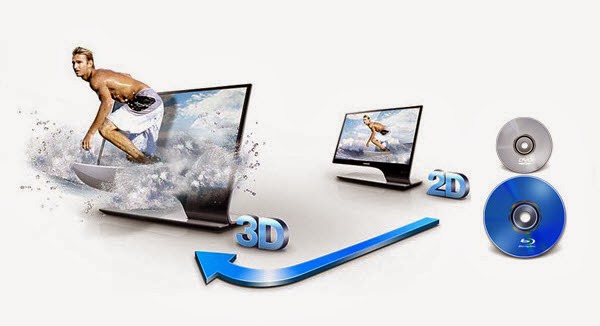
Want to watch Avatar/Pacific Rim/Planes 3D but only have the 2D Blu-ray on hand? Bought a 3D TV but most of your Blu-ray collections are 2D? Well, you don’t need to play a lot to reorder the 3D versions; just prepare a set of blank Blu-ray discs and let’s start converting Blu-rays from 2D to 3D! 

What you need: 

1. A Blu-ray drive – to make your Mac read this disc 
2. Pavtube ByteCopy for Mac – to roll off your Blu-ray protection and turn it into 3D 
3. A Blu-ray/DVD burner and Roxio Toast – to burn the converted 3D movie to Blu-ray disc 

Part 1. Rip and convert your Blu-rays into 3D videos. 

We all know most commercial Blu-rays are protected so we cannot convert or watch it on any other devices. No worries, Pavtube ByteCopy for Mac is a magic tool to help your decrypt your Blu-rays and convert them into 3D videos. Now well support Mac Mavericks. 

  • Join 2014 Thanksgiving Promotion to earn 30% OFF ByteCopy for Mac. 

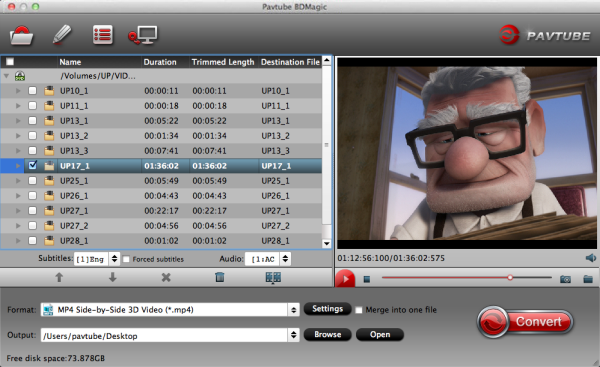
a.) Insert your Blu-ray to external Blu-ray drive and load disc to this Mac Blu-ray 2D to 3D Converter. 

Mac Blu-ray 2D to 3D Converter

b.) Choose Format.
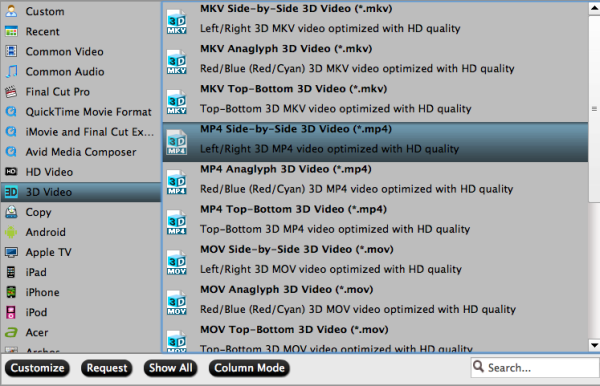
Click "Format" and you will find many presets. There are three types of 3D effect: Anaglyph 3D, Side-by-Side 3D and Top-Bottom 3D. 

In consideration of burning to disc later, you are suggested to choose "3D Video > MKV Side-by-Side 3D Video (*.mkv)". Or choose "MP4 Side-by-Side 3D Video (*.mp4)"


c.) Adjust target video settings and 3D effect.
Click "Settings" which is next to "Format", free change your target video size, bitrate, frame rate and 3D depth. If you want to get best video quality, pls switch them to "original". 

d.) Start conversion.

Now hit the big red "Convert" to start converting videos to start converting 2D Blu-ray to SBS 3D MKV. After the conversion, click "open output folder" to quick locate the generated media file. 

Part 2. Burn 3D movie to Blu-ray using Roxio Toast 

Burning A BluRay:

Launch Toast 11 and drag the MKV file into this window, or select it from your file browser using the Select button. Choose BD-R from the Space Remaining bar graph at the bottom of the screen, and choose your BluRay burner from the Destination menu. Choose the number of copies you want to burn - each time a disc is complete; you will be prompted by Toast to insert another disc. Hit the big red Copy button, and the disc burning will begin! Now insert this 3D Blu-ray to your 3D TV and star enjoying! 

Related guides: 

Rip 2D/3D Blu-ray with 3D effect on Mac OS X 10.9 Mavericks

Do you kown how to transfer 2D/3D Blu-rays to your 3D device with 3D effect on Mac? This guide will help you convert 2D/3D Blu-ray to 3D SBS MP4 format on Mac OS X 10.9 Mavericks. 

3D effect is destined to give audiences a fantastic and lifelike visual experience. With the 3D blu-ray come into being, more and more folks are talking about how to play 2D/3D Blu-ray movies on their portable devices. However, most commercial Blu-rays are encrypted by film studio which makes it much more difficult to play 2D/3D Blu-ray movies everywhere. 


But it's not big deal; finally we find this a top Mac 2D/3D Blu-ray Ripper software to help remove disc encryption and transform 2D/3D Blu-ray to compatible MP4 format for playing with 3D device on Mac OS X 10.9 Mavericks. 

Big surprise: Pavtube BDMagic for Mac is also able to rip commercial DVD/Blu-rays and put it on many other Android/Apple/Windows 8 tablets & smartphones, now is 30% off. The windows version is Pavtube BDMagic 

And to output 3D effect, you can convert 2D/3D Blu-ray to 3D SBS MP4 format with the converter and then you transfer the converted videos to with your 3D media Player or TV for playback on Mac OS X 10.9 Mavericks. Below is a tutorial. 

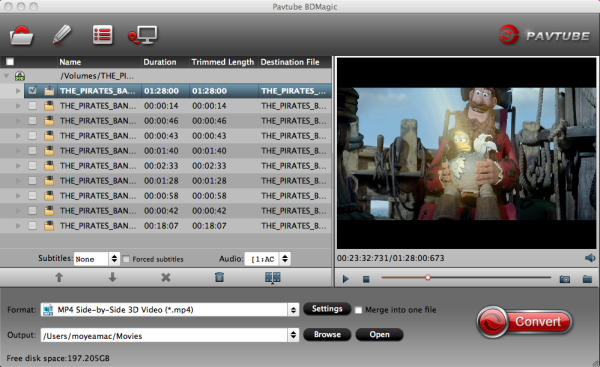
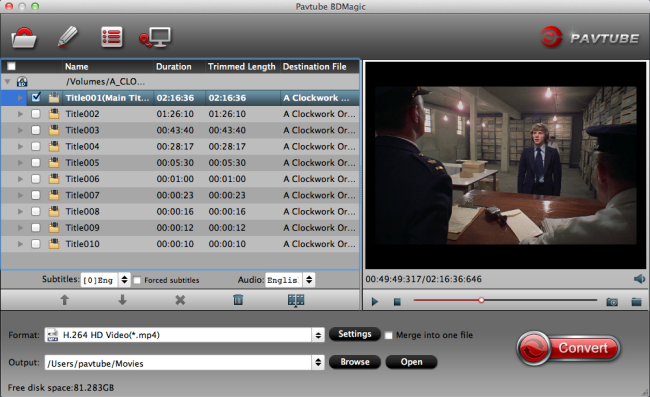
Step 1. Run the best BDMagic for Mac and import disc. 

Click "Load files" to import Blu-ray, Blu-ray ISO/IFO or Blu-ray/DVD folder. Choose subtitles, languages or forced subtitles in the main interface. 


Step 2. Choose 3D SBS MP4 video format for playback. 

Click the “Format” bar and find “3D Video”, you will find several presets for MP4 in Side-by-Side 3D, Top-Bottom 3D and Anaglyph 3D. MKV and MP4 are both recommended formats, but you still need to check your device specification to choose one accordingly. 


Step 3. Adjust 3D effect. 

Click “Settings” to enter customize specs window; you can adjust resolution(size), bitrate, frame rate, 3D mode and depth here. 

Tip: When you have trouble getting aligned images in saved 3D MP4 video, adjust "Depth" in Profile Settings helps make the film images aligned?perfectly. 

Step 4. Start Conversion. 

Hit the "Convert" button to copy your 3D Blu-ray movie to 3D MP4 video. When if finishes, click the "Open" option to locate the created 3D video and you are ready to transfer your 3D Blu-ray movies to 3D TV or 3D Media Players for entertainment. 

Tip 2: It is much complicated for encoding Blu-ray to 3D video because of data analyzing and processing, so the process of copying 3D video takes more than regular disc ripping. 


Read more: 

Thursday, December 12, 2013

Ripping and Moving DVD movies to Kindle Fire HDX for watching

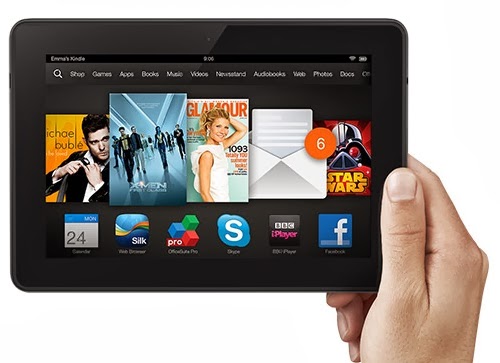
This guide will show you the easiest way to rip and convert DVD to Kindle Fire HDX MP4 videos so that you can play your favourite DVD movies on your new Amazon Fire HDX 7/8.9 Tablet.

Love my Kindle Fire HDX 7", HDX Display, Wi-Fi, 64 GB. The HDX was incredibly easy to set-up. I also had no problem adding my FB photos to the cloud nor uploading my iTunes to the Cloud drive. The screen is absolutely gorgeous. The color and clarity are amazing. I opened a magazine and could read it without expanding the text which I couldn't do with the original Fire. I also found the sound quality excellent. The browser is very fast. I've viewed videos and had no problem with dropped WiFi connections; this was a problem with the Original Fire.


My husband, who has an iPad, is very impressed with my HDX. This is a great little tablet at a great price. However I am eager to enjoy my DVD movies about the coming Halloween on my Kindle Fire HDX. Here I will give you the best solution to get DVD videos to Kindle Fire HDX 7/8.9.

And at first, I have a very splendid program named DVD to Kindle Ripper (30% off now) for you. It can help you convert latest DVD movies to Kindle Fire HDX supported MP4 Video so that you are able to enjoy your output videos on your Fire HDX 7/8.9 freely. The Mac version is DVDAID for Mac.

Let us know the program in detailed. Here are the procedures of DVD to Kindle Fire HDX conversion. The primary of everything is downloading the nice program.

How to Rip, Transfer DVD movies to Kindle Fire HDX

The quick start guide below uses DVDAID Windows screenshots. The way ripping DVD to Kindle Fire HDX on mac is almost the same.

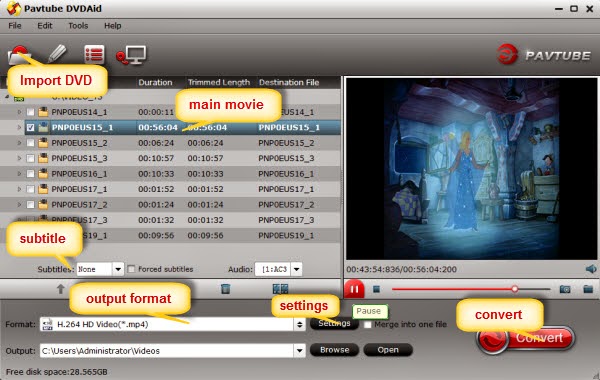
Step 1. Launch the top DVDAID for Kindle Fire HDX, insert the DVD disc to your BD drive, and then click the "DVD disc" icon to navigate to the videos you want to convert. You can also add DVD disc, ISO file, IFO file or DVD folder.


Step 2. Now choose the output format for playback on your Kindle Fire HDX.

You can get optimized videos for Kindle Fire HDX under Format > Android > Amazon Kindle Fire HD H.264(*.mp4). The output videos could also fit on your Kindle Fire HDX device perfectly. You can also click "Settings" to change the video encoder, frame rate, resolution, etc.


Step 3.
When everything is OK, just press the "Convert" button to start the conversion from DVD to Kindle Fire HDX. It will not take much time. Just wait for the conversion process to get done.
Tips: Before the conversion, you can click "Edit" button to edit your videos by cropping, trimming, adding watermarks, etc. What's more, you can choose the subtitles and audio track for the target video on the main interface.

See Also:
 Get Kindle Fire HDX 7 to Play all 1080p/720p MKV HD movies
 Free Play AVCHD MTS/M2TS Videos on Kindle Fire HDX 7/8.9
 Transfer and Watch Blu-ray movies on Kindle Fire HDX 7

Wednesday, December 11, 2013

Convert Tivo Baseball recordings for editing or playback without Losing Quality

As Tivo files are not a friendly companion to edit or smoothly playback. You may want to convert Tivo shows to an easy-to-play format.
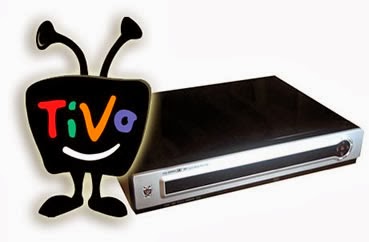
I'm a telecommunication Facility Spec. I have recorded some videos about our local Baseball Game with TiVo and in house CATV services for baseball and for departmental use. Then how to get my Tivo recordings and CATV videos for editing and playing? Having tried high download, power director 11, but any better program suggested?


Many users have issues to edit and enjoy Tivo video files. In fact, Tivo is an encrypted video format. Based on its specificity, few media players and editors can play it well. Thus, we'd better convert Tivo to a common format that widely supported. e.g. MPEG-4/H.264 MP4 format. The guide shares with you how to convert TiVo file to MP4 step-by-step.

Part 1: Transfer TV shows from TiVo to PC

To transfer TV shows on any PC, you need to download TiVo Desktop software. When your TiVo is connected to your home network, TiVo Desktop provides you with a list of available shows for transferring to your PC. You can play TiVo video files using Windows Media Player.

Hints: TiVoToGo Transfers system requirements: TiVo Series2 DVR, TiVo software version 7.1 or later, TiVo Series2 box must be connected to your home network using a wired or wireless USB network adapter.


Part 2: Guide to Converting TiVo to MP4

With this TiVo Converter, you can also encode TiVo to MP4 files for enjoying your favorite TV shows recorded by TiVo box on Pocket PC, iPod, iPad, iPhone, Android, Windows RT/8, PSP etc device so that you can watch TV shows any time and any where. Meanwhile, you can also encode/re-encode TiVo to MPEG, MPG, MKV, WMV etc files while keeping perfect quality.

Pavtube offers free trial version of TiVo Video Converter Ultimate(alternative Mac TiVo Converter) for you to evaluate the software. So just go ahead, download and install Pavtube Video Converter and try it out!

Launch the utility and here pops up an intuitive interface. Click “Add Video”  to load recorded TiVo TV shows, or you just drag the files in. When first loading, Pavtube TiVo Converter will ask you to input your Media Access Key.


Simply enter your Media Access Key, and click "OK" to confirm.


Tips:

1. Crop out unwanted edges and trim off ads


Click on "Edit" menu to enter editor panel where you could edit selected files. “Crop” feature allows you to cut off unwanted black edges, while "Trim" feature enables you to select specific length of video and convert it to specified format. Just drag the slider or input start time and end time.

2. Set output format and A/V settings.

In order to encode TiVo shows to MP4, you can click on “Format” bar and follow either Common Video-> MPEG 4 Movie(*.mp4) or H.264 Video(*.mp4). For users who want to upload to YouTube, you can also select this format.

You can see profiles for iPad, iPhone, iPod, Apple TV and you can also choose one according to your device model.

And there are many presets in "Andoroid" column, you can use the search box on bottom right corn and locate proper mp4 presets for your own phonetablet model.


You can also click "Settings" (which is marked as "3" above) to customize video size, bitrate(quality), frame rate and other settings.

Pls note that the higher bitrate you choose, the better video quality you will get. Next specify location for generated files in “Output” box.

Now it comes to the final click---- click "Convert" button to start the TiVo to MP4 conversion and wait. The ViewLog will present you all the info such as conversion progress, conversion state, elapsed and estimated conversion time, and generated and estimated conversion file size. You may check "Shut down computer after conversion" and leave it be.

Learn more Tivo video related guides:

How to Free convert Tivo shows to MPEG on Mac?
How to play Tivo files on iPad, iPad 2, iPad 3, iPad 4?
Best way to burn huge Tivo video to DVD disc on Mac
How to convert Tivo file to Divx AVI on PC?
Convert Tivo shows to HD formats with least quality loss on Mac
How to deliver Tivo shows to iPhone 5C for watching?

Tuesday, December 10, 2013

Rip Blu-ray,DVD movies on portable devices and convert DRM-videos on Mac

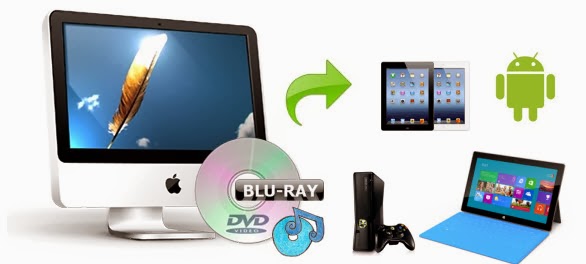
In this article I will share the process of ripping Blu-ray/DVD movies to play on iPad, Surface, Android, PC and Xbox 360, meanwhile you can also learn an easy way to remove DRM protection from Amazon, iTunes and Google Play videos.
The reason I write this guide is I was in the same dilemma few months ago before I find Pavtube BDMagic for Mac– rip BD/DVD for playing on portable devices on Mac (Mac Mavericks 10.9 included), and ChewTune for Mac – the best Mac DRM removal and record tool I ever used.


Part I: First of all, let’s talk about the way ripping Blu-ray and DVD movies to PC, Xbox 360 and portable tablet like iPad, Surface, Android for playback on Mac.

After I searched widely and I got some tech support for converting Blu-ray and DVD movies to Android/Apple/Windows device video on Mac 10.9 Mavericks & Mountain Lion without losing quality in a simplest way, I find more than one people suggest to rip Blu-ray/DVD to MP4 format which is the most compatible format for portable devices on Mac with BDMagic for Mac.

It is an ideal Mac app for you to rip Blu-ray, DVD, ISO/IFO files to MP4 video. Plus, it also can help you to convert Blu-ray, DVD to almost any other common video format such as VOB, FLV, WMV, AVI, MKV or backup the BD, DVD keeping the whole movie structure as you need. Now are on 30% off for Christmas Special.

Top Blu-ray Ripper for Mac Review: Rip Blu-ray Movie on Your Mac


Users Reviews:

We are a modern normally family with different devices. I had the Mac Version which worked really well for me. I have lots of Blu-ray, DVD and other legally bought films which I want to play over my home network on tablet devices. Between us my family and I have iPads, Surface, Android, PC's and Xbox's so disk format, particularly with copy protection means they would normally be useless and if I had not brought Pavtube product to the market. I would not have purchased the DVD's and Blu-Rays. With Pavtube BDMagic for Mac, I can freely enjoy 2D/3D Blu-ray/DVD on my portable devices with ease. So ironically Pavtube actually help the movies studios sell more as without its solution I would not buy their films.

Below is how I rip my Blu-ray and DVD movies to MP4.

Now just download it and follow the tutorial below.

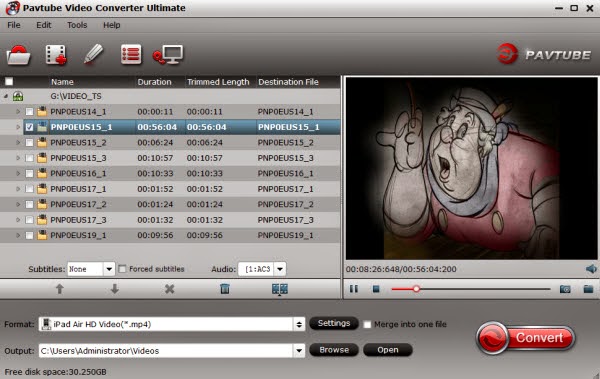
1. Click the top left icon to import Blu-ray/DVD discs correspondingly.
 

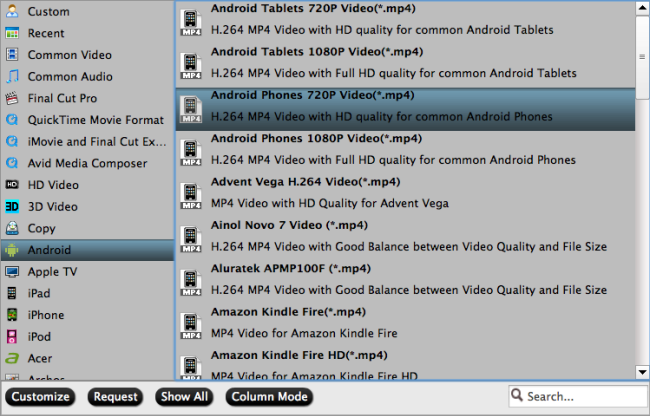
Click the drop-down list on the bottom; choose proper presets according to your device model. You can see columns for normal devices.

Basically the “Common Video -> H.264 Video (*.mp4)” is a universal format for your tablets and smartphones or NAS devices.

Or depends on your device, you can choose a suitable video format from “Android” or "iPad" or "Windows" catalogue, or you can use the small search box to locate your device quickly.


2. Check the pencil-like icon to activate the editing function. Here you can trim video for your needed length, crop video to get rid of annoying black edges, join multiple video clips into one, add text/image watermark and add subtitles.

For example, if the original Blu-ray/DVD movie has no subtitle or the subtitles you need, you can download it from website and then add it into the output videos for full enjoyment with this software.

Notice the small triangles under the progress bar? Click them to adjust frame by frame easily.


3. If you want to output video in specific size, bitrate or frame rate, click “Settings” (which is marked as “3″) and change the digits as you need. Pls notes that the video quality improved with the bitrate, but not the higher the better. You need to consider your device configuration as the high bitrate required higher read&write speed.

4. Ok now click the “Convert” button to start converting/copying Blu-ray/DVD to iPad, Surface, Android, PC and Xbox 360 for playing or streaming. After conversion, click “Open” to locate the converted video directly.

The Windows version is Pavtube BDMagic, it’s also on 30% off to thanks for your great support;

Part II. As iTunes, Amazon or Google Play videos are no good due to the DRM protection which will lock you for playback directly, so I'm considering about how to remove the DRM protection from these videos to unprotected mp4 files so as to play on my device easily.

I use Pavtube ChewTune for Mac, perfect tool to legally remove DRM protection from purchased iTunes movies, Amazon Instant Videos, and digital copies.

Three simple steps for recording and converting DRM videos to portable devices

1. Import a single DRM video or a folder to free downloaded Pavtube DRM removal.

2. choose optimized output formats. I can find at least one profile for every smartphone or tablet I have.


What about your device not listed? Don’t worry, choose similar device and change presets to suit the needs of your device, which can be easily handled.

2. Last but not least, hit the “Convert” icon to start DRM removing process.

It would take as long as the source movie length for the whole DRM removing conversion  process since Pavtube ChewTune for Mac records source DRM videos in 1:1 video and audio quality. I would prefer to start converting my DRM videos before bedtime, so it could run overnight and the conversion would be successfully complete when I get up, which it would not interface my spare time.

More info for converting DRM protected videos:

Make sure that your computer is authorized for source videos, that is to say you can play the source iTunes movies in iTunes, play Amazon and digital copy using Windows Media Player.
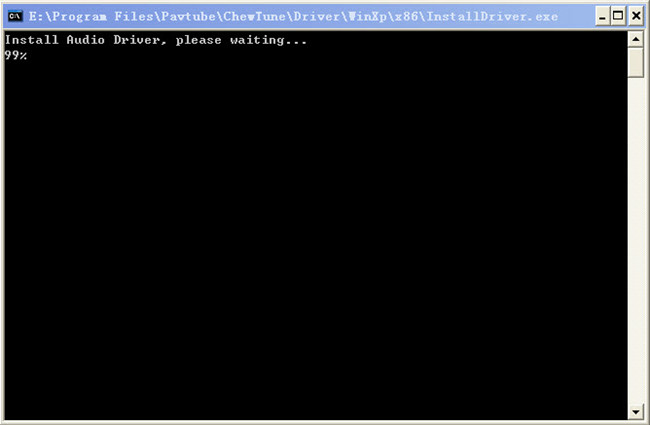
Allow the audio driver installed during the Pavtube ChewTune for Mac installation.


Good News! Pavtube Studio is offering money saving bundles for ChewTune for Mac. With either bundle package, not only can you save money, you will get the most powerful combination from Pavtube to handle Blu-rays, DVDs, regular videos as well as DRM protected videos files.

Read more:

Enjoy Blu-ray movie on widescreen Smart TV
Play Netflix Blu-ray on iPad Mini 2, iPad Air on Mac
Converting HD-DVD (.evo) files to NAS for streaming to Xbox 360

2013 Christmas Gift ideas- 20% off Ultimate Video Converter for Android/Apple/Windows 8 Tablets

Good new for you! 2013 Christmas is around the corner! To celebrate the coming Christmas Day, Pavtube launch Christmas Giveaway and Promotion 2013, you can get Free, Buy one get one free, Up to 66% off discount between Dec.10,2013 and Feb. 10, 2014. Never miss!!!

  • Freebies and giveaway
  • Buy one get one free
  • $9.9 zone
  • Share to get more
All can be found on PAVTUBE CHRISTMAS PAGE NOW!


Pavtube Studio has launched amazing freebies and specials more than ever! The hottest Pavtube programs are one sale right now: Blu-ray Ripper (Win/Mac), DVD Ripper (Win/Mac), Video converter series (Win/Mac) and the most popular all-in-one program: Pavtube Video Converter Ultimate & iMedia Converter for Mac. 20% OFF available now!

With this program, you can easily enjoy Christmas Blu-ray/DVDs movies on smartphone/tablets with family and friends; playback family’s Christmas memory video on computer &tablets &smartphones &other devices, or smoothly transfer your camera footage to editing program without any format problems, etc. All can be finished with this Video Converter Ultimate (Mac version is renamed as iMedia Converter for Mac)

Online user manual:

Windows: http://www.pavtube.cn/blu-ray-video-converter-ultimate/user-manual-on-line.html
Mac: http://www.pavtube.cn/imedia-converter-mac/user-manual-on-line.html

What are you waiting for? Make the specialist Christmas memory videos with Pavtube Software!

Video Converter Ultimate (Win) features:

1. Backup your Blu-ray/DVD discs for longtime preservation

Just bought some brand new discs and want to save it from your naughty kids? Pavtube Video Converter Ultimate offer two ways to lossless backup your Blu-ray/DVD discs:

a.) Full Disc Copy – make a 1:1 copy of your original disc; all the folders and description documents would be preserved. No compression, no quality loss, no audio track loss.

How to: load disc and click this icon directly:


b.) Directly Copy – only backup the movie itself; other info like art cover, film info, extras will not be save. You will get an intact M2TS/VOB file of the main movie. No compression, no V/A quality loss as well.

How to: load disc and select “Copy>Directly Copy” in format:


2. Transfer Blu-ray/DVD movies to smartphones, tablets, Xbox/PS3, etc.

Want to play Blu-ray/DVD movies on portable devices? You don’t need to have every devices authorized. Try this Video Converter Ultimate and convert your movies to best presets for different devices: iPhone 5S/5C/5/4S/4, Samsung Galaxy S4/Galaxy Note 2/3, HTC Desire HD, HTC One, Sony Xperia Z, Motorola Droid), on your Android tablet (including Samsung Galaxy Tab 3, Google Nexus 7/10, Amazon Kindle Fire HD, Fuhu Nabi 2, Asus Transformer Pad Infinity TF700); Apple iOS based (iPad Air/4/3/2/1/mini/mini with R) tablet, Windows tablet (like Microsoft Surface RT).

Plus, the Blu-ray and DVD movies can be imported from not only BD/DVD Disc, but also BD/DVD Folder and BD/DVD ISO image.

FYI: if you want to obtain multiple audio tracks after transcoding, try this Pavtube ByteCopy.

How to: load disc and choose preset from the column on left, or simply search for your device model:


3. Convert videos/footages to various video formats.

This tool support most mainstream video formats including a wide range of HD and SD video files, like MTS, M2TS, TOD, MOD, MOV, WMV, MP4, TiVo, FLV, some MXF files, etc that are downloaded online and recorded by camcorders, and convert them to AVI, MP4, WMV, FLV, RMVB, MPEG, 3GP, MKV, MP3, AAC, etc. for playback or editing.

Video Editor features:

1) Trim and crop DVD/Blu-Ray/video clips

Trim function helps you select wanted movie scenes to rip or convert at will and leave out unwanted in saved videos. Crop function enables you to cut off the black bars and unwanted area of the source movie easily.

2) Merge multiple video clips into one file

Tick this Merge into one file box and Pavtube application helps combine several selected video clips into one big file and convert it to your desired video format.

3) Split one large file into smaller pieces

Using the Split function, you can split the selected video file into required several smaller video clips based on the clip quantity, duration time or file you set up.

4) Add watermark

The program supports adding text, image and video watermarks to your movie and enables you to experience better video display quality on your devices.

5) Customize volume in saved file

With this feature, you are allowed to adjust the volume in BD/DVD movie before output to make sure you receive better video and audio entertainment.

6) Add *.srt and *.ass subtitles into video

Pavtube Video Converter Ultimate now supports adding *.srt and *.ass subtitle into video and merge them into video part. Note: Once you have merged subtitle text and video into one file, the subtitles would be hard subtitles and become a part of video, in other word, you cannot turn it on or off during playback.

How to: load disc/video, click the pencil-like “Edit” icon on the top to enter the video editor window.

4. Convert to 3D videos for playback

Pavtube Video Converter Ultimate support outputting MKV/MOV/MP4/AVI/WMV videos in Anaglyph, Side-by-Side and Top-Bottom 3D effect for playback on 3D TV, 3D video projector, etc.

How to: click “Format” and select “3D Video” column, choose the wanted video format and preset. Adjust 3D depth in “Settings”.

5. 6X faster conversion speed

Pavtube Windows program takes full advantage of NVIDIA's CUDA technology and ATI Stream (AMD APP) technology to largely accelerate conversion speed. The GPU acceleration saves users lots of time when using H.264 codec to do format conversion. NOTE: To use GPU computing feature, a CUDA-compatible NVIDIA graphics card or an AMD graphics card with AMD APP technology must be installed. The CUDA and AMD APP acceleration both work only when creating H.264 encoded video files.

How to: press Ctrl+Shift+T, find the Acceleration tab. If your hardware meets the requirements above, the checkbox will be checkable.


iMedia Converter for Mac features:

1. Backup/convert Blu-ray/DVDs

1:1 copy your Blu-ray/DVD disc & folder as all the Windows version can do: support Full disc copy & Directly Copy as well. Plus, there’re various presets available for transferring to smartphones, tablets, HD players, HDTV such as Apple TV, Samsung Smart TV, etc.

iPhone 5S/5C/5/4S/4, Samsung Galaxy S4/Galaxy Note 2/3, HTC Desire HD, HTC One, Sony Xperia Z, Motorola Droid), on your Android tablet (including Samsung Galaxy Tab 3, Google Nexus 7/10, Amazon Kindle Fire HD, Fuhu Nabi 2, Asus Transformer Pad Infinity TF700); Apple iOS based (iPad Air/4/3/2/1/mini/mini with R) tablet, Windows tablet (like Microsoft Surface RT).


FYI: if you want to obtain multiple audio tracks after transcoding, try this Pavtube ByteCopy for Mac.

How to: load disc and choose preset from the column on left, or simply search for your device model.

2. Support most camera/camcorder models and Editing programs

iMedia Converter for Mac helps you convert videos (*.ts, *.mts, *.m2ts, *.tp, *.trp, *.mov, *.mod, *.tod, *.mxf (partial), *.dv, *.vob, *.m2v, *.tivo *.avi,*.divx, *.mpg, *.mp4, *.m4v, *.mov, *.qt, *.wmv, *.asf, *.3gp, *.3g2, *.rm, *.rmvb, *.dat *.mkv, *.nut, *.nsv, *.flv, *.f4v, *.h.264) and audio files (*.m4a, *.wma, *.wav, *.mp3, *.mp2, *.au, *.flac, *.mka, *.aac, *.ogg, *.aiff, *.ra, *.ram, *.dts)) to various formats as below:


Besides, iMedia Converter for Mac well support Canon/Sony/Panasonic/Nikon, part of JVC footages and convert them to best videos codec for different NLEs including: Apple ProRes for Final Cut Pro, DNxHD for Avid Media Composer, Apple InterMediate Codec (AIC) for iMovie/Final Cut Express; well support Adobe Premiere Pro, Apple Aperture 3, Kdenlive, Keynote, Avid Xpress Pro, Adobe Creative Suite 6, Adobe After Effects CS6, DaVinci Resolve, iPhoto as well as QuickTime MOV.

3. Support universal video formats

Mac version also support most mainstream video formats including a wide range of HD and SD video files, like MTS, M2TS, TOD, MOD, MOV, WMV, MP4, TiVo, FLV, some MXF files, etc that are downloaded online and recorded by camcorders, and convert them to AVI, MP4, WMV, FLV, RMVB, MPEG, 3GP, MKV, MP3, AAC, etc. for playback.

Video Editor features

1) Trim and crop DVD/Blu-Ray/video clips

Trim function helps you select wanted movie scenes to rip or convert at will and leave out unwanted in saved videos. Crop function enables you to cut off the black bars and unwanted area of the source movie easily.

2) Merge multiple video clips into one file

Tick this Merge into one file box and Pavtube application helps combine several selected video clips into one big file and convert it to your desired video format.

3) Split one large file into smaller pieces

Using the Split function, you can split the selected video file into required several smaller video clips based on the clip quantity, duration time or file you set up.

4) Add watermark

The program supports adding text, image and video watermarks to your movie and enables you to experience better video display quality on your devices.

5) Customize volume in saved file

With this feature, you are allowed to adjust the volume in BD/DVD movie before output to make sure you receive better video and audio entertainment.

6) Add *.srt and *.ass subtitles into video

Pavtube iMedia Converter for Mac now supports adding *.srt and *.ass subtitle into video and merge them into video part.

Note: Once you have merged subtitle text and video into one file, the subtitles would be hard subtitles and become a part of video, in other word, you cannot turn it on or off during playback.

How to: load disc/video, click the pencil-like “Edit” icon on the top to enter the video editor window.

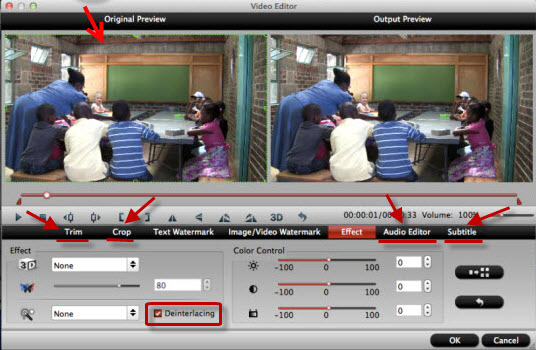
4. Deinterlacing the raw footages to get better video effect

Simple gauss blur effect is very useful to recorded file formats, since it can eliminate the recorded videos noise. If you like, you can also add other special effects including simple laplacian sharpen gray, flip color, invert, aged film and deinterlacing. What is worth mentioning is the deinterlacing, which can convert interlaced video into a progressive form so that you can enjoy a better and clearer video effect.

How to: click “Edit” as above, switch to “Effect” and check the “Deinterlacing”

5. Add 3D effect to the converted video for playback

Pavtube iMedia Converter for Mac support outputting MKV/MOV/MP4/AVI/WMV videos in Anaglyph, Side-by-Side and Top-Bottom 3D effect for playback on 3D TV, 3D video projector, etc.

How to: click “Format” and select “3D Video” column, choose the wanted video format and preset. Adjust 3D depth in “Settings”.

More Christmas Gifts are available on Pavtube Christmas Specials 2013.

From: http://techmovieshare.blogspot.com/2013/12/christmas-money-saving.html