When it comes to the new Samsung Galaxy S7, are you going to buy one to replace your old iPhone? While you may still have some purchased iTunes movies which you have not watched and want to transfer onto Galaxy S7 for enjoying. But you may find that Samsung Galaxy S7 can not play purchased iTunes movies directly. So here will give you a guide to help you play purchased iTunes movies on Galaxy S7.

Hot search: DVD to iTunes Library, Edit iTunes Movies with Edius Pro 6/7/8
First of all, you need to be aware of the fact that video files purchased from iTunes are protected with DRM protection, therefore they can not be played on Samsung S7 or other non-Apple devices. Besides, the format of the video files purchased from iTunes is usually the M4V, which is not supported by Samsung S7. So in order to play iTunes movies on Galaxy S7 or other Samsung devices, you need firstly get rid of the DRM protection and convert M4V into a compatible format for Samsung S7, such as MP4, which is supported by all kinds of mainstream devices.
So, here I would like to recommend you a professional tools–Pavtube ChewTune, which is designed to legally remove DRM protection from iTunes movies and output any regular format you want with expected quality(MP4, MOV, AVI...) to play on iOS/Android/Windows, etc. Devices, such as Surface Pro 2 tablet, Nabi 2 Kids tablet, Samsung Smart TV. Follow the below steps and you can watch purchased iTunes movies on this new Galaxy S7 anywhere and anytime.(review)
Free download and install:


Other download:
Pavtube Old Site Download: http://pavtube-chewtune.software.informer.com/
Steps to convert purchased iTunes movies to MP4 for playing on Galaxy S7
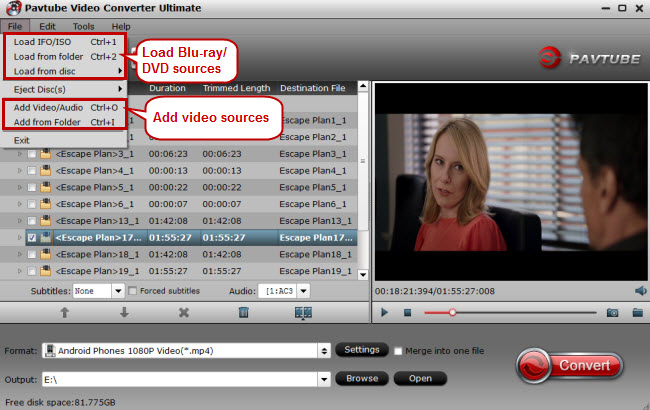
Step 1. Load purchased iTunes movies
Click "Add Video/Audio" or "Add from folder" from "File" drop-down menu to load iTunes DRM movies to the program.

Tips:
1.The program only supports to deal with DRM protected files, if the files are not authorized, you will fail to load into the program.
2. To record/convert iTunes files, iTunes is required to be installed.
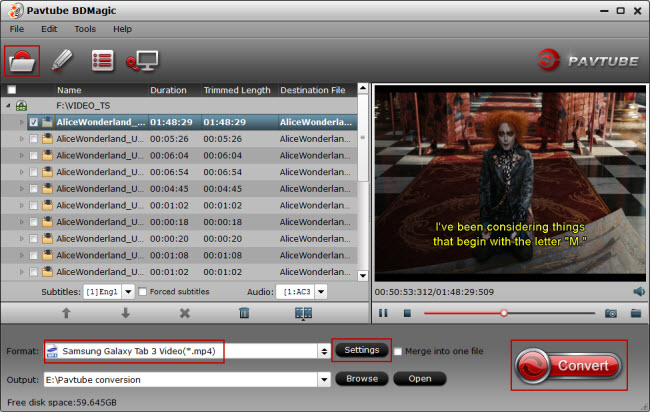
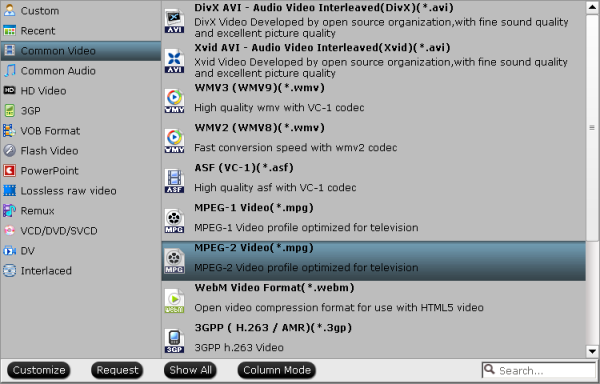
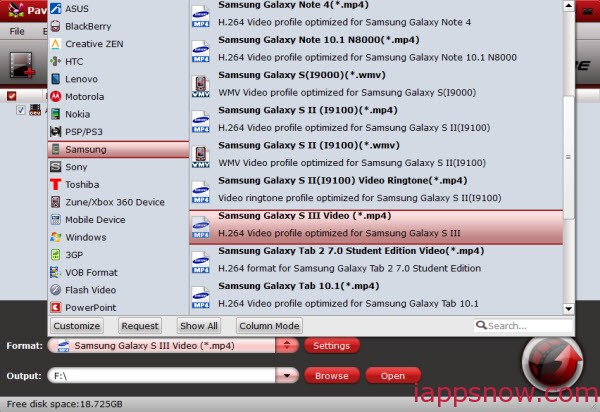
Step 2: Set output format
From "Format" drop-down option, select "SamSung" > "SamSung Galaxy S III Video(*.mp4)" as the desired output format for Galaxy S7.
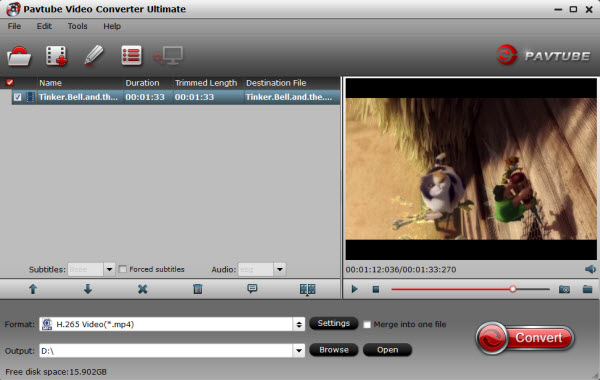
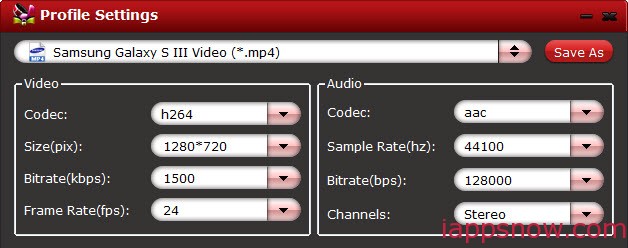
Step 3: Customize output video and audio quality
In the “Setting”, you can set codec, size, bitrate etc. as you wish to lower the size of the video to store more movies in Galaxy S7.
Step 4: Start to convert
Press the right-bottom "Convert" button to remove the DRM protection and convert purchased iTunes movies to MP4 format.
When the DRM conversion process is done, press "Open output folder" on the program to locate and find the converted files. Then you can freely transfer iTunes purchased movies to Galaxy S7.:
It is now time to relax and enjoy your iTunes movies on your Samsung Galaxy S7.
Source: How to Play Purchased iTunes Movies on Galaxy S7?
Related Articles:
Hot search: DVD to iTunes Library, Edit iTunes Movies with Edius Pro 6/7/8
First of all, you need to be aware of the fact that video files purchased from iTunes are protected with DRM protection, therefore they can not be played on Samsung S7 or other non-Apple devices. Besides, the format of the video files purchased from iTunes is usually the M4V, which is not supported by Samsung S7. So in order to play iTunes movies on Galaxy S7 or other Samsung devices, you need firstly get rid of the DRM protection and convert M4V into a compatible format for Samsung S7, such as MP4, which is supported by all kinds of mainstream devices.
So, here I would like to recommend you a professional tools–Pavtube ChewTune, which is designed to legally remove DRM protection from iTunes movies and output any regular format you want with expected quality(MP4, MOV, AVI...) to play on iOS/Android/Windows, etc. Devices, such as Surface Pro 2 tablet, Nabi 2 Kids tablet, Samsung Smart TV. Follow the below steps and you can watch purchased iTunes movies on this new Galaxy S7 anywhere and anytime.(review)
Free download and install:
Other download:
Pavtube Old Site Download: http://pavtube-chewtune.software.informer.com/
Steps to convert purchased iTunes movies to MP4 for playing on Galaxy S7
Step 1. Load purchased iTunes movies
Click "Add Video/Audio" or "Add from folder" from "File" drop-down menu to load iTunes DRM movies to the program.
Tips:
1.The program only supports to deal with DRM protected files, if the files are not authorized, you will fail to load into the program.
2. To record/convert iTunes files, iTunes is required to be installed.
Step 2: Set output format
From "Format" drop-down option, select "SamSung" > "SamSung Galaxy S III Video(*.mp4)" as the desired output format for Galaxy S7.
Step 3: Customize output video and audio quality
In the “Setting”, you can set codec, size, bitrate etc. as you wish to lower the size of the video to store more movies in Galaxy S7.
Step 4: Start to convert
Press the right-bottom "Convert" button to remove the DRM protection and convert purchased iTunes movies to MP4 format.
When the DRM conversion process is done, press "Open output folder" on the program to locate and find the converted files. Then you can freely transfer iTunes purchased movies to Galaxy S7.:
It is now time to relax and enjoy your iTunes movies on your Samsung Galaxy S7.
Source: How to Play Purchased iTunes Movies on Galaxy S7?
Related Articles: