If you like to get my Blu-ray and DVD discs for viewing on computer or other devices, all you need is a bit of hardware and software to make it all possible. Here is my test for ripping my movies and I wanna share to all of you guys here.
I like collecting Blu-ray and DVD movies and what I find most wonderful is to take my BD/DVD discs for viewing on-the-go or when sitting at work writing code. Besides, I owned one Blu-ray player in the house, but I'm annoyed by one unskippable warning or commercial after another as below.
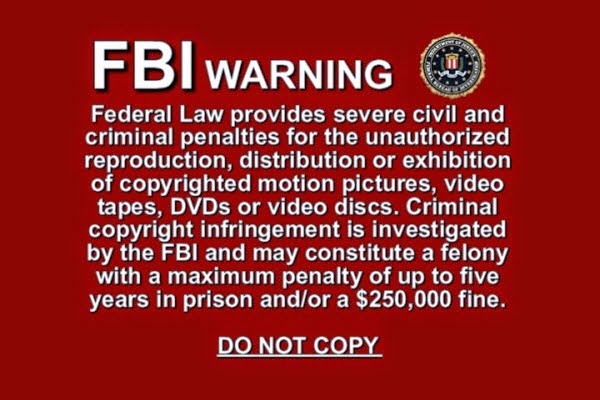
As we know, commercial pre-recorded DVD and Blu-ray discs are typically protected with some form of copy protection. In the US, a controversial law called the Digital Millennium Copyright Act (DMCA) has criminalized any attempt to decrypt protected content, even if the consumer has legally purchased the content.
And because of this, I choose to exercise my fair-use right to format-shift my movies into something more convenient. Making a personal backup of movies you own is in a legal gray-area in the U.S. The encryption is where the line is drawn. You’ve been warned!
Hardware
The Mac used for this tutorial is an
17″ MacBook Pro (early-2011) with a 64-bit quad-core 2.2 GHz Intel Core i7 processor, 16 GB of RAM, OS X Mountain Lion, and a standard, built-in Superdrive. The external BD-R drive is a
Buffalo MediaStation 6X USB 2.0 Portable Blu-Ray Writer.
Backing-up your discs
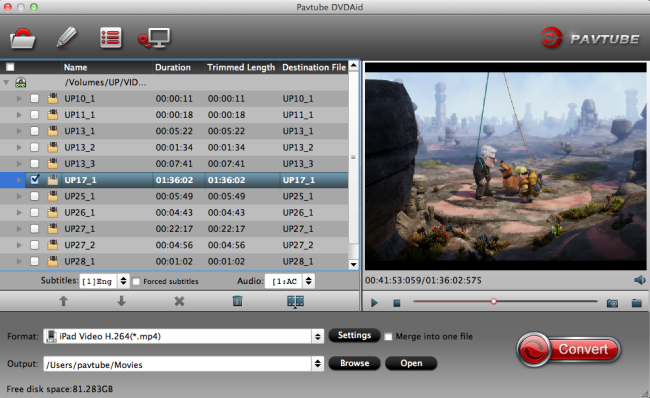
Pretty much every Mac since the early 2000s has shipped with a DVD drive, so these are easy to come by. For backing up personal DVDs so that they can be format-shifted, here
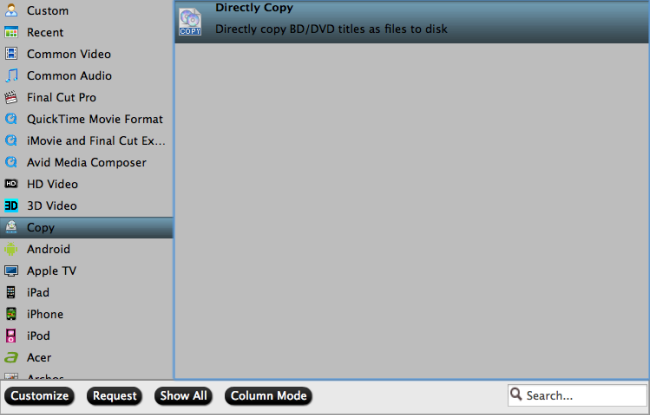
Pavtube DVDAid for Mac is highly recommended. A license is a paltry $21 now. It is a professional Mac DVD ripping tool with strong ability to remove DVD protection and transcode DVD to any video and audio format for using.
 Main features:
- Best DVD ripping software on the market
- Rip and convert DVD movies to MP4/AVI/MKV/WMV,etc with high quality.
- Makes 1:1 copy of original DVD Disc without quality loss with all audio streams, subtitle tracks, extras, etc.
- It’s simple to use and well worth the investment.
- Support latest DVD
- Support adding *.srt and *.ass subtitle
Backing up is as easy as A, B,C, you just need to inserting the DVD, launching DVDAid, choosing format, and clicking "Convert". You can expect a rip to take 1-2 hours, depending on the size of the disc.
Someone will try RipIt, but I think it is a little expensive, and this program does not work if you are now using Mac 10.9 Mavericks, so I think it is not recommended according to my experience.
Read the detailed info: Alternative to RipIt for Mac to Rip DVD on Mac 10.9 Mavericks
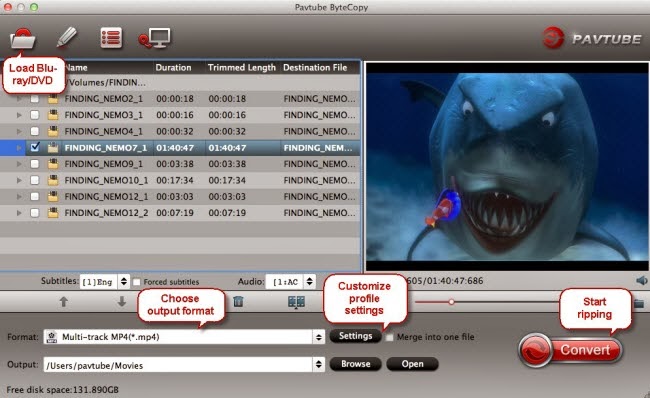
For Blu-ray discs, you first need a
Blu-ray drive. For backing up personal Blu-rays so that they can be format-shifted,
Pavtube ByteCopy for Mac is highly recommended
. A license is $29.4 now. It can rip commercial Blu-ray and DVD movies to MKV container format with multiple audio tracks and subtitles included. Besides Pavtube ByteCopy for Mac is also able to encode my BD/DVD for playback on PC and HD media player.
 Main features:
- Automatically detect Blu-ray/DVD main movie
- Full disc copy Blu-ray/DVD by chapters without quality loss
- Rip/convert/backup BD/DVD to any other format for playback on any iOS/Android/Windows tablets and phones
- Backup BD/DVD to MKV format with multi audio/subtitle tracks and chapter markers without any quality loss.
- Convert BD/DVD to MP4/MOV with multi audio (language) tracks
- Add SRT, ASS, and SSA subtitles to BD/DVD movie
- Edit BD/DVD movies: trim off commercials, crop off black bars, merge several chapters into one, split one movie into several pieces, and more
- Support latest BD and DVD
I didn't choose MakeMKV as it only makes.mkv files and a license is somewhere in the $60-$80 range, too expensive for me.
Reviews: ByteCopy for Mac- Top Alternative to Mac MakeMKV on Mac OS X
Backing up is as simple as inserting the Blu-ray disc, launching ByteCopy, and choosing "Lossless/encoded Multi-track MKV(*.mkv)” and click "Convert". You can expect a rip to take 45m-1h15m, depending on the size of the disc.
If you’re on Windows, check-out
DVDAid and
ByteCopy.
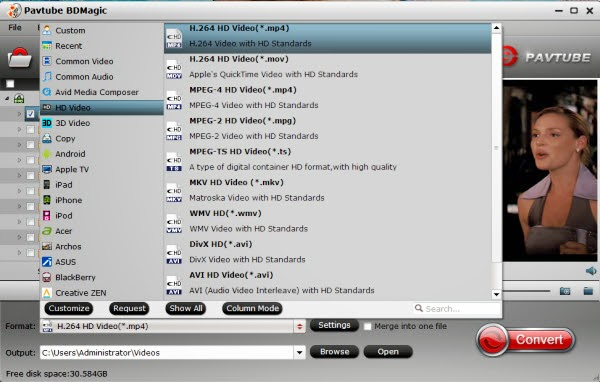
Format-Shifting to MP4/H.264/AAC
Video files are a lot more complicated than most people realize. You may have heard words like MKV, MPEG-4, AVI, MP3, AAC and other acronyms.
The short explanation is that every video file is made up of
3 different parts: the
video stream, the
audio stream, and the
container. The audio and video are synced-up (a.k.a., “multiplexed” or “muxed”) and are bundled together into a single file using a container format.
If you want to make yourself a little more educated about this stuff, check out the “
Video on the Web” chapter of Dive Into HTML5 by Mark Pilgrim. For this exercise, just know that we want to end up with an
H.264 video stream and an
AAC audio stream, wrapped up inside an
MP4 container.
For this, we’ll use
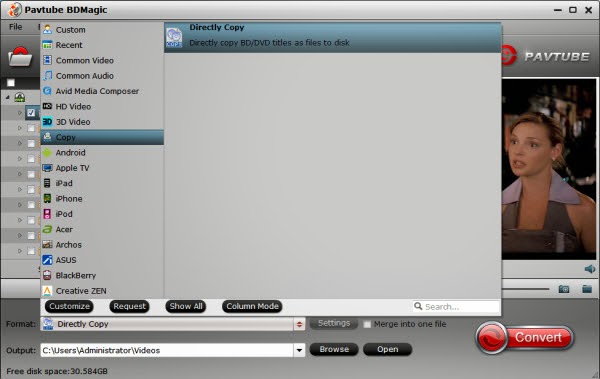
Pavtube BDMagic for Mac. A license is $39.2 now. It can copy Blu-ray and DVD with original structure, and convert 2D/3D Blu-rays and standard DVDs to watchable video/audio format for mobile devices.
Main features:
- Rip Blu-ray 3D/2D discs to MP4, AVI, MKV, MOV, WMV, etc. without video-audio sync issues
- Directly copy the latest releases of Blu-ray/DVD movies in fast speed
- The broad support of multimedia devices, such as Apple iDevice, Android devices, Windows devices, PSP, PS3, Xbox 360, etc.
- Convert Blu-ray for editing on Mac.
- Add *.srt, *.ass, or *.ssa subtitle files to BD/DVD movie or videos
- Customize video/audio parameters, resize video screen, rip files in batches, etc.
- Edit video by trimming, cropping, merging, adding video effects and audio editor
The freeware like Handbrake can only deal with the non-protected Blu-ray movies. Also even some paid Blu-ray ripping programs can't successfully finish this task. So I didn't select.
Get the Best Handbrake Equivalent for Win/Mac(OS X Mavericks included)
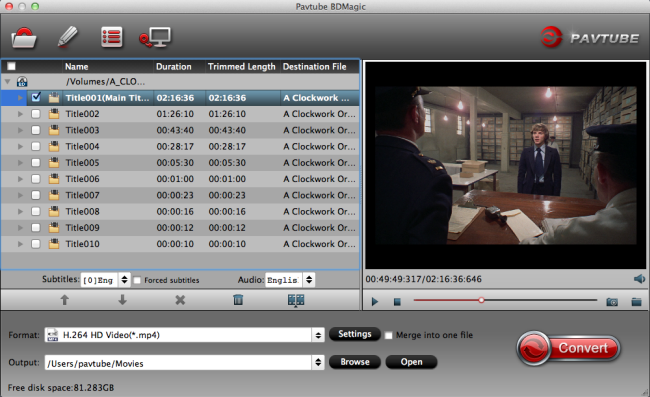
Pavtube BDMagic for Mac will take our personal backups as input, and produce an.mp4 (or .m4v or other files — same thing) as output for watching.
BDMagic for Mac comes with a good set of default settings. If you don’t know what you’re doing, feel free to use those. I’ve tweaked my settings a bit as I prefer higher-quality files at the cost of a larger file size.
See the following screenshots for information on my presets.
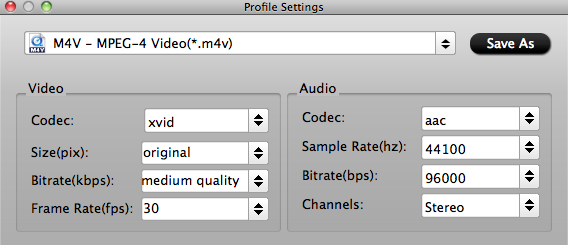
The biggest difference between these is that the video bitrate for DVDs is 3,000 kbps while for Blu-rays it’s 10,000 kbps.
If you’re using my presets, choose DVD (480p) if your source is a DVD backup, or Blu-ray (1080p) if your source is a Blu-ray backup. It may also be helpful to check out the
BDMagic for Mac Quick-Start Guide if you’re new to the tool.
Click the "Load disc" button. Once you’ve queued-up all of the movies you want to format-shift, click the "Convert" button. On the reference hardware listed above, DVDs typically take 45m-1h30m to fully encode a new MP4 file. Blu-rays take 4-6 hours. In both cases, Pavtube BDMgaic for Mac will leverage as much of your CPU and RAM as possible, so don’t expect to be able to do much with your computer until its done.
There is a box of video “Bitrate” on the Profile panel, which is related to file size and quality. By default “medium quality” is applied, which means a Blu-ray of 20GB will be downsized to 8-9GB, and the picture quality is great on PC and HDTV. When “high quality” is set, the file size is doubled, and video quality will be improved (unnoticeably on PC). When “low quality” is set, the file size will be cut down to around 3GB, and you get videos of DVD quality.If having a 15-20 GB copy of Robocop 2014 is too much, lower the video bitrate for the Blu-ray (1080p) setting from 10,000 kbps. The lower the setting, the worse the quality, but the smaller the file size. One more tip:
 1080p video has a resolution of 1920×1080. The smaller the screen, the less there is for your eyes to notice, so you can be more forgiving of lower-quality. However, if you’re stretching1920×1080 across your nice new 55″ LED TV, a low-quality file will make your whole movie-watching experience suck. The bigger the TV, the better you want the quality to be.
Metadata and Artwork
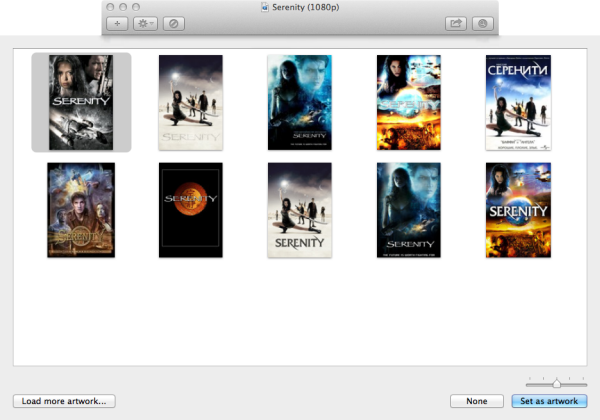
Once you have your .mp4 or .m4v file, you’ll want to give it a proper name and add the metadata and artwork to the file. The format I use is ().mp4 (e.g.,My Favorite Movie (1080p).mp4).
It’s possible that you may have heard of AtomicParsley, MetaX or MetaZ before. They all suck. Check out
Subler instead.
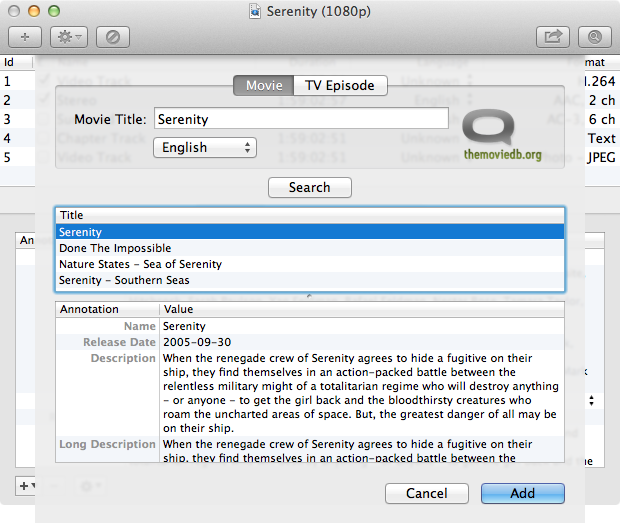
Subler queries
The Movie DB for movie data and artwork, and uses
TVDB for TV show data. While The Movie DB has a pretty awesome selection of movie artwork, I’m generally unimpressed with the TV show artwork. For that, I use
Get Video Artwork and download the iTunes-compatible, square-shaped TV show artwork.
Save your changes, and Subler will write the video metadata and artwork into the file.
Streaming via iTunes
I have an Xbox 360, a Playstation 3, and two Apple TVs at home. I also have an iPad 2, iPad 3 and an iPad mini. Needless to say, I watch a lot of movies and TV shows.
Because the video files tend to be so large, I use an external hard drive attached to my Mac to store the video files. I then tell iTunes where to find the movie by option-dragging the MP4 file from Finder into iTunes’ Movie pane. The option-drag tells iTunes “here’s a pointer to the movie, but don’t copy it onto my built-in hard drive”.
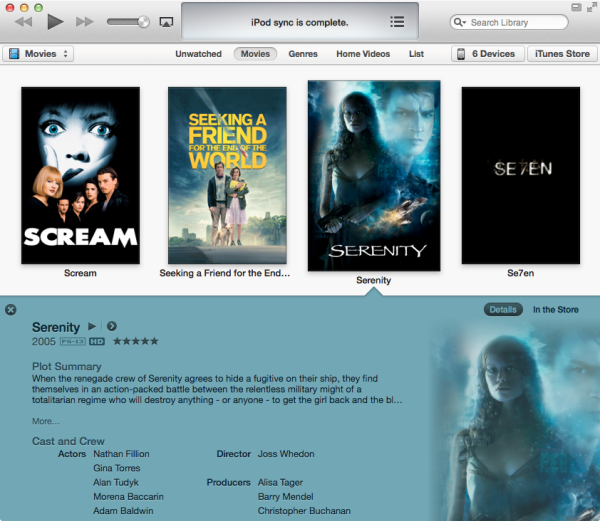
Now it’s time to watch your movie!
My
iPad supports 1080p video. Simply sync the movie to your iPad and watch it on-the-go.
As long as your computer running iTunes and your
Apple TV are on the same network and are both configured to use the same Home Sharing account, you should be able to start streaming the movie to your Apple TV right away. (I would always recommend a hard-wired network connection, otherwise a Wireless-N connection. A Wireless-G connection is likely going to require more buffering or have choppy playback.)
To stream to your
Playstation 3, you’ll need to be running a
DLNA server on your Mac.
Medialink ($20) can be installed as a System Preference and automatically serve your iTunes content to your Playstation 3.
To stream to your
Xbox 360, you’ll need to be running a similar server which the Xbox understands.
Connect360 ($20) can be installed as a System Preference and automatically serve your iTunes content to your Xbox 360.
Since MP4/H.264/AAC is the industry-wide standard for all modern-age video, pretty much any smartphone, tablet, laptop, operating system, and streaming device created since 2004 can play this format out-of-the-box. Even ancient OS’s like Windows XP have been updated to support this format. Go nuts.
Isn’t it quite easy? Just several mouse clicks, you have finished Blu-ray backup or ripping and obtained the wanted .mp4/.m4v files. Now time for enjoy!
Blu-ray Disc (also known as Blu-ray or BD) is an optical disc storage medium designed to supersede the standard DVD format. Its main uses are for storing high-definition video, PlayStation 3 games, and other data, with up to 25 GB per single layered, and 50 GB per dual layered disc. The disc has the same physical dimensions as standard DVDs and CDs.
Meanwhile, with Pavtube's new site releasing, there are many new
Money Saving Software Bundles like:
ByteCopy($42) + Video Converter Ultimate($65) = Only $79.9, Save $27.1
ByteCopy($42) + DVD Creater($35) = Only $44.9, Save $32.1
ByteCopy($42) + Vidpie($29) = Only $54.9, Save $16.1
ByteCopy($42) + MXF MultiMixer($45) = Only $69.9, Save $16.1
Video Converter Ultimate($65) + Vidpie($29) = Only $74.9, Save $19.1
Video Converter Ultimate($65) + DVD Creater($35) = Only $64.9, Save $35.1
BDMagic($49) + Vidpie($29) = Only $49.9, Save $28.1
BDMagic($49) + DVD Creator($35) = Only $49.9, Save $28.1
DVDAid($35) + Vidpie($29) = Only $49.9, Save $14.1
DVDAid($35) + DVD Creator($35) = Only $35.9, Save $34.1
Go to find the one you need.
Related articles:
How to Save Pictures from a DVD to a Mac
How to Play DVD with VLC Media Player
Effortlessly Backup Disney’s Blu-ray movies without quality loss on Mac