For some movies we love, If we haven't backed up our beloved blu-ray disc to Mac, we might fail to find it at the proper time when we need it. On the contrary, if we backup Blu-ray disc to a Blu-ray BDMV folder, we will be lucky to have an insured Blu-ray copy permanently saved on the Mac and entitled to burn the Blu-ray folder into disc at any time. Then, you can playback them on Any devices via HiMedia Box. Here is an easy way for you to copy a Blu-ray disc with original structures or menus for HiMedia Box. Read on to learn the instruction.
Although HiMedia box supported Blu-rays natively, it's still not a good idea to take out Blu-ray discs frequently due to scratch issues. So the best workaround is that you can use a professional tool which can help you make full disc copy of Blu-rays to HiMedia box best formats without quality loss on Mac.
To permanently saved Blu-ray on HiMedia Box, Pavtube ByteCopy for Mac is high recommended, it works like a charm! Read the Review. It will help you to lossless copy your Blu-ray/DVD collections to MKV for HiMedia Box on Mac with all subtitles and original audio track for future usage like disc burning. Meanwhile, this app equips with all features other BD ripping tools do so that you can rip your BD/DVD movies to any other video and audio format you like on Mac and do simple video editing here.
Tips:
1. There's 6 times limitation if you use the trial version to output lossless MKV files;
2. This program also has a Windows version which works for Windows 10/Windows 8.1/Windows 8/Windows 7/Windows Vista/2003/XP find the ByteCopy (windows) here.
3. Hot!!! - (Now, you can get 50% OFF discount after liked our FaceBook.) More Money Saving Tips, you can Click Special Offer.
How to Full Copy of Blu-ray for HiMedia Box and keep multi-track?
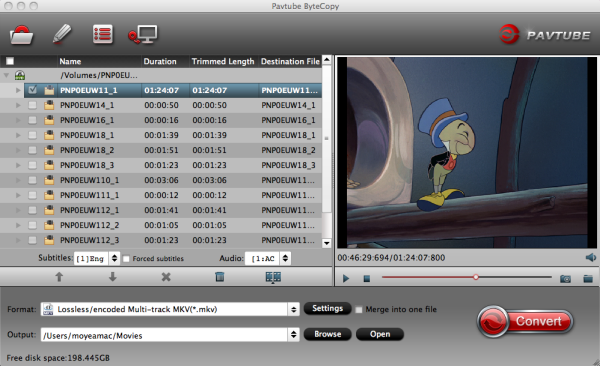
Step 1. Launch Pavtube ByteCopy for Mac and load disc.
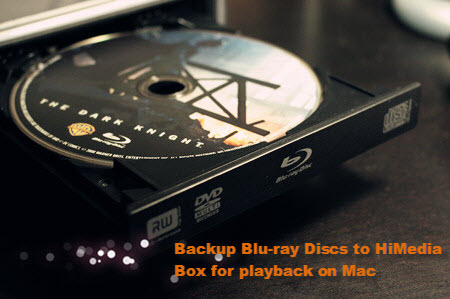
Firstly you need an external blu-ray drive; there's no special requirements of the drive model as long as it's supported by your Mac. Click the top left icon and it will detect the inserted Blu-ray disc, click disc name to load them.
Step 2: Copy Blu-ray and DVD movie
- Option A: “Full Disc Copy” without anything loss
Click quick button “Copy the entire disc” to starts copying the BD/DVD disc to hard drive maintaining the original structure.
When the copying task finished, you can click “Open” button to get the output videos. The backed up Blu-ray/DVD movie is usually saved as a directory file structure in VIDEO_TS or BDMV folder.
- Option B: Directly Copy only Blu-ray and DVD main movie
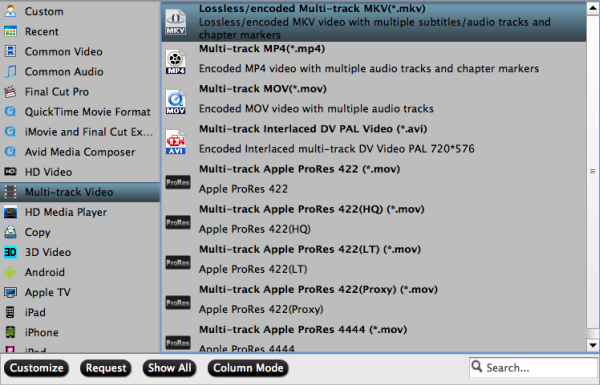
Click “Format” bar, choose “Copy” > “Directly Copy” from the Format menu to copy the . vob files or .m2ts only which contains the main movie of Blu-ray and DVD. Then hit the “Convert” button to do Movie-only copy. Then, Click "Browse" button to select a destination folder for the output files.
Step 3: Copy the entire Blu-ray structure
Click the quick button "Copy the entire disc" to start copying the Blu-ray disc to hard drive, including the menus, titles, ads, etc. Full disc copy means to help users to backup the whole contents of a Blu-ray disc remaining the original structures. The decrypted Blu-ray folder contains all information and contents in the original disc. Among them, the BDMV folder is the most important one with audio and video files in it. Open BDMV -> STREAM folder and you will find all the .m2ts movie clips for HiMedia Box, now you can enjoy Blu-ray movies on TV without quality loss!
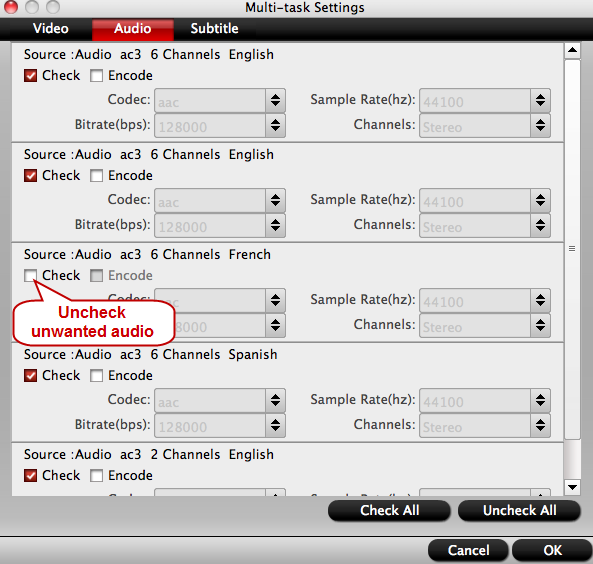
You can also use Pavtube ByteCopy for Mac to backup Blu-rays without quality loss. Meanwhile, several audio tracks and subtitles are preserved so that you can switch language when watching movies. Have a try!
Related articles:
Although HiMedia box supported Blu-rays natively, it's still not a good idea to take out Blu-ray discs frequently due to scratch issues. So the best workaround is that you can use a professional tool which can help you make full disc copy of Blu-rays to HiMedia box best formats without quality loss on Mac.
To permanently saved Blu-ray on HiMedia Box, Pavtube ByteCopy for Mac is high recommended, it works like a charm! Read the Review. It will help you to lossless copy your Blu-ray/DVD collections to MKV for HiMedia Box on Mac with all subtitles and original audio track for future usage like disc burning. Meanwhile, this app equips with all features other BD ripping tools do so that you can rip your BD/DVD movies to any other video and audio format you like on Mac and do simple video editing here.
Tips:
1. There's 6 times limitation if you use the trial version to output lossless MKV files;
2. This program also has a Windows version which works for Windows 10/Windows 8.1/Windows 8/Windows 7/Windows Vista/2003/XP find the ByteCopy (windows) here.
3. Hot!!! - (Now, you can get 50% OFF discount after liked our FaceBook.) More Money Saving Tips, you can Click Special Offer.
How to Full Copy of Blu-ray for HiMedia Box and keep multi-track?
Step 1. Launch Pavtube ByteCopy for Mac and load disc.
Firstly you need an external blu-ray drive; there's no special requirements of the drive model as long as it's supported by your Mac. Click the top left icon and it will detect the inserted Blu-ray disc, click disc name to load them.
Step 2: Copy Blu-ray and DVD movie
- Option A: “Full Disc Copy” without anything loss
Click quick button “Copy the entire disc” to starts copying the BD/DVD disc to hard drive maintaining the original structure.
When the copying task finished, you can click “Open” button to get the output videos. The backed up Blu-ray/DVD movie is usually saved as a directory file structure in VIDEO_TS or BDMV folder.
- Option B: Directly Copy only Blu-ray and DVD main movie
Click “Format” bar, choose “Copy” > “Directly Copy” from the Format menu to copy the . vob files or .m2ts only which contains the main movie of Blu-ray and DVD. Then hit the “Convert” button to do Movie-only copy. Then, Click "Browse" button to select a destination folder for the output files.
Step 3: Copy the entire Blu-ray structure
Click the quick button "Copy the entire disc" to start copying the Blu-ray disc to hard drive, including the menus, titles, ads, etc. Full disc copy means to help users to backup the whole contents of a Blu-ray disc remaining the original structures. The decrypted Blu-ray folder contains all information and contents in the original disc. Among them, the BDMV folder is the most important one with audio and video files in it. Open BDMV -> STREAM folder and you will find all the .m2ts movie clips for HiMedia Box, now you can enjoy Blu-ray movies on TV without quality loss!
You can also use Pavtube ByteCopy for Mac to backup Blu-rays without quality loss. Meanwhile, several audio tracks and subtitles are preserved so that you can switch language when watching movies. Have a try!
Related articles: