Thursday, October 22, 2015

3 Methods of Lossless DVD Backup on Mac OS X El Capitan

There are many instances wherein you may need to copy the entire content of a DVD disc into your hard drive for safe keeping? This guide will present you three simple and reliable methods to losslessly backup DVD on Mac OS X El Capitan. Just check it out!

Generally speaking, copying DVD movies is not an easy task since they are usually protected by new copy protection, which prevents them from being copied or ripped. To backup a copyright protected DVD quickly and efficiently, what you need is a more professional DVD ripping tool.

HOT Search: DVD on iPhone 6 Plus|DVD Audio to Lossless FLAC|DVD to Windows Media Center

Pavtube ByteCopy for Mac El Capitan is the one ideal DVD ripping software for you. With it, you can easily copy DVD whole content or just backup main movie from DVD with its provided copying features. Plus, it also enables users to fast rip video/audio from DVDs and convert them to MP4, MOV, AVI, WMV, FLV, MKV, VOB, MP3, OGG, WMA, etc. for playing and sharing anywhere you like. It has 3 ways to backup a lossless DVD on Mac EL Capitan.


Other Download:
- Pavtube old official address: http://www.pavtube.cn/bytecopy-mac/
- Cnet Download: http://download.cnet.com/Pavtube-ByteCopy/3000-7970_4-76177783.html

3 Step by step methods to backup DVD to Mac OS X 10.11 El Capitan?

Part 1. Load DVD Files.

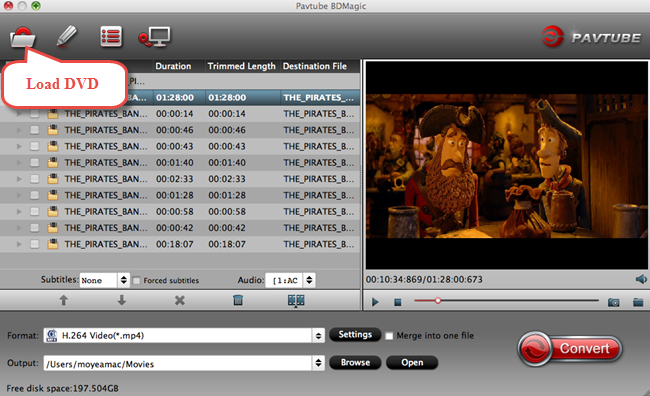
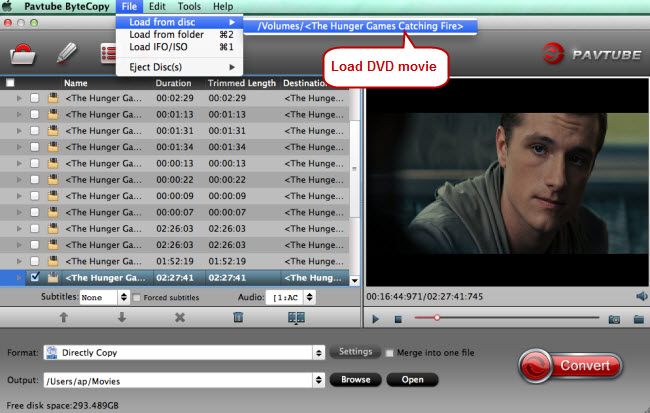
Insert your DVD disc into your Mac computer DVD optical drive, then launch the application, Click "File" > "Load Disc" to import DVD disc to the program.


Part 2. Backup DVD to OS X El Capitan.

Method one:

Make a full disc copy of DVD movie

Hit the top tool menu bar, a computer like icon to make a full disc copy of your original DVD movies.

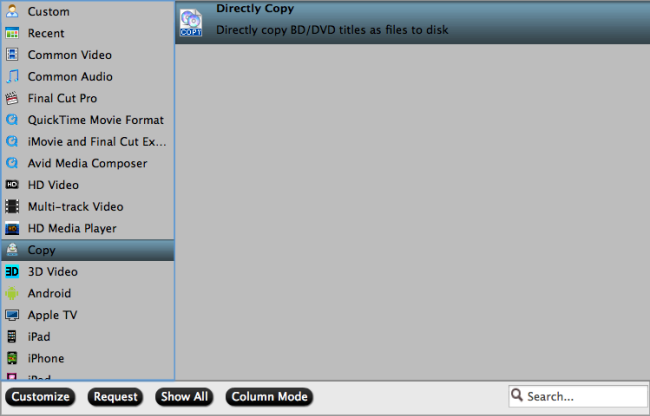
From "Format" drop-down list, go to "Copy" > "Direct Copy" and backup DVD movies in VOB format.


Method two:

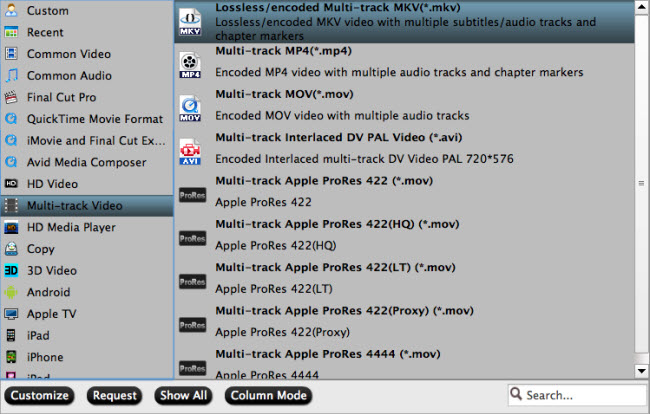
Backup DVD to Multi-track video format.

Hit "Format" bar, go to "Multi-track Video" option, there are four different Multi-track video for you to output, select your desired one as the final backup format.


Method three:

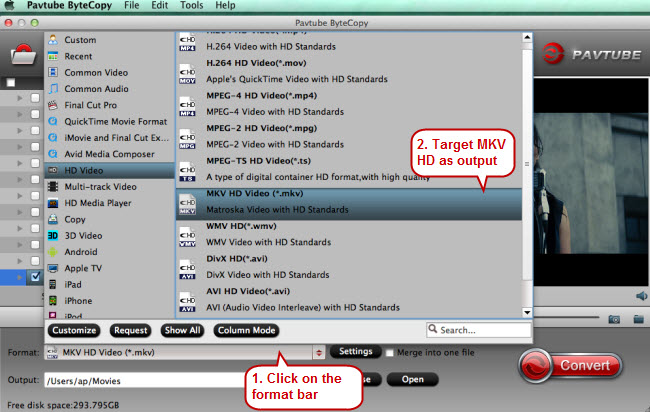
Backup DVD to media file formats.

You can output a common media file format or a device optimize file format according to your own needs.


Part 3: Start DVD to Mac OS X El Capitan backup process.

Press the "Convert" button to start the backup process.

When the DVD copying process is completed, you will have no problem to create a new DVD disc, play DVD on Windows Media Playeror transfer DVD to play on iPhone, etc. 

Read More:
Source: http://video-tips.jimdo.com/2015/10/22/backup-dvd-to-mac-el/

Pavtube Mac Products Upgrade Support for Mac OS X El Capitan

More and more people have upgraded their Mac system to the newest 10.11 El Capitan. When they are enjoying the benefits OS X El Capitan brought, many of them are suffering the softwares incompatibility issue on Mac OS X El Capitan, such as blu-ray Ripper and DVD Ripper. Pavtube Studio updated its Mac products to meet the trend to prevent Pavtube users from the softwares incompatibility with El Capitan issue. Products that works compatible well with El Capitan including: Pavtube Video Converter for MacPavtube HD Video Converter for MacPavtube MTS/M2TS Converter for MacPavtube MXF Converter for Mac,Pavtube iMixMXFPavtube bDMagic for Mac,Pavtube byteCopy for MacPavtube DVDAid for MacPavtube iMedia Converter for Mac.


Rip and backup  blu-ray/DVD on El Capitan

After updated to El Capitan, you can't rip and copy blu-ray/DVD any more? Don't worry! Pavtube blu-ray/DVD rippers have solved the system incompatibility issue.With Pavtube newly upgraded blu-ray/DVD products, you will get no difficulty to make a full disc copy or the main movie copy of the original 2D/3D blu-ray/DVD disc on Mac OS X El Capitan. besides that, the program also enables you to rip/convert blu-ray/DVD disc to various different file formats on El Capitan platform for playing on iPhone/iPad/iPod, Android phone and tablets, Windows phones or tablets, game consoles, HD media players, streaming to Apple TV/Amazon Fire TV/Roku, etc.

Support 4K UHD, 8K video conversion

Updated Pavtube Mac products can  fully support you to convert 720P, HD, 4K even 8K videos differentiates itself from the pool of video converters on Mac OS X El Capitan. With  preset profiles for Apple and Android, the best video converter for OS X El Capitan enables you to convert any videos of any resolution to iPhone(6S Plus/6 Plus), iPad(Air 3/Mini 4/Pro), Samsung(Galaxy S6), HTC, blackberry, Sony, etc. in a single click. It's very simple to use, requiring less time to learn the user guide.

Related Articles


Source:http://onebestsoft.com/pavtube-upgrade-support-el-capitan/

Thursday, October 15, 2015

Play home movies from VHS on Windows Media Player Smoothly

Perhaps you too have a VHS tape (or stack of them) that you want to transfer to your Windows Media Player for playing. If so, this column might help you out. It describes the steps I took to transfer the video from the VHS tape to Windows Media Player on my computer, edit the video and then burn the edited video to a DVD. I also include some time-saving tips that I discovered along the way.

Here show the supported video and audio files of Windows Media Player in a table:

File type (format)File name extension
CD audio.cda
Intel Indeo video technology.ivf
Audio Interchange File Format (AIFF).aif, .aifc, and .aiff
Windows Media audio and video files.asf, .asx, .wax, .wm, .wma, .wmd, .wmv, .wvx, .wmp, and .wmx
Windows audio and video files.avi and .wav
Windows Media Player skins.wmz and .wms
Moving Picture Experts Group (MPEG).mpeg, .mpg, .m1v, .mp2, .mpa, .mpe, .mp2v*, and .mpv2
Musical Instrument Digital Interface (MIDI).mid, .midi, and .rmi
AU (UNIX).au and .snd
MP3.mp3 and .m3u
DVD video.vob

From the table we know that the VHS type video and audio files are not included. There is another way to get though this issue. In order to watch and play the VHS video on Windows Media Player, first you should convert the VHS files into Windows Media Player supported format like the normal mp4. Pavtube Video Converter Ultimate could give you a lot help, it can rip the VHS files into the any Windows Media Player supported format in the table. What's more, this all-inclusive program is a HD video converter as well, and you can feely convert TiVo, MXF, MOV, and other HD videos to almost all formats. Besides, it is a professional video editing software to assist users with trimming, cropping, splitting, merging, attaching subtitles...to create your own videos.


Other Download:
- Pavtube old official address: http://www.pavtube.cn/blu-ray-video-converter-ultimate/
- Cnet Download: http://download.cnet.com/Pavtube-Video-Converter-Ultimate/3000-2194_4-75938564.html


Other Download:
- Pavtube old official address: http://www.pavtube.cn/imedia-converter-mac/
- Cnet Download: http://download.cnet.com/Pavtube-iMedia-Converter/3000-2194_4-76177788.html

Play home movies from VHS on Windows Media Player Smoothly

Step 1. Load VHS files.

Run Pavtube Video Converter Ultimate on PC, and click “File” to follow “Load from folder” and find the VHS files you put into the computer.


Step 2. Choose Windows Media Center supported video format

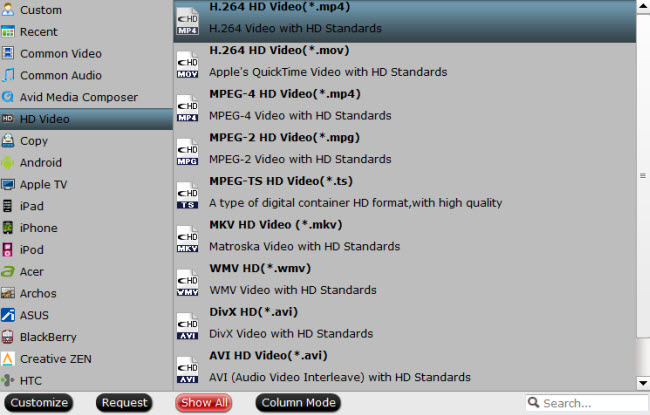
Then click the format bar under the video file list to find “HD Video.” Under “HD Video” item please find the output video formats compatible with Windows Media Center according to the form listed above.


Step 3. Start QuickTime MOV to WMP conversion

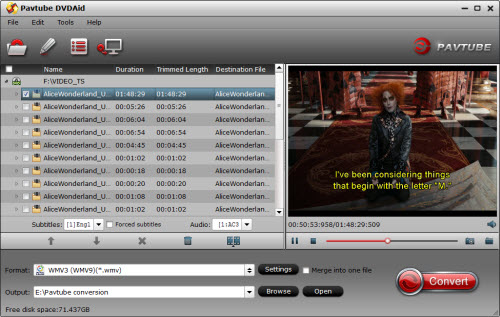
Before performing the conversion, you can edit your VHS files and set the best audio and video parameters for the output target files. Then click “Browse” in main screen to decide which folder you’re going to save the converted VHS files. At last, just one click “Convert” to get conversion from VHS to Windows Media Player started.

Read More:

Wednesday, October 14, 2015

Watching DVD on Samsung Galaxy Tab E NOOK

Samsung's current flagship tablet and the Nook version -- The 9.6-inch Galaxy Tab E. It's an incredibly thin and light tablet with a bright quad HD screen.The device has 16/32GB of built-in storage and an expansion slot that allows you to add up to 128GB of additional space.It offer full access to the Google Play store so you can load any Android apps you want.

As for DVD fans, or other people who have favoriate DVD collections, how to transfer Blu-ray to Galaxy Tab E and watch DVD movies or image files on the go? There’s a very powerful and professional DVD to Galaxy Tab Converter I would recommended to you--Pavtube DVDAid,If you are a Mac user, Pavtube DVDAid for Mac also available here, it can remove the commercial protection easily and rip it into Galaxy Tab E Nook in it’s supported h.264 format. We recommend h.264 here for it can keep the original video quality and smaller in size. Now, download the Blu-ray to Galaxy Tab Converter and follow the guide below to start conversion.


Other Download:
- Pavtube old official address: http://www.pavtube.cn/dvd_ripper/
- Cnet Download: http://download.cnet.com/Pavtube-DVDAid/3000-7970_4-76158510.html

Watching DVD on Samsung Galaxy Tab E NOOK

Step 1. Load DVD files.

Put DVD disc into computer and add your DVD disc via "Load" button to the app. Launch the program and add videos in the following two ways: 
1> Click Add button to choose video files from your hard drive for converting. 
2> Directly drag the movies you want to convert to the left item bar.


Step 2. Select output profile format.

Click "Format" bar, from its drop-down option, select "H.264 High Profile(*.mp4)" as the output format for watching on Galaxy Tab E Nook.


Tip: If you are still not satisfied with the defaulted profile settings, you can click "Settings" to change the video encoder, resolution, frame rate, etc. as you wish.

Step 3. Start conversion.

Click “Convert” button and start Blu-ray videos to Galaxy Tab E Nook compatible MP4 format video conversion. After conversion, you can get the converted files by clicking “Open” button. Now you can enjoying Blu-ray videos by Galaxy Tab E Nook.

Read More:
  • Play DVD on Apple TV 3, 2, 1 with optimal Frame Rate via Mac 
  • Put DVD on Western Digital My Cloud for Sharing 
  • Enjoy DVD movies on Oneplus One, Oneplus Two on the Train 
  • Play DVD to Galaxy Note 4 via Gear VR for spending holiday 
  • Get DVD movies into Plex Media Server for Streaming 
  • Saturday, October 10, 2015

    Play Any Video on 4K Ultra HD TV


    People who has purchased a 4K TV and is still waiting for the compelling 4K content to arrive may wonder to know the possibility of playing common SD, HD or full HD content on your 4K Ultra HD TV? The answer is depends, like HD TV, 4K TV has limited support for video playback, in addition, the mismatch of file resolution of your video and 4K TV will cause bad video playback quality. Therefore, it is not an easy work to watch any video on 4K UHD TV unless you are an expert in this area. 

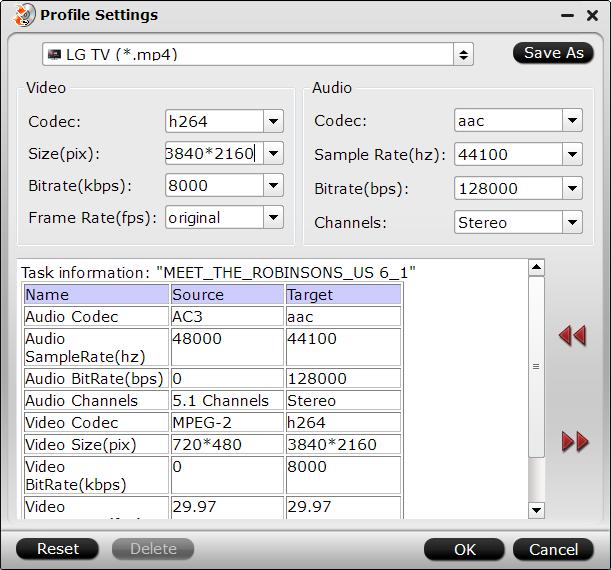
    To help user simplify the process of watching common video on 4K UHD TV, Pavtube has upgraded support for TV profile output. Just download Pavtube Video Converter Ultimate/Pavtube iMedia Converter for Mac, you will be able to directly output any video to Samsung/Panasonic/LG/Panasonic TV profile optimized file format with all the suitable profile parameters. In addition, you can also upscale SD, HD and full HD video to 4K UHD with a resolution of 3840*2160 in the output “Profile Settings” window. 


    Other Download: 

    - Pavtube old official address: http://www.pavtube.cn/blu-ray-video-converter-ultimate/ 
    - Cnet Download: http://download.cnet.com/Pavtube-Video-Converter-Ultimate/3000-2194_4-75938564.html 

    Samsung: UN65HU8550F, UN55HU8550F, UN65HU9000F, UN55HU9000F, UN85S9VF, UN65F9000AF, UN55F900AF, UN85S9AFXZA; 

    Sony: XBR-55X900A, XBR-65X850A, XBR-65X950B, XBR-49X850B, XBR-65X850B, XBR-65X900A, XBR-55X850A, XBR-79X900B, XBR-70X850B, XBR-65X900B, XBR-55X850B, XBR-55X900B, XBR-85X950B, VPL-VW600ES, VPL-VW1100ES; 

    LG: 84LM9600, 65LA9650, 65LA9700, 55LA9650, 55LA9700, 84LA9800, UB8500, UB9500, UB9800; 

    How to convert and play any video on Samsung/Sony/Panasonic/LG 4K Ultra TV

    Step 1: Add source files to the program. 

    Start up the program on your computer click “File” > “Add Video/Audio” or “Add from folder” to import source files to the program. 


    Step 2: Choose TV optimized output file format. 

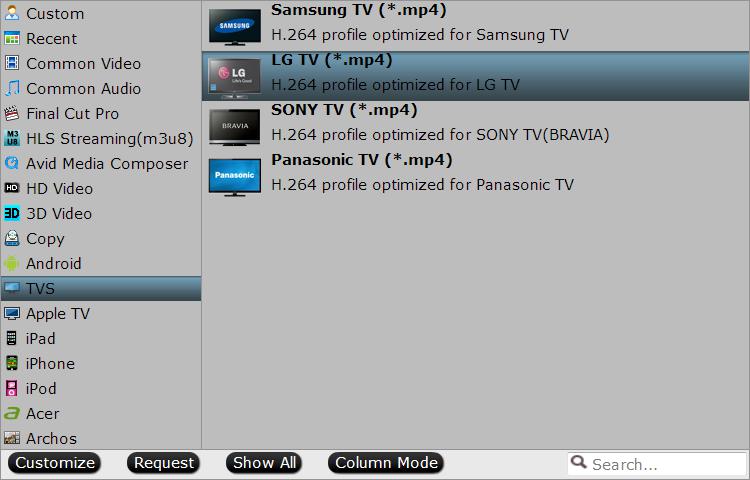
    Go to “Format” bar, from its drop-down select, choose TV optimized file format to output according to your 4K TV brands, for example, if you own a LG 4K TV, you can select “TVs” > “LG TV(*mp4)” as your desired output file format. 


    Step 3: Upscale to 4K resolution. 

    Click “Settings” icon on the main interface to open “Profile Settings” window, enter “3840*2160” in “Size(pix)” brackets, so that you will be able to upscale your SD or HD content to 4K resolution content for 4K UHD TV. 

     
    Step 4: Start Video to UHD TV conversion process. 

    After all the setting is completed, hit the "Convert" button under video previewing window to start the video conversion process. 

    When the conversion is completed, you will be able to watch more sharper and detailed videos and movies on 4K Ultra HD TV. 

    Further Reading: 

    Monday, October 5, 2015

    Enjoy Blu-rays to H.265/HEVC HD MKV on Win/Mac

    In near future, HEVC will be used by almost every content. It is a matter of decision for service whether to send data using HEVC/H.265 instead of MPEG-4/H.264. Many companies have already begun to use HEVC for streaming 4K content. Like the hottest Samsung NX1 has already explore this brand new market. Netflix, Amazon, M-Go also are few of them. If you have got a box of Blu-ray discs and want to rip them for storage and playback with more efficient coding, converting Blu-ray to H.265 MKV is a wise choice. 

    Follow this page, you will get a guide talks about how to rip Blu-ray movies to H.265 MKV for more efficient coding. Once converted Blu-ray into MKV files with H.265 codec, the videos can be stored on a hard drive, NAS devices or can be easily watched on computer or HDTV without hardware player. Read on reading how to realize Blu-ray to H.265 MKV conversion on Windows or Mac. 

    To help users who don't know how to rip Blu-ray to H.265 MKV, here we want to introduce the best Blu-ray to H.265 MKV encoder - Pavtube BDMagic to you which has just upgraded with adding H.265 MKV encoding support. Read the review

    You can get H.265/HEVC encoded HD MKV from Blu-ray not only for space-saving storage but also for playing on H.265 compatible multimedia players like VLC, Divx, PotPlayer, Hoid P HEVC H265 Video Player, PowerDVD 14 Ultra, etc with rich media experience. For Mac users, you can turn to Pavtube BDMagic for Mac

    Step-by-Step guide: Encode Blu-ray to H.265/HEVC MKV with ease 

    Free Download Top Blu-ray to H.265/HEVC MKV Ripper: 


    Other Download: 

    - Pavtube old official address: http://www.pavtube.cn/blu-ray-ripper/ 
    - Cnet Download: http://download.cnet.com/Pavtube-BDMagic/3000-7970_4-75922877.html 

    Step 1. Load Blu-ray movies 

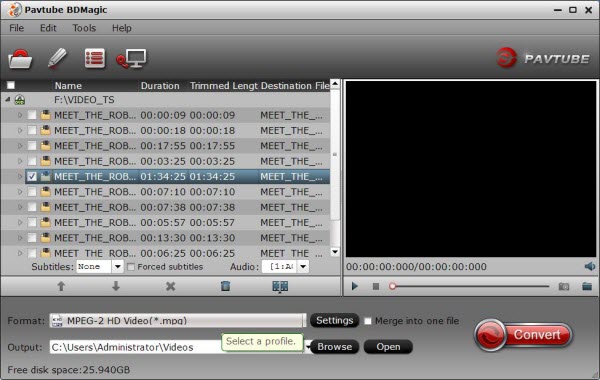
    Install and launch the best Blu-ray to H.265 MKV Converter program. Insert your Blu-ray disc into your BD drive, and click "Load file(s)" icon to load your Blu-ray movies. You can also import movies files from Blu-ray folder, ISO and DVD discs. 


    Step 2: Select H.265 encoded HD MKV format to output. 

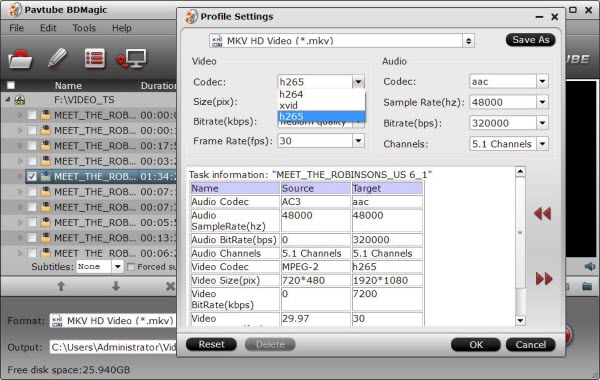
    Tap on the "Format" bar to select "HD Video" > "MKV HD Video(*.mp4)" to output, then hit "Settings" on the main interface to open "Profile Settings" window, under Video settings panel, click "Codec" drop-down selection, choose "H.265" as your final output file codec. 


    Step 3: Change output file resolution. 

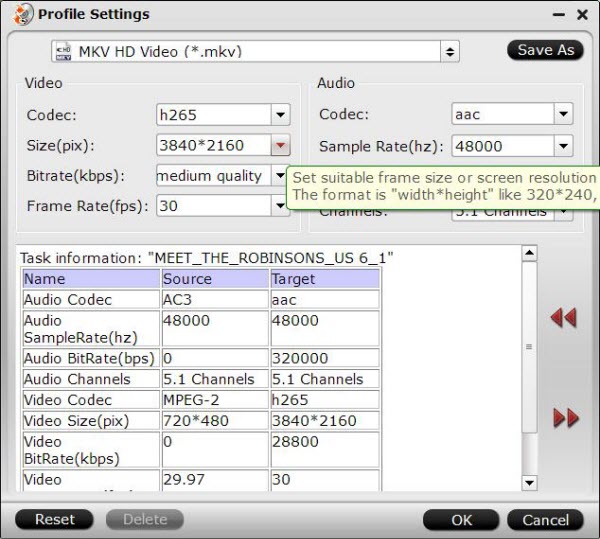
    If you want to play converted Blu-ray movies on 4K TV, you can upscale the output file resolution to 3840*2160 from "Size(pix)" in the "Profile Settings" window. 


    Step 4: Convert Blu-ray to H.265 encoded HD MKV format. 

    Hit the "Convert" icon on the right-bottom to start the conversion process. Get ripped Blu-ray files by clicking the "Open output folder" button. 

    Then you will be able to save all your precious Blu-ray movies with subtitle languages and audio tracks well reserved for playing on various H.265 capable players with rich media experience. 

    Read More: 


    Wednesday, September 30, 2015

    Import Blu-ray to Final Cut Pro with Apple ProRes 422 Format

    Q: “Recently, my friend bought me a great movie which called "The King’s Speech". I have purchased many Blu-ray movies in the past several years, now I need to use some clips of the Blu-ray movies in Final Cut Pro with my recordings, can you tell me the best way to rip Blu-ray and edit with FCP X? What software do I need? Thanks!” 
       
    Just as showed above, you may want to import Blu-ray to Final Cut Pro for editing. However, the Final Cut Pro only accepts DV, HDV, P2 MXF (DVCProHD), XDCAM, and 2K film formats and does not support Blu-ray importing. So, you will need to convert Blu-ray to FCP X supported format. Is there an easy way to convert Blu-ray HD contents into your own film? Now, You got the right place! Pavtube BDMagic for Mac can help you, With it, you can rip/convert Blu-ray movies to Apple ProRes 422 (Review: Types of Apple ProRes Codecs)for FCP without quality loss in a fast speed on your Mac OS X (El Capitan included). Below is how. 
      
    Why choose Pavtube BDMagic for Mac? Here is a customer review:

    “I use the program to allow me to edit clips in FCP X. I like to use Final Cut Pro X (10.1.3) from Apple because it’s really intuitive and fast. I find that I’m able to translate my editing ideas from initial thought to realization quickly and easily. Pavtube is just one of the best tool that allows me to pull in content from Blu-ray to help my clients realize their vision.” 
       
    Step-by-Step Guide: Rip/Convert Blu-ray to ProRes 422 for editing on FCP with Pavtube Blu-ray to FCP Converter. 


    Other Download:

    - Pavtube old official address: http://www.pavtube.cn/blu-ray-ripper-mac/
    - Cnet Download: http://download.cnet.com/Pavtube-BDMagic/3000-7970_4-76177782.html
      
    Note: For Ripping Blu-ray to FCP on Mac, a Mac compatible BD driver is needed. 

    Step 1. Load Blu-ray movie. 

    Install and run the Blu-ray to ProRes Converter for Mac, click "Add Disc" icon to add source Blu-ray/DVD Disc from disc driver. Or load from BD/DVD folder or IFO/ISO file.


    Tip: This Blu-ray to FCP Converter not only can help you convert Blu-ray to FCP, but also enables anyone with Blu-ray files to use in any non-linear editor like Adobe Premiere ProiMovie, FCE, Avid Media Composer, etc as long as rip Blu-ray to a recognizable format.

    Step 2. Choose output format. 

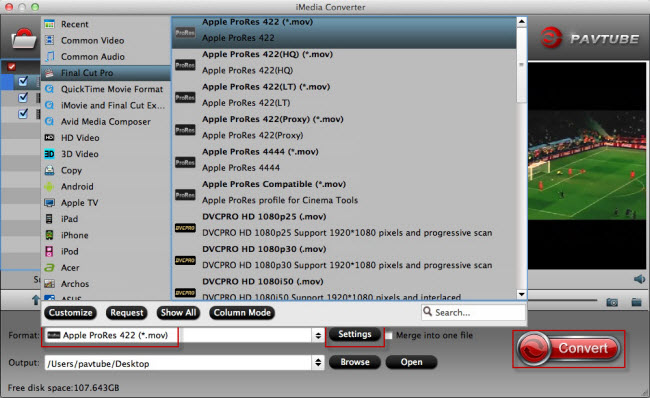
    Click the Format button, and choose "Final Cut Pro > Apple ProRes 422 (*.mov)" as best codec for FCP. 


    Tip: Click on "Settings" button to adjust audio and video parameters. Bit rate, aspect ratio, frame rate, sample rate, and channels are all changeable in the following interface, so you can adjust them according to your own requirements. 

    Step 3. Convert Blu-ray to prores for FCP editing. 

    Click the “Convert “button to start conver blu-ray to Prores Converter for FCP under Mac. Click “Open” button to get the exported files for transferring to FCP with easy playback or editing. 
       
    What’s more? if you prefer to work with multiple audio tracks, another Pavtube ByteCopy for Mac can do this for you, it supports to preserve multiple audio and subtitle streams and leave out unwanted ones, retain chapter information, allow editing videos, etc. 

    Read More: