Friday, December 5, 2014

Best software to convert BR ISO to MKV lossless?

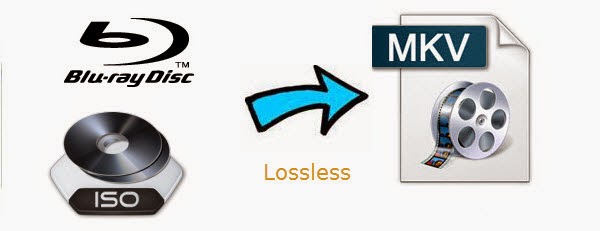
This guide provides a simple way to complete backup Blu-ray ISO to lossless mkv format keeping multiple audio tracks, subtitle streams and chapter markers. 

Q1: Hey guys is this even possible? I convert my BDMV/certificate files to an ISO, can I do lossless complete 1:1 BR ISO rip to get an MKV file? while maintaining all audio/video integrity? Thanks!

Q2: Hello all, I have a 3D blu ray .iso. I want to convert the main (3D) movie to a SBS 3D .mkv without loss of quality. So can anyone help me which software is best please? Thank you in advance.


So a digital backup will help to save the storage space of BR ISO collection, and make it easier to access and carry with. As most Blu-ray include multiple audio and subtitle tracks so that people from different countries who speaking different languages can enjoy same movies in their native languages, so this is reason why people choose to "go from BR ISO direct to lossless MKV format" as above.
Best software to convert BR ISO to MKV lossless

Here recommend you Pavtube Bytecopy which can help you to backup BR ISO to mkv without any quality loss. It helps to convert to lossless mkv with all multiple audio and subtitle tracks, and chapter markers keeping. So you can enjoy your Blu-ray ISO on media players with freely choosing your desired language. Let me show you how to do it and you will find the workflow is so easy. (Read tips for selecting a Blu-ray to MKV Ripper)

More money-saving Trip:

ByteCopy($42) + Video Converter Ultimate($65) = Only $79.9, Save $27.1
ByteCopy($42) + DVD Creator($35) = Only $44.9, Save $32.1
ByteCopy($42) + ChewTune($29) = Only $54.9, Save $16.1

Firstly, you should have download and installed the software. (PS: If you wanna a Mac version, please go to Pavtube Bytecopy for Mac.)

Lossless Backup BR ISO to MKV lossless

1. Run the Pavtube ByteCopy. Press “Load IFO/ISO” icon to import Blu-ray ISO movie.

BR ISO to mkv lossless Ripper

2. Go to Format to find "Multi-track Video catalogue. Select "Loss/encoded Multi-track MKV(*.mkv) , which will provide lossless backup Blu-ray ISO to MKV with multiple audio and subtitle tracks.

Lossless MKV format

Tip: One special function that makes ByteCopy stands out is you can easily select you needed tracks, subtitles.

Multi-track settings

3. Click "Convert to start conversion. Conversion can be completed within a short time, then click "Open to find generated mkv files.

With a very easy operation, you get the lossless mkv files from Blu-ray ISO, which make you to enjoy movies with high quality wherever you want. However, what Bytecopy can do is more than it, let's go to below tips to find more.

If you have Blu-ray and DVD movies, here is the workflow to copy Blu-ray/DVD to lossless MKV format.

Tip 1: You may be confused about the other options under "Multi-track Video" catalogue. They are used to transcode BD/DVD to multi-track mp4, multi-track mov and multi-track avi output files. The point is that they support saving encoded multiple audio tracks.

Tip 2: Directly Copy will provide you another way to lossless output. It will provide you a 100% backup in original format without extracts. If you do not want to output mkv files or your player cannot play mkv files, directly copy is the best choice for you. It will save 100% intact .M2TS main movie from original BD disc, and allow all. subtitle and audio tracks preservation.

Tuesday, December 2, 2014

Transcoding MKV with DTS to AC3 to play on Google Chromecast

Here is a step by step guide to convert MKV with DTS-HD Master Audio to AC3 5.1 for playing on Google Chromecast on Windows and Mac.

Question:

I am trying to play an MKV file which is encoded with DTS on ChromeCast via DSVideo. DS Video informs me that it cannot manage DTS, and ChromeCast also does not support DTS. I own a ds214play. What I want to do is transcode DTS -> Dolby Digital AC3. I have installed a package I found on the Synology forums to enable DS Video to decode DTS. This works fine, however when I cast from DS Video to CC now, it shows a grey box with an exclamation mark. Any solutions?

In mention of DTS audio, we often refer to DTS Digital Surround, DTS-HD Master Audio, DTS Neural Surround, DTS Neo:X. All of the them are famous for high definition audio quality and widely used for in-movie sound on film, DVD, CD, HD DVD and Blu-ray Disc. However, DTS encoded audio or video files are incompatible with your chromecast as above.

In order to successfully play MKV with DTS audio on chromecast anywhere, a recommended solution is to convert DTS to supported format by chromecast and more popular audio format like AC3. The following will introduce a powerful DTS Converter as well as a step by step guide on how to convert MKV with DTS to AC3 to play on CC.

Preparation:

To perform DTS to AC3 conversion in simple steps while still keeping the original quality, Pavtube Video Converter Ultimate is what you need. It is simple to use and features fast conversion speed. With this excellent DTS to AC3 audio converter, you can convert movies, TV shows, and music video with unsupported formats to chromecast with the audio format you need, like 5.1 channels, stereo or mono depending your source audio.

Here is how to convert DTS to AC3 audio format for Chromecast

1. Import source media files

Download, install and run Pavtube Video Converter Ultimate. Click “Add video” button to load your source MKV with DTS files into the program. The DTS to AC3 Converter is multi-task based and supports batch conversion, this means you can load in multiple video files to convert at one time.
 
DTS to AC3 Converter

2. Select output format

The default Chromecast video formats are MP4 and WebM. It also supports MPEG-DASH, Smooth Streaming, and HTTP Live Streaming (HLS) video files.

From the Format bar, navigate to “Common Video” catalogue, here both MP4 and MKV are suitable for your Chromecast.  
Chromecast video format 

3. Set AC3 audio

Click “Settings” button, the “Profile Settings” windows pops up, on which you can set the Audio Codec to AC3 and Channels to 5.1 Channels. This ensures your output audios to be encoded with ac3 5.1. Otherwise, you can keep your channels as Stereo.

Apart from that, you are also allowed to reset audio bit rate and sample rate on this window.

AC3 5.1 audio settings

4. Start conversion

Click “Convert” button to start converting MKV DTS to Chromecast supported format with 5.1/Stereo Channels. As soon as the conversion finished, you can click “Open” button to get the generated files with ease.

Another good thing about Pavtube Video Converter Ultimate is, it offers a “Shut down computer after conversion” option, so if you don’t want to wait around in front of your computer for the entire conversion process, you can tick off it and go away to do other things.

If you are mac users, turn to iMedia Converter for Mac.

Now start streaming converted files using your Chromecast media player

1.Connect with your Mobile device

Download and open the Chromecast app on your Android or iOS smartphone or tablet using Google Play or the App store.

Note: You should ensure that your mobile device is connected to your Wi-Fi and not mobile network. Also, you must have the latest app installed and be on the same network as your Chromecast digital media player.

2. Connect with your Computer

  • Open the Chrome browser and the setup Chromecast.
  • Download the Chromecast app to your computer.

3. Connect with YouTube

  • Connect your Chromecast device to an available HDMI slot on your HDTV. 
  • When your Chromecast digital media player is securely connected to your TV you will see the Chromecast Home screen with your Wi-Fi name at the bottom of the screen. 
  • Now, download the YouTube app on your Android or Apple tablet or smartphone. 
  • Connect your Android or Apple device to the same Wi-Fi network as your Chromecast device.
  • Open the YouTube app on your Android or Apple device and click the Cast button  to start streaming videos.  
Related tips: 


Friday, November 28, 2014

Watch DVD movies on iPad Mini, iPad Mini 2 or iPad Mini 3 with Highest Quality

Do you ever imagine that you can watch DVD on iPad Mini, Mini 2 or Mini 3? This article shows how to rip DVDs to iPad Mini accepted format for playback easily.

Apple has eventually gone where many of the consumers, techies, and media’s have long rumored about. Or, maybe from the day when the original iPad came out, this topic had been argued like thousands of times inside the company, among the decision makers. iPad Mini, just 1.8 inch smaller, brings Apple a fresher tablet experience. iPad Mini has 1024X768, iPad Mini 2 and 3 both have 2048x1536p resolution, twice of the first-gen mini iPad. So it is amazing to play DVD movies on the compact and lightweight iPad Mini/2/3.

watch DVD on iPad Mini, Mini 2 or Mini 3

Accepting limited video formats like MP4, MOV, M4V only, iPad Mini series tablets, however, cannot support playing DVD videos and movies directly. In spite of this fact, there are always ways to break through this difficulty.

Convert DVD to iPad Mini - Play DVD Movie on iPad Mini, iPad Mini 2 or iPad Mini 3

Even the playback of DVD disc on computer will consume lots of CPU source, so do not expect Apple will install a DVD drive on iPad one day. However, you can still enjoy classic or hot DVD movies on iPad Mini, iPad Mini 2 or iPad Mini 3 on the go without mobile DVD drive.

Here Pavtube DVDAid- the best DVD to iPad Mini converting software designed with specialized profiles to support DVD to iPad Mini, iPad Mini 2 or iPad Mini 3 conversion effortlessly. In about a dozen minutes, you can backup DVD Pirates of the Caribbean, Transformers 4, Rise of the Planet of the Apes, The Amazing Spider-Man 2, X-Men: Days of Future Past, Captain America: The Winter Soldier or other pop DVD movies to computer hard disk, and then sync to iPad Mini series tablets. And you will find that it is so convenience to play and watch converted DVD movie upon your iPad Mini. (Here is the review)
Go to get it and freely enjoy your favorite DVD movies on iPad Mini, iPad Mini 2 or iPad Mini 3

1. Load DVD (ISO/IFO image file) to Pavtube DVD to iPad Mini Ripper.

Click “Import DVD” button on the top left to load the DVD from DVD-ROM, you can also “Load ISO/IFO” or “Load from folder”. It will only take few seconds for ripping and importing DVD and you will be kept informed of timely state with a progress dialogue box.

When it has been imported successfully, you can preview the whole movie and select the subtitle and audio you want.

DVD to iPad Mini Ripper

2. Choose iPad Mini, iPad Mini 2 or iPad Mini 3 friendly format.

Click “Format” menu to find the “iPad” option in the dropdown list, choose “iPad Mini HD Video (*.mp4)” for output. It is the most compatible format, which is especially made for iPad Mini, and also fit for your iPad Mini 2 or iPad Mini 3.

iPad Mini, iPad Mini 2, iPad Mini 3 video format

Besides, click “Settings” button on the interface, you will be able to check and adjust the video and audio parameters like bitrate, size, channels, etc. Just do it when you need.

3. Convert DVD movies to iPad Mini MP4.

You can “Browse” your computer to choose a new folder for output file before conversion. When everything is ready, click “Convert” button to start converting DVDs to MP4 for iPad Mini series tablets, then “Open” button will show you the location of output files.

Pavtube DVDAid More Features:
  • Edit the videos before conversion, such as trim, crop, add subtitles, video effect, etc.
  • Convert DVD to many other mobile devices and editing software like iPad Air, iPad Air 2, ATV 3, Nexus 6, Nexus 6 Galaxy Tab S, Galaxy Note 4, Sony Vegas and more.
  • Add srt, ass, ssa subtitles to your movies.
  • Backup DVD main movie to VOB format with original quality.
Now you can sync converted files to you iPad Mini via iTunes and watch DVD movies on iPad Mini, iPad Mini 2 or iPad Mini 3 anytime and anywhere. Hope it will help you.

Learn more:

Tuesday, November 25, 2014

Best Quality Profile Settings for Playing DVD on Surface Pro 3

Wanna play DVD movies on Surface Pro 3? Here gives you the shortcut to rip DVD to Surface Pro 3 without the limits of any DVD protection with faster speed and outstanding quality.

12 inches, 2160 x 1440 pixel-free resolution, 3:2 aspect ratio, Surface Pro 3 exceeds our expectations about tablet display and makes itself an ideal device to watch movies. However, every bean has its black. As other tablet PCs, Surface Pro 3 does not support direct playback of DVDs. That seems a little pity. Here I will give you a relatively easy solution for ripping DVD to Surface Pro 3 tablet.

Playing DVD on Surface Pro 3

Why You Need to Rip DVD Video to Microsoft Surface Pro 3

  • Surface Pro 3 doesn't have a built-in DVD-ROM or DVD player 
  • Many DVDs are protected

To play DVD on Surface Pro 3, you can get a powerful DVD player to play DVD files in either DVD folder, VOB or other formats. If you don't want to change the default media player on your Surface Pro 3, here is another solution: to convert DVD movie to Surface Pro 3 compatible and playable video first, so that you can play it with any different media player.
To bring more convenience to all Surface Pro 3 users, I will make a brief share with all of you.

Preparations for DVD to Surface Pro 3 Backup:

1. DVD disc ready for backup
2. DVD ripper for Surface Pro 3 (for this case, I recommend you Pavtube DVDAid)

Overall, Pavtube DVDAid (also available for Mac users with the Mac versionassists you to remove DVD protections and convert commercial DVD movies yet DVD ISO/IFO files to Microsoft Surface Pro 3 highly supported MP4 video files with high output video quality and fast ripping speed. Just get it and follow the simple tutorial below to copy DVD movies to Surface Pro 3 for playing in just a few clicks! 

How to Rip and Put DVD movies to Surface Pro 3

Step 1. Insert your DVD disc into computer's DVD-Rom and then launch the DVD to Surface Pro 3 Converter. Click DVD disc button to load the DVD movies. You can also import ISO files, IFO files or DVD folder (DVD folders files name appear like "Video_TS") for conversion.

DVD to Surface Pro 3 Converter

Step 2. Choose output profile via clicking the Format bar. Select "Windows > Microsoft Surface Windows RT/Pro H.264 Video (*.mp4)". The output videos could also fit on Surface Pro 3 perfectly.

Surface Pro 3 Video Format

Tip: If you think the video size and image quality are not suitable for your tablet, you can first choose any one of the provided types, then change the settings.

Please remember the file size is based more on bitrate than resolution which means bitrate higher results in bigger file size, and lower visible quality loss. And some of the settings can be tweaked to improve the video quality but it's a balance between quality and size. 

Step 3. When everything is OK, just press "Convert" button to start ripping DVD to Surface Pro 3 .mp4 videos.
Now transfer converted files to Surface Pro 3 and play precious DVD movies with Surface Pro 3 on gorgeous screen in case you have some long journeys and want to watch them in the airport waiting on your flight!

Saturday, November 22, 2014

Play DRM-protected iTunes movies on Nabi 2, Nook HD/HD+ and Coby Kyro tablets

This article will show you how to convert protected iTunes M4V video to Nabi 2, Nook HD/HD+ and Coby Kyro tablets for you kids with Pavtube DRM Media Converter.

Nabi 2, Nook HD/HD+ and Coby Kyro tablets are all full-featured Android tablets designed especially for Kids that lets Kids watch their favorite movies and TV shows. If you have purchased some movies from iTunes store, you must can't wait to transfer those iTunes videos to them so that your kids can enjoy them anywhere they likes.
convert protected iTunes M4V video to Nabi 2, Nook HD/HD+ and Coby Kyro tablets

Even though these kids tablets lack of applications for importing and playing iTunes audio and video files, it can’t hinder us from obtaining media sources in some other way. As long as you have an iTunes Media Converter software at hand, all problems could be readily solved.

The reason is that iTunes video is DRM protected and in M4V format, and removing DRM protection and resetting the file format could enable Nabi 2, Nook HD/HD+ and Coby Kyro tablets to accept media files from iTunes library successfully.

Here Pavtube DRM protection removal- ChewTune is highly recommended to help you get the work done. It is an efficiant combination of iTunes M4V DRM protection removal, video recorder and converter which is able to record and convert both purchased and rented iTunes M4V vidoes to plain MP4 format for playback on kids tablets with all DRM protections striped.

Simply follow the steps below to sync your iTunes movies to Nabi 2, Nook HD/HD+ and Coby Kyro tablets.

Get the program in bundle package: Video Converter Ultimate($65) + ChewTune($29) = Only $74.9, Save $19.1 which can save you more money, then you can enjoy any movies on Kids tablets freely with your kids.


How to convert and recoed iTunes videos to play on Nabi 2, Nook HD/HD+ and Coby Kyro tablets?

Step 1: Download the iTunes to Kids tablet converter

Note:

1. Allow the audio driver installed during the Pavtube ChewTune installation.

audio driver installed

2. Make sure to close iTunes when converting iTunes M4V movies.

Step 2: Add iTunes movies to the program.

Launch Pavtube DRM Media Converter and click "Add Video" or "Add from folder" button and browse files from your computer. Also you can directly drag and drop the source DRM video to ChewTune.

DRM Media Converter

Step 3: Choose output format.

Click “Format” bar and choose “Common Video” > “H.264 Video (*.mp4)” as the output format for playing on your Nabi 2, Nook HD/HD+ and Coby Kyro tablets.

Nabi 2, Nook HD/HD+ and Coby Kyro tablets Video Format

Tip:

If you like, you can click “Setting” option to adjust profile parameters, such as video bitrate, frame rate, audio channels, etc to get a specific video for yourself.

Kids tablet video settings

Step 4: Start the conversion.

After finishing all the settings, you can click the “Convert” button to begin converting iTunes video files to MP4.

It would take as long as the source movie length for the whole DRM video to Kids tablet conversion process since Pavtube ChewTune records DRM videos in 1:1 video and audio quality.

How to transfer the output videos to Nabi 2, Nook HD/HD+ and Coby Kyro tablets?

Connect your kids tablets to computer, copy the file over to the MOVIE folder located in the LLN folder on memeory card. Once completed, just open the build-in video player app on Nabi 2, Nook HD/HD+ and Coby Kyro tablets, and tap the movie to play it.

More related:

Thursday, November 20, 2014

Take extra $9.9 to pay Pavtube DVDAid for Mac

With another Thanksgiving looming around the corner, people can't wait mulling over how to spend the festival with families. In such a cold weather, nothing could be cozier than curling up on the sofa to enjoy Thanksgiving DVD movies with your family members.

Pavtube DVDAid for Mac only costs another $9.9

According to Pavtube Thanksgiving plan, at this promotion page, buy one converting tool, you just need to pay extra $9.9 to get Pavtube DVDAid for Mac- a professional DVD ripping and editing tool. Just contact dvdwindupport@pavtube.com or dvdmacsupport@pavtube.com and get your perferable combination!

How do Pavtube DVDAid for Mac work for you?

Pavtube DVDAid for Mac is an all-in-one DVD converting ripping and editing program that supports converting DVD disc, DVD folder and DVD ISO/IFO files to Apple ProRes/AIC/DNxHD/DVCPRO, MOV, MPG, AVI, MP4, etc. for NLEs like iMovie, FCP X, FCE, Avid Studio, etc. and upload the edited video to YouTube, Vimeo (well support Mac OS X Yosemite and Mavericks). And it's capable of outputting videos in any video formats for playing on Apple iOS, Android, Windows smartphone/tablet, HD media players, Game Consoles, HDD, video projector, 3D TV, Media Server, TV, BlackBerry, PSP, PS3, PS4, Xbox One, etc. with highest video/audio quality.

Besides, it offers the efficient way to copy disc with 1:1 DVD structure and save to computer hard drive without quality loss. What's more, it is a professional video editing software to assist users with trimming, cropping, splitting, merging, attaching subtitles...to create your own videos.

Give it a try, and you will find more powerful features! Buy one converter, you only need $9.9 to get another. So amazing! Isn't it? More  Discount DVDAid can be found at Pavtube Facebook. Have a wonderful Thanksgiving Day!

Read More:

Monday, November 17, 2014

Rip 3D Blu-rays to Plex Server for playback with 5.1 channel on TV via Raspberry Pi

Are you busy to search for the best way to backup 3D blu-ray movies to Plex Server? This guide introduces the 3D Blu-ray to Plex ripping workflow for watching on TV through Raspberry Pi.

3D effect is destined to give audiences a fantastic and lifelike visual experience. Since 3D Blu-ray come into being, the owners are enabled to watch 3D movies at home instead of going to cinema. Now I’ve already been playing with converting 3D Blu-rays – which I own – to h.264 top bottom mp4 files that I can play from my Plex server. I have a Raspberry Pi running the RasPlex distro that connects my tv to the server. I would like to play the full quality 1080p 5.1 files as well as the 3D movies there. I could not find a way to do it with handbrake and makeMKV.
Rip 3D Blu-rays to Plex Server

Backing up 3D Blu-ray movies will be a nice choice as Plex Server can give you a robust storage solution. Here offers a brief instruction to reach the goal.

After widely Internet search for ripping 3D blu rays for playback on my passive 3d tv, I found Pavtube BDMagic for Mac which was recommended on a forum and I tried out the trial. It works perfectly by giving us the ability to store our purchased physical 2D/3D Blu-ray and standard DVD discs to 3D Side-by-Side, Top-Bottom, or Anaglyph video for playback on 3D TV or 3D players.
Well I started ripping my 3D blu ray collection so I’ve successfully ripped Avatar, The Avengers and Jurassic Park and several other 2D blu ray discs such as Zombieland, The Guardian and The Amazing Spiderman, saving time looking for them from the cardboard. If you are working on Windows PC, please get Pavtube BDMagic.


Here is the step-by-step guide on ripping, converting 3D Blu-ray to Plex Server. 

Step 1: Load Blu-ray movies Insert your Blu-ray disc into your BD drive, run the Blu-ray Ripper for Plex and click disc icon to load Blu-ray movies. 
Blu-ray Ripper for Plex 

Step 2: Choose output format Click the "Format" option, and select "3D Video > MP4 Top-Bottom 3D Video (*.mp4)" for playback.
MP4 Top-Bottom 3D Video 

Tip: To keep 5.1 audio when ripping 3D Blu-ray, click “Settings” to go to “Profile Settings” screen and adjust “Channels” under “Audio” option. Set channels to “5.1 Channels” and click “OK”. And then you’ll get 5.1 surround sound after conversion.

Step 3: Start 3D Blu-ray to Plex Server ripping 

Click the "Convert" button under the preview window, and the Blu-ray ripper will start the conversion from 3D Blu-ray movies to Top-Bottom 3D MP4 for Plex Server. 

After conversion, you can store 3D Blu-ray movies on Plex Server and stream through my Raspberry Pi onto my 3D TV. I also stream them from my plex server using the plex apps on my mobile devices. The server transcodes them from playback on those devices.

In addditon, copying Blu-ray/DVD to WD My Cloudrip DVD to a Laptop with Projector, and enable 2D/3D Blu-Ray and DVD Playback in XBMC are not so difficult as you think.