Friday, August 22, 2014

Put DVD movies to EVGA Tegra Note 7 for Watching on the trip

With the best Tegra DVD Ripper in hand, you will be able to watch any treasured DVD on EVGA Tegra Note 7 for enjoyment wherever you go.

The EVGA Tegra NOTE 7 tablet is the perfect traveling companion - combining a lightning-fast mobile processor with a brilliant 7-inch HD display in a sleek, comfortable design. Play the latest games at full speed. Capture stunning photos. Watch HD video for up to ten hours.

EVGA Tegra Note 7


So to take the cinema with you as you travel, please consider EVGA Tegra NOTE 7 tablet! Being able to watch all your favorite videos on your EVGA Tegra NOTE 7 is definitely a nice experience, when you do not want to end up bored on the trip.

With that in mind, it is tempting to get this glamorous gadget for watching DVD movies on its 7-inch, 1280 x 800 IPS LCD display. However, EVGA Tegra Note 7 still cannot play DVD movies directly because of DVD drive absent. If you want to put and watch beloved DVD movies on Tegra Note 7, the only way out is to rip DVD to Tegra Note 7 supported format in advance.

No worries; this Top Tegra DVD Ripper from Pavtube for ripping and converting DVD movies to Tegra Note 7 MP4. Ease of use, with clean and simple interface, reasonable price, lot of formats supported and basically, faster ripping speed and perfect video quality, it will become your most reliable DVD Ripping tool and the most important is its lossless ripping ability feature. The Mac version is Pavtube DVDAid for Mac.

Get the trial version and follow the steps below:

Rip DVD movie to EVGA Tegra Note 7 supported format for watching when travelling


Step 1. Run DVDAid, as the Tegra DVD Converter. Click "Load Files" to import DVD. It will recognize DVD discs from ROM, DVD ISO/IFO and DVD folders automatically.

Tegra DVD Ripper

Step 2. Choose EVGA Tegra Note 7 compatible format.

Click "Format" drop-down list to locate all the profile; choose "Android -> Android Tablets 720P Video(*.mp4)" as the most compatible format for EVGA Tegra Note 7.


Tip 1:

If you want to rip DVD to for EVGA Tegra Note 7 with multiple audio tracks and subtitles, Bytecopy will help you with special multiple track MP4 profiles. Choose "Multi-track MP4 (*.mp4)" from "Multi-track Video".

Step 3. Customize video specs.(Optional)

Click "Settings" to set up video size, frame rate, bitrate and other settings.

Tip 2:

Please remember the file size is based more on bitrate than resolution which means bitrate higher results in bigger file size, and lower visible quality loss. Here 720P is just enough for you. And if you want to watch converted DVD on Tegra Note 7 in full screen, click “Size(pix)” dropdown list under “Video” item to choose “1280*720”.

watch DVD on Tegra Note 7 in full screen

Step 4. Start the DVD to Tegra Note 7 conversion.

Now hit to big "Convert" button to start ripping DVD files for playing on Tegra Note 7. Once the process completes, just click “Open” to find the EVGA Tegra Note 7 playable MP4 videos and transfer them to Android device with ease. .

Now just enjoy your converted DVD movies on your EVGA Tegra Note 7 and it will make yourself entertained for many hours during this trip. Have a good time!

Related Articles:

Wednesday, August 20, 2014

How to convert Blu-ray/DVD to AVI with multiple audio tracks

Want to convert Blu-ray/DVD to AVI format with multi-track for a good enjoyment? This tutorial will tell how to store and play BD/DVD with multiple audio tracks preserving.  

As AVI format is a multimedia container which can contain both audio and video data in a file container that allows synchronous audio-with-video playback. And AVI is a popular video format that supported by most portable media player devices. For backing up and storing your Blu-ray/DVD on computer and get them for later watching on Xbox 360, or other media players, video editing apps, online video websites, etc, you need to convert BD/DVD to AVI format at first.

Blu-ray/DVD to AVI with multiple audio tracks


But how to finish the Blu-ray/DVD to AVI conversion while preserving multiple audio channels as the above question?

In fact, with the right program, you can get all done easily and quickly. I recommend you Pavtube Bytecopy, which is special designed for users to rip Blu-ray/DVD to MKV/MOV/AVI with multiple audio tracks. Moreover, it's also a professional Blu-ray/DVD ripper, allows you to rip and convert BD/DVD discs to any video format you like. Intimate is, there are many optimized presets for tablet and smartphone, including Kindle Fire HDX, Google Nexus 7/Nexus 10/Nexus 4, Galaxy S4, Galaxy S5, Galaxy Tab 3, iPad, iPhone etc. which will give you best video quality.

Here, this post will give you a guide on how to convert Blu-ray/DVD movies to multi-track AVI format on Windows/Mac.

Tips:

1. When ripping Blu-rays, it is necessary to own an external Blu-ray drive.

2. Mac version is also available: Pavtube Bytecopy for Mac.

Get this ByteCopy installed and let's start the workflow easily.

Step 1. Import Blu-ray/DVD disc, Blu-ray/DVD folder, IFO/ISO image files.

Step 1. Free download and install the Best Blu-ray/Blu-ray Copying & Ripping tool on your PC. Insert Blu-ray/DVD disc to your drive, click "Load files" to import Blu-ray disc. If you have IFO/ISO and BD/DVD folder, choose the corresponding option to load Blu-ray/DVD movies from your computer.

The main title in your Blu-ray/DVD will be checked by default; so let's move on and choose format.


Multi-track Ripping tool

Step 2. Choose format

Click the "Format" drop-down list and choose "Multi-track Video >Multi-track Interlaced DV PAL Video (*.avi)" as below:

Multi-track avi format


Step 3. Adjust video & audio settings (optional)

Click the "Settings" button to check all video&audio settings. By default it will check all the audio tracks (languages), so if you only need some of the languages, just check the unwanted ones.

Btw, video size, bitrate and frame rate can all be changed if you are not satisfied with default settings. Don't forget to click OK to confirm all the changes.

Step 4. Start conversion.

Click the big red "Convert" to start converting Blu-ray/DVD to AVI with multiple languages.

After conversion, hit the "Open" or "Open output folder" icon to quick locate converted AVI videos, transfer it to your media players for playing. OK! We now can freely watch Blu-ray/DVD movies with multiple languages on AVI-compliant devices.

More related:

Tuesday, August 19, 2014

Add srt subtitles to MP4 on Windows 8.1/8/7/XP in a Hassle-Free Way

This guide is available for people who want to add .srt subtitles to the mp4 videos to get them easily understood on Windows 8.1/8/7/XP.

Subtitles are the textual representation of a dialog displayed at the bottom of the screen. They can be a written translation of the dialog in a foreign language or its transcription in the same language. That is really very helpful in case you cannot hear properly what is being said.

Movie with subtitle

Have you ever created your own movie with your recordings but found your clips are difficult to understand? One feasible solution is to add SRT, the most basic subtitle format, to MP4 video file.

If you don't have any .srt subtitle or who want to add some of their own words to the .srt subtitles displayed onscreen.refer to part 1. If you have saved SRT subtitles you need, just skip this part and directly move to part 2. 

Part 1: Download External SRT Subtitle or Create Your Own SRT before Adding to MP4 Video 
Download SRT subtitle: You can put "movie title" + "your preferred language" + "subtitle" as the search strings and select the subtitle file saved in .srt for an effective SRT subtitle file searching. Alternatively, finding the needed subtitle in .srt format from those popular subtitle download sites like Moviesubtitles.org is also a practical way.

Edit or make your own .srt file: Here we take Notepad as an example. Just open Notepad, create the subtitle you like in the text editor, click menu File->Save As; change the subtitle file name based on your name of video file and save it in .srt format.

Tips: The SRT subtitle needs to contain the following parts while creating the SRT subtitle:

1. The number showing which subtitle it is in the sequence.
2. The time that the subtitle should appear and disappear on the screen.
3. The subtitle itself.
4. A blank line indicating the begin of a new subtitle.


Part 2: How to Add SRT Subtitle to MP4 File on Windows 8.1/8/7/XP

To get it done effortlessly, I recommend you Pavtube Video Converter Ultimate, which is most user friendly, professional and the outlook of it is smart. With it, users can add subtitles in *.srt, *.ass, *.ssa to MP4 videos on Windows 8.1/8/7/XP with just a few clicks. It can not only add subtitles to MP4, but also supports many other video formats, like AVI, MKV, etc.

Besides adding subtitles to movies, it is an easy-to-use program with many other functions, which enables you to edit videos, convert videos(MKV, AVI, WMV, MOV, VOB, MPG, FLV…) quickly without quality loss. Just download the program and follow the guide below, you’ll find it is really simple to srt embed subtitle to MP4. The Mac version is iMedia Converter for Mac.

1. Import mp4 source.

Click "Add video" button to import the *.mp4 files. After few second, it will be imported successfully and you can preview the whole movie in the preview window.


For BD/DVD videos, force subtitle can be checked for output so as to help you to read the unknown language and fully enjoy the blu-ray/dvd movies.

2. Choose output format.

Now go to "Format" menu to select output format there. A variety of options are listed, and choose the one you desired like rvmb, mp4, WMV format. For example, you can select "Common Video > H.264 Video(*.mp4)".


Tip:

By the way, if you want, you can adjust output video and audio parameters according to your own needs. You can change bitrate, frame rate, channels, etc. Click "Settings" button to set output profiles.

3. Add .srt subtitles

In order to get customized videos, you can add subtitles to your own videos.

Find "Edit" icon and then click it, you will find video editor. There you can Trim, Crop, Add watermark and Effect. Above all, Subtitle can be added here.


For creating customized subtitle, you can count on free software for subtitle editing: Subtitle Edit. Go to write the subtitle content there and it will be saved as SRT files, which is supported by Video Converter Ultimate. Then load it to the software for output videos and you will get a characteristic video.


Top 5 Subtitle Sites to Download Subtitles

4. Convert your mp4 files.

Now it's time to start conversion. Click big Convert button on the interface and then you will get a conversion dialogue box to show the exact progress, like time left, estimated size, state and so on.

Note: If you are bothered about waiting for conversion to finish, you can choose to check "shut down computer after conversion". Then just let it alone, you are free to go out to do anything you like.

With it you can get your mp4 video played in your media players and portable devices with added subtibles. Just try it now!

Related posts:

Convert DVD to iPad Air/iPad Air 2 with Subtitles/Closed Captioning
Top 5 Free Subtitle Editor Tools for Your Video Editing
How to convert MKV to M4V with external srt subtitles embedded

Friday, August 15, 2014

2014 Back to School Promo Discount- 30% Off Top DVD Ripper for Mac users

Welcome to the Pavtube 2014 Back to School Promotion Center where Up to AMAZING 35% OFF Back to School Specials are waiting for you. You be surely be entertained at your free time.

2014 Back to school Promo Discount

The giveaway includes Blu-rays, DVDs and HD Videos related software which will give you great experience when enjoying these videos and movies on Android/Apple/Windows devices. Besides that, you will have no worry about any compatibility issues when editing the MTS/MOV/MXF files in Mac editors(FCP, FCE, iMovie, Avid Media Composer, Adobe Premiere, etc.), and Windows editing programs (Sony Vegas, Premiere Pro, Movie Maker, etc.)!

Hurry to get- 30% OFF DVDAid for Mac now!  

Powerful abilities to remove DVD protection, convert DVD to any video and audio format, and edit DVD to create personal movie on Mac.

DVDAid for Mac

TERMS & CONDITIONS APPLIED:

The deal is valid from 15th Aug to 15th Sep, 2014

More details are here:

http://www.multipelife.com/back-to-school-specials-2014

Thursday, August 14, 2014

Copy Blu-ray to 12T La Cie Thunderbolt drive for various end use

How to copy blu-ray disc to 12T La Cie Thunderbolt drive to let it stored and played back freely on your computer? The following guide can help you achieve it easily.

Want to prevent your Blu-ray from scratching, cracking and other physical damages even lost? Embarrassed by variety of Blu-ray protections? Searching for a way you can convert a bookshelf of movies into 12T La Cie Thunderbolt drive that fits in your palm? Then copying Blu-ray or creating digital backup of your BD disc can be the best choice to achieve all your goals!

12T La Cie Thunderbolt drive

Best solution to backup Blu-ray to 12T La Cie Thunderbolt drive

Remember that, it is not over after copy Blu-ray movie to 12T La Cie Thunderbolt drive which means that you can enjoy Blu-ray movies without ever having to get off your couch to drop a disc in your Blu-ray player.

Now with Pavtube BDMagic- the best Blu-ray coping tool, you can backup main Blu-ray in .m2ts format or transcode your Blu-ray to perticular format you need. For example, by converting Blu-ray movie to AVI format, you can playback the movie on computer since majority of media player like PS3, can recognize AVI file. Ripping Blu-ray to MP4 have more advantages, such as play and watch Blu-ray movie on multimedia portable devices. And iPad, iPhone, iPod touch, PSP, Samsung Galaxy Tab are all delightful platforms for Blu-ray videos.

What's more, if you like to cut and save some of favorites scenes from my Blu-rays, Pavtube BDMagic can be a magic tool to help you get it done. The app is also available for Mac OS – Get BDMagic for Mac if you work with OS X 10.5/10.6/10.7/10.8/10.9.

FYI: If you need to keep all the audio tracks (language) and soft subtitles when ripping Blu-rays, here's another choice for you: Pabtube ByteCopy.

How to convert Blu-ray to 12T La Cie Thunderbolt drive with playable Divx AVI format 

1. Launch the highly recommended BD Copier. Insert your Blu-ray movie to disc drive, and click “Load Disc” button on Pavtube ByteCopy interface to load Blu-ray from BD drive; it also support importing Blu-ray ISO and Blu-ray folder.

Blu-ray to 12T La Cie Thunderbolt drive

2. Select the main title and set subtitles/audio language you'd like to preserve.

3. Select a format for conversion. To convert Blu-ray to Divx video, press on "Format" and choose "Common Video>> DivX AVI - Audio Video Interleaved(DivX)(*.avi)" format.

12T La Cie Thunderbolt drive Video Format

Tip: Powerful edit function including Trim, Crop, Add subtitles, etc will give you great experience for conversion. For example, you can use Trim to cut off the adverts/intro/credits that you don’t want to retain in output videos.


4. Start ripping Blu-ray movie to Divx AVI for playing.

5. After conversion completes, press "Open" to locate resulted avi files. Copy these AVI to 12T La Cie Thunderbolt drive via usb or cable and then transfer them to your media player or mobile devices for watching.

Tips:

1. You can hit the Copy the entire disc icon on BDMagic main interface and start Blu-ray backing up process.

2. If you’d like to copy only movie content and leave out the extras and commentary, the Directly Copy is exactly what you need, which copies intact .M2TS main movie from original Blu-ray disc without extras.


3. If you have a large DVD collection, just learn how to convert old DVDs to MKV and copy DVD on 12T La Cie Thunderbolt drive.

Tuesday, August 12, 2014

How to set up Windows Media Player and stream video from Windows 8.1 PC to HDTV

The following guide will give you an instruction to set up a Windows 8.1 PC as a DMS and stream from PC to HDTV via Windows Media Player.

You may be surprised to learn that sharing digital media across different devices and platforms is quite easy. Windows 8.1 with Windows Media Player has built-in tools and DLNA/UPnP support for easily sharing digital media libraries with compatible devices. And allowing access to the media across a network or the Web requires minimal configuration.

stream video from Windows 8.1 PC to HDTV

First, some definitions: The device that sends the stream—such as a PC—is the DLNA server. The device that receives the stream—such as an HDTV or something connected to the TV—is the DLNA renderer. Both devices must be on the same network. Follow these steps to stream videos from PC to DLNA HDTV:

Part 1. How to Set Up Your Windows 8 DLNA Media Server for video streaming

Windows 8.1 DLNA Media Server

The quickest way to set up a Windows 8.1 DLNA Media Server is to use the one that comes with Windows 8.1. By default, all the music that you load in the “My Music”, “My Pictures”, and “My Videos” folders gets added to your PC’s media library. In order to share media over your home network, you should put the media you want to share in the “Shared Music”, “Shared Pictures” and “Shared Videos” folders. They will still be part of your local library and fully accessible from your PC but will also be available to anyone on your network. If you want to see how its done read this TopNetTricks How-To article.How It’s Done

Putting media in the correct folders is simply a matter of using Windows Explorer and moving the files to those folders. You can see from the screen below that each of the media libraries contains a “My” folder and a “Shared” folder. When you set up Media sharing the entire library (both “My” and “Shared” folders) will become visible to media players.

set up Media sharing

1. Enabling DLNA Media Server Function in Windows Media Player

It is not necessary to have a Homegroup configured to use the Windows 8.1 DLNA Media Server. But you must have Windows Media Player correctly set up.

From the “Stream” menu.

Windows Media Player correctly set up


Select “Turn on media streaming”, and press the “Turn on media streaming button”.

Turn on media streaming


You will then be prompted with a list of DLNA devices that Windows has found on your network. Select the one you want to share with and then “OK”

Select the one you want to share

2. Allowing DLNA Media Players to Access Your Media

You want to be a bit careful here about selecting “Allow All”. This will allow people at the office or at the local coffee shop to browse your library, including personal photos you may have. Likewise, the Windows Media Player has an option under “Stream” to “Automatically allow devices to play my media…” which has the same effect. Be careful if you decide to use this option on a laptop computer that you use outside the home.3Setting Up the DLNA Media Client in Windows Media Player

First you need to make sure that the player PC is on the same network as the media server. Now if you go to another windows PC and call up Windows Media Player, you should be able to see, in the left column, under “Other Libraries”, the shared Library that you just set up. You may have to right click “Other Libraries” and select “Refresh” if you don’t see the content right away.

Notice that the shared content that you can see from the Windows 8 DLNA Media Server is the combination of “My Music” and “Public Music”. As well, both “My Pictures” and “Public Pictures” are shared by default. This may not be what you want. You can control what gets shared in Windows Media Player under “Organize”, “Manage Libraries”, and “Pictures”. You can remove the “My Pictures” Folder from the list, or specify a different folder.DLNA Media Server Security (or lack of it)

Keep in mind that Windows 8.1 DLNA Media Server does not have any access control (fancy word meaning security). It has no logins and no permissions. So whatever you make available through your DLNA server is visible to everyone. a Windows 8.1 DLNA Media Server is great around the house but you should be wary if you use it on shared or public networks. It is best to use the Media Streaming Options screen to control who you want to share with if you plan on using that computer outside the home.

2. Pushing/Streaming PC media to DLNA compliant HDTV over wifi

I found this article via PCWORLD on how to stream from PC to HDTV. Having Chromecast is pretty awesome, but has it’s limitations. With the free Android app BubbleUPnP, you can turn Chromecast into a DLNA renderer.

(DLNA uses Universal Plug and Play (UPnP) for media management, discovery and control. UPnP defines the type of device that DLNA supports (“server”, “renderer”, “controller”) and the mechanisms for accessing media over a network)

I installed BubbleUPnP on my Nexus and then selected Chrome Cloud as the renderer.

BubbleUPnP


Then you just set up Windows Media Player to stream your stuff. Simply open WMP, select Stream > Turn on media streaming. Once it is turned on, click OK.

media streaming options

Use the BubbleUPnP app to locate your photos, music, videos and play on! (You may need to select Chromecast via your TV input options before using)

Locate Media Content


Other ways to stream Video to Your TV can be found here. (All devices required a TV with an HDMI port, so that means an HDTV.)

Notes:

1. Windows Media Player 12 (bundled with Windows 7 and 8.1) supports all DLNA roles. Windows Media Player 11 reportedly supports DLNA, but there appear to be problems.

2. If you’re not sure if your TV is DLNA-certified, search info at DLNA Certified Products and see if it is a DLNA compliant HDTV.

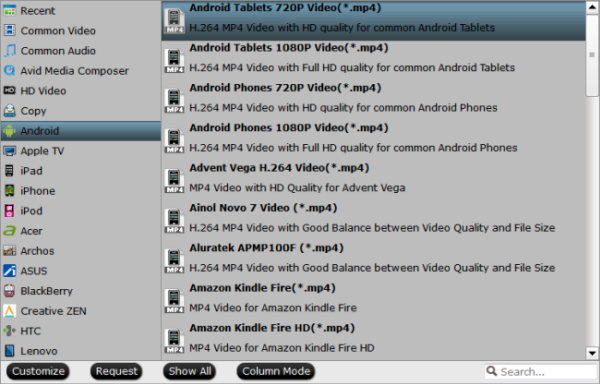
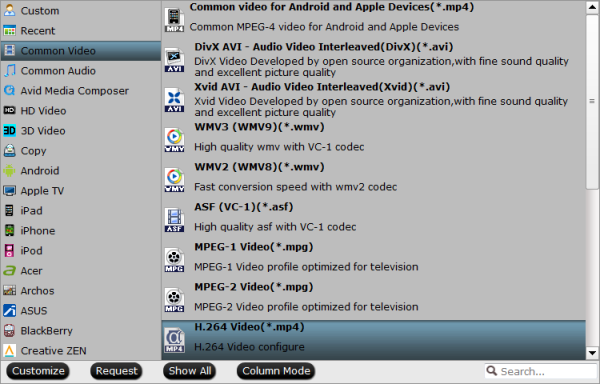
3. Not all the videos can be streamed from PC to HDTV via DLNA. Only specified media formats (MPEG-1, MPEG-4 and WMV 9) are good for DLNA video streaming. Errors occur in case of unsupported video format. Native formats for DLNA media streaming:

Stream Videos from PC to HDTV DLNA

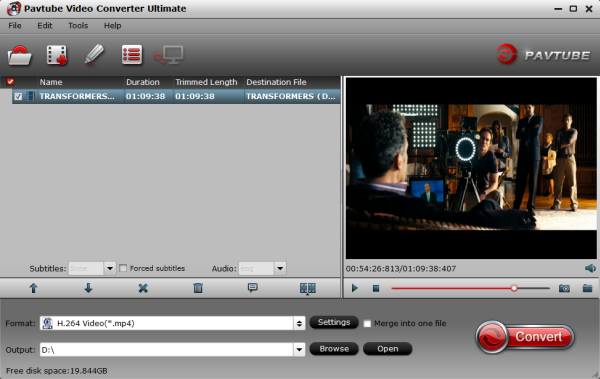
4. To stream MKV, AVI, H.264 videos to HDTV, you can transcode the format to one of the applicable required formats. A recommended transcoder here is Pavtube Video Converter, which uses CUDA acceleration tech and converts videos fast enough.
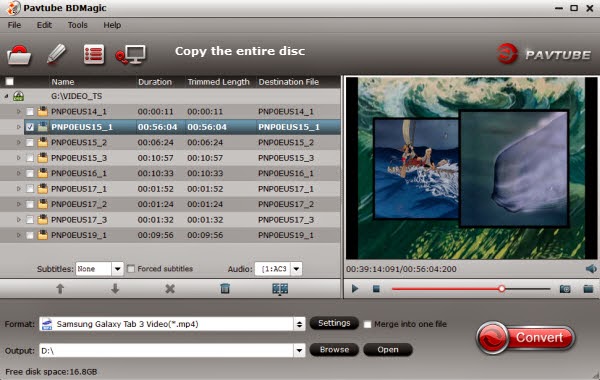
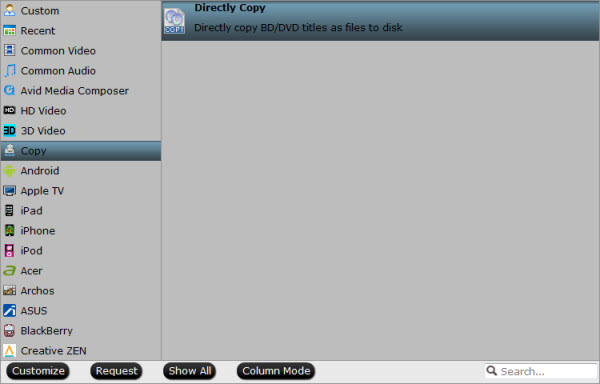
5. You can also use Pavtube BDMagic to convert Blu-rays and DVDs to PC hard drive and your PC a DLNA Media Server for streaming to HDTV and other DLNA certified devices like PS3, PS4 and Xbox 360, etc.

Wednesday, August 6, 2014

Encode M2TS Full HD video to MP4 for Sound Forge Pro editing

In this article, we will offer you the way encoding M2TS Full HD video to MP4 for importing into Sound Forge Pro without any problems. 

Sound Forge Pro is the application of choice for a generation of creative and prolific artists, producers, and editors. Record audio quickly on a rock-solid platform, address sophisticated audio processing tasks with surgical precision, and render top-notch master files with ease.


M2TS file recorded from AVCHD camcorder is made to multiplex audio, video and other streams for high definition videos. If you want to edit M2TS Full HD video in Sound Forge Pro, you need to convert/encode your high definition .m2ts to Sound Forge compatible fomrat like mp4 at first.

After many trials, I find Pavtube Video Converter Ultimate is the one I choose. Easy transcode Full HD M2TS files to mp4, which will fast import into Sound Forge Pro for editing. As for video quality, at least I cannot distinguish any loss by naked eyes. The Mac version is iMedia Converter for Mac.

Steps to encode M2TS Full HD video to MP4 for Sound Forge Pro

1. Free download Pavtube M2TS Converter. Install and launch. Click "Add" or "Add from folder" to import your 1080p m2ts files.

convert m2ts to sound forge pro

2.Click Format bar to choose the output format, you can click and choose "MPEG-4 HD Video(*.mp4)" as output format under "Common Video" catalogue for Sound Forge Pro:

sound forge pro format

3.You can click settings button to adjust the resolution, bitrate, etc. in the video, audio settings column.

mp4 settings

4.Click convert button to start to encode M2TS Full HD files to Sound Forge Pro, just follow the steps above and have a try.

In this way, you can easily and fast ingest your M2TS Full HD videos in Sound Forge Pro.

See also:

Transcode 4K M2TS to Sony Vegas Pro
Convert AVCHD MTS, M2TS, M2T, TS to MKV
Get M2TS with DTS for Playback on PS3

Tuesday, August 5, 2014

Make MKV files Compliant for streaming over DLNA

Many people get no luck when trying to stream a MKV file from NAS to DLNA certified TV or HD media player, but it does work for some guys. 

I wanted the capability of streaming MKV files off my pc on to my hdtv in the living room so i bought the Sony smp-n100 but soon realised it only plays mkv thru USB device and not over DLNA. So I promptly returned it. Is there such a device that will play mkv via DLNA over wifi or wired network? I find my DLNA can't index my mkv files.

Convert MKV for streaming over DLNA

Basically, with DLNA media devices(like WDTVDune HD Media Player, etc), there are certificates given to each product that receives DLNA approval. The problem is that .mkv is not one of the media options that are categorized because it’s not a sanctioned format (not like WMV, MPEG, etc.). Besides, MKV is a flexible container format which can store just about anything (H.264, DivX, MPEG, any sort of audio, even menus and subtitles) while WMV, MPEG is more or less complete formats so they know what to expect while with MKV’s you really can’t tell without checking the contents itself.

Anyway, the best way solving this problem is streaming .mkv while transcoding the file on the fly with media server like Tversity. Despite that, you may receive error message when streaming .mkv to the DMP (Digital Media Player). In that case you’re suggested to convert .mkv to DLNA sanctioned format, e.g. H.264 .mp4. The following guide tells you how to convert .mkv to H.264 .mp4 video with AAC audio included.

Download a free trial of the Pavtube Video Converter Ultimate first. It is a yet professional all-in-one BD/DVD/Video converting tool, which comparatively has better output quality, in particular HD videos and intuitive interface. What’s more, its deinterlacing function and merging, cropping, trimming, adding subtitles ability are what its many competitive products lack of.

Converting MKV to H.264 MP4 for streaming over DLNA

Step 1. Load H.264 MKV to the Video Converter Ultimate.

Have the Pavtube Video Converter Ultimate installed on your computer. Run the app and click "Add Video" button to load source MKV files. The converter works with MKV files encoded with H.264, Xvid, AAC, AC3, DTS codecs and converts any video thrown to it. It supports CUDA acceleration and batch conversion.

Convert MKV to H.264 MP4

Step 2. Select DLNA optimized streaming media format.

DLNA applicable required formats include MPEG2, MPEG4, H.264 and WMV9. H.264 is recommended as a top choice for achieving very high data compression while maintaining good video quality at bit rates that are substantially lower (e.g., half or less) than what previous standards would need.

Here, you’re advised to follow “Common Video” to choose H.264 Video(.mp4) format for video streaming over DLNA. If the source MKV is 1080p or 720p high definition video, you may follow “HD video”>>H.264 HD (*.mp4) video to get best video quality and AAC 5.1 sound.

H.264 .mp4 format

Step 3. Convert MKV to optimal DLNA streaming media format.

Click “Convert” to start converting MKV for streaming over DLNA.

When the conversion completes, click “completed”, back to the Pavtube Video Converter Ultimate interface, and click “Open” to find converted H.264 mp4 videos and then stream MKV video via DLNA t certified TV or HD media player for sharing.

Wednesday, July 30, 2014

Downloading all Disney movies onto Fuhu Nabi 2 and play for my boys using Mac

This post will give you the easiest solution to rip downloaded Disney movies to Nabi 2 for playing for your Kids, so that they can enjoy them anywhere they like.  

Just a few weeks ago my boys were super excited to open up their most recent shipment. It was the Nabi 2 Disney Edition Tablet tablet!  They love Disney shows and they especially love when they can call something as cool as a tablet – their OWN! To entertain them, I want to download their favorite Disney movies for convenient playback on the go. In this article, you will learn how to make it with ease.

Nabi 2 Tablet

To transfer your Disney movies on your Fuhu Nabi 2, all you need is downloading and installing Pavtube iMedia Converter for Mac  (A professional Mac Media Converter for Nabi 2). Overall, this program can help you extract Blu-ray, DVD and convert movies to Nabi 2 readable format on Mac. Please download it and follow the steps below to do your task.

Step 1. Run Pavtube Mac Media Converter for Nabi 2 and import source media.

Once run the software, click "Add Video" to load your video files like MTS/M2TS, MKV, MOV, TOD, TiVo, etc. The windows version is Pavtube Video Converter Ultimate.

Nabi 2 Video Converter

Step 2. Set a Fuhu Nabi 2 suppported media format.

Click on the pull down menu of "Format" to choose "Common Video-> H.264 Video(*.mp4) or MPEG-4 Movie(*.mp4)" for Video to Nabi 2 conversion.

Nabi 2 Video Format

Tip: As the request in the beginning of the article, this video converter also supports to adjust the size. If you want to output 720P, just choose the “1280*720”. Apart from size, video bitrate, frame rate, audio codec, channels, etc are allowed to be changed as you like.

According to video testing result, for watching videos on the Android tablet, 720p with 1500~2500kbps is just all right.

Step 4. Start converting Disney movie to Nabi 2 support video format on Mac.

Now click "Convert" button to start encoding Disney Movie to Fuhu Nabi 2. When the conversion task is finished, you can click "Open" button to get the final output files and transfer to your Nabi 2 for watching effortlessly.

Saturday, July 26, 2014

Backup/Copy Blu-ray Disc to BDMV with Pavtube BDMagic in 2 clicks

If we choose to backup full blu-ray disc to a BDMV folder, you are lucky enough to have an isured Blu-ray copy permanently we can play the video file inside directly on our PC or burn the folder to another Blu-ray disc anytime we like.

In general, Blu-ray Discs are easy to break and after we backup Blu-ray disc, we can rest assured of playing the Blu-ray disc without worrying about the damage to the optical disc due to frequent playing.  Here I will specify the steps of backing up full Blu-ray disc to BDMV folder in the hard drive in details:

Copy Blu-ray Disc to BDMV

Please first prepare a Blu-ray backup program capable of backing up full Blu-ray disc to a complete Blu-ray folder. Here, Pavtube BDMagic ranks top on the Blu-ray ripping, conversion and backup application list which can rolls off Blu-ray/DVD disc protection, supports loseless 1:1 Blu-ray backup and keeps all the disc titles and chapter structure perfectly.

Easy Guide: 2 Clicks Copy/Rip Blu-ray Disc to BDMV with Pavtube BDMagic

They provide free trial (no time limitation) before purchase; and you can reach the Mac version here.

Note: Before coping, you need to hook up an external Blu-ray drive with your computer, and insert your Blu-ray Disc into the drive.

Step 1.
Run Best Blu-ray Ripper and import disc.

Click “Load files” icon to load your inserted Blu-ray disc . 

Step 2. Make 1:1 Full Disc Copy

Once loaded, click “Browse” to specify where to send the generated files to. When ready, click “ Copy the entire disc" icon to start copying your Blu-ray movie to an intact Blu-ray folder.


And it could take 1-2 hours to copy a Blu-ray to PC a depending on data reading speed of your HDD and source disc. After ripping you can click the “Open” button to locate generated files and transfer them into it or directly store it on your computer. The final output files have the same structure as that on the original Blu-ray disc.

Trial limits: Full Disc Copy feature can be used for 3 times only.

Tip: If you only want to copy the intact main movie without any recoding on Mac, turn to the guide to learn backup Blu-ray disc in M2TS.

Wednesday, July 23, 2014

Convert any Audio and Video files for Surface Pro 3 and Surface RT/Pro

The fretful experience of inability to play Audio and Video files on Surface Pro 3 and Surface RT/Pro will no longer exist with the help of an Surface Ultimate converter. Just read on.

Microsoft's Surface lineup just keeps getting better and better, through every iteration, Surface tablet has edged closer to becoming a true laptop replacement. However Surface has its own supported format as Window OS devices, which means there are still many video and audio formats that cannot be played by Surface tablet like Surface Pro 3 and Surface RT/Pro directly.

Surface tablet

So we need to find a powerful Surface media converter which can all the videos and audios to  Surface tablets playable videos files first. Here Pavtube Video Converter Ultimate, is such an all-in-one Movie Converter for Surface device.
The program can not only convert all the videos and audios to Surface playable format, but also supports ripping/converting Blu-ray and DVD disc to Surface optimized formats.

Before converting, please download and install Pavtube Surface Media Converter on your computer. 

Simple Guide of transferring or copying Video and Audio to Surface Pro 3 and Surface RT/Pro

Note: BD drive is required for ripping Blu-ray disc.

Step 1. Once run the Ultimate Video Converter for Surface on your PC, import source media.

You can click "Add Video" to load video files like MTS/M2TS, MKV, MOV, TOD, TiVo, etc, audio files like m4a, wma, wav, mp3, flac, etc. If you want to rip Blu-ray/DVD disc, click on "BD/DVD folder" to load movie from DVD and Blu-ray source(Disc, folder, ISO).

Surface Media Converter

Step 2. Select output format. You can easily find the optimized profiles for Surface: "Microsoft Surface Windows RT/Pro H.264 Video (*.mp4)" under "Windows" which is specially designed for Surface Pro 3 and Surface RT/Pro and supplies full-screen effect.

Surface Video Format

Tip: By click "settings" button, you can easily adjust the output parameters of the video. Remember the file size is based more on bitrate than resolution which means bitrate higher results in big file size, and lower visible quality loss.


Surface Format Settings

Step 3. Click "Convert" button to start converting any video and audio to Surface Pro 3 and Surface RT/Pro optimized videos.

After several simple clicks, you can obtain available media files on Surface Pro 3 and Surface RT/Pro by this Surface media converter. Just have a try now!

Tuesday, July 22, 2014

Get MKV with DTS Audio to play on iPad Air, iPad Mini 2, iPad 3/4 smoothly on Mac

This article teaches you how to convert MKV movie with dts audio for playing on iPad Air, iPad Mini 2, iPad 3/4 with Mac OS X.

Blu-ray movies are normally compressed in MKV file format with surrounding sound – dts audio. (Learn how to copy Blu-ray with DTS 5.1 in all audio streams) DTS audio may not be the file type for iOS devices like iPad Air, iPad Mini 2, iPad 3/4 to handle since its nature as surrounding sound that requires multi-speaker to pull off.

Play MKV with DTS Audio on iPad

Anyway, if you have MKV dts file you'd like to play on these iPad series tablets, this is a tutorial about how to convert them to iPad supported format, say, mp4 or mov.

At first, to get it done, it is not so complicated. you just need an easy-to-use third-party software to transcode MKV with dts to iPad Air, iPad Mini 2, iPad 3/4 quickly and smoothly. Download and install the App: Pavtube iMedia Converter for Mac.

It works well in converting MKV DTS videos to iPad supported video formats on Mac. The program is easy to use and produces excellent results. It will provide you an optimized preset for iPad Air, iPad Mini 2, iPad 3/4 and fast conversion speed. If you need, you can adjust video and audio parameters like bitrate, resolution, channels to change the videos size or to make it fit your iPad tablet best. In a word, it will make MKV with DTS videos fully compatible with iPad Air, iPad Mini 2, iPad 3/4. The windows version is Video Converter Ultimate.

Just download it and follow the steps below.

Convert MKV with DTS videos to iPad Air, iPad Mini 2, iPad 3/4 on Mac for playing?

Step One. Add MKV videos to Mac iPad Video Converter.

Click the "Add Video" icon to add your source mkv videos, or drag-and-drop them directly.

convert mkv with dts to ipad

Step Two. Choose target video format.

Choose the iTunes supported formats in the "Format" dropdown list. You can go to "Common Video" or "HD Video" options to find what you like. I think MP4 format is better for iTunes.

For iPad Air, choose " iPad Air Full HD Video(*.mp4) for play with iPad Air.

For watching on iPad Mini 2, select "iPad Mini HD Video(*.mp4)".

For enjoying on iPad 3/4, choose "iPad 3/4 (New iPad) Full HD Video(*.mp4)", or other preset if you don't need full size.

iPad Mini format

Step Three. Customize video specs. (Optional)

Click "Settings" to open profiles settings window. Here you are able to customize video size, bitrate, frame rate, sample rate(Hz)…all the specs can be fixed manually. A personal tip: the higher bitrate you choose, the better video quality will be; and you will get videos in larger size.

Tips: DTS to AC3 5.1 Availability - Set advanced video and audio settings.

Click on "Settings" button, and the following window will pop up, which enables you to adjust video and audio parameters including codec, aspect ratio, bit rate, frame rate, sample rate, etc. Here you set Audio codec as AC3, and adjust Audio sampling rate and Bit rate to fit your player. By the way, 5.1 sound is available in "Channels". I find that bitrate higher results in big file size, and lower visible quality loss.

Step Four. Start Conversion.

Go ahead and click "Convert" button to get MKV with DTS Audio to iTunes conversion started. After a while, you can find the generated file for iTunes quickly via "Open" button.

Now open your iTunes and then sync the converted mp4 movies to iTunes library for convenient playback on iPad Air, iPad Mini 2, iPad 3/4 or stream them to other iOS devices (iPhone/iPod) for smoothly watching.

In this way, you can enjoy your favorite MKV with DTS Audio on your iPad Air, iPad Mini 2, iPad 3/4 with iTunes wherever you are.